Git Staging
The "Staging" view in the Git perspective provides a centralized location to stage and commit changes to your Git repository. This section provides an overview of the key features and actions available in the "Staging" view.
Staging Changes
- Open the Git Staging View:
-
To open the Git Staging view, navigate to the Git perspective and select "Staging" tab.
-
View Unstaged and Staged Changes:
-
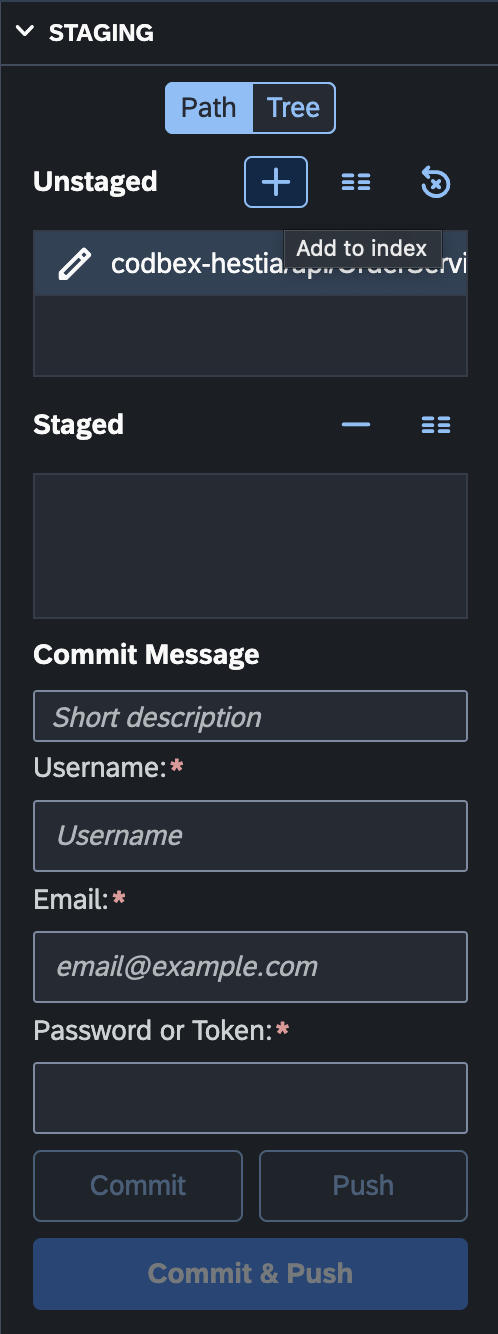
The Git Staging view displays a list of changes in your working directory categorized as "Unstaged Changes" and "Staged Changes".
-
Stage Changes:
-
Stage specific changes for commit by selecting them and clicking the "Add to Index" button.
-
Unstage Changes:
-
Unstage changes that were previously staged by selecting them and clicking the "Remove from Index" button.
-
View Diffs:
- View the differences between the working directory, staged changes, and the last commit by selecting files and clicking the "Show Difference" button.
Actions in the Git Staging View
1. Refresh Staging Area:
- Use the "Refresh" button in the Git Staging toolbar to update the list of changes and their staging status.
2. Commit Staged Changes:
- Commit the staged changes by entering a commit message and clicking the "Commit" button in the Git Staging toolbar.
3. Push Committed Changes:
- Push the committed changes by clicking the "Push" button in the Git Staging toolbar.
4. Commit and Push Staged Changes:
- Commit and Push the staged changes by entering a commit message and clicking the "Commit & Push" button in the Git Staging toolbar.
5. Revert to Last Commit:
- Use the "Revert to Last Commit" button in the Git Staging toolbar to revert to the state of the last commit.
Conclusion
The "Staging" view in the Git perspective provides a streamlined workflow for staging and committing changes to your Git repository. Familiarize yourself with the available actions and staging features to efficiently manage your version control.