Hyperion - Implement a BPM application for leave requests
Using codbex Hyperion you can easily implement BPM (Business process management) applications in a few minutes.
In this tutorial, I'm going to show you how you can implement an application for leave requests.
A simple leave request application
Let's have the following use cases:
- employees who report to employee managers
- employees want to submit leave requests for a particular period using a modern user interface
- employee managers must be the only one who can approve or decline these requests
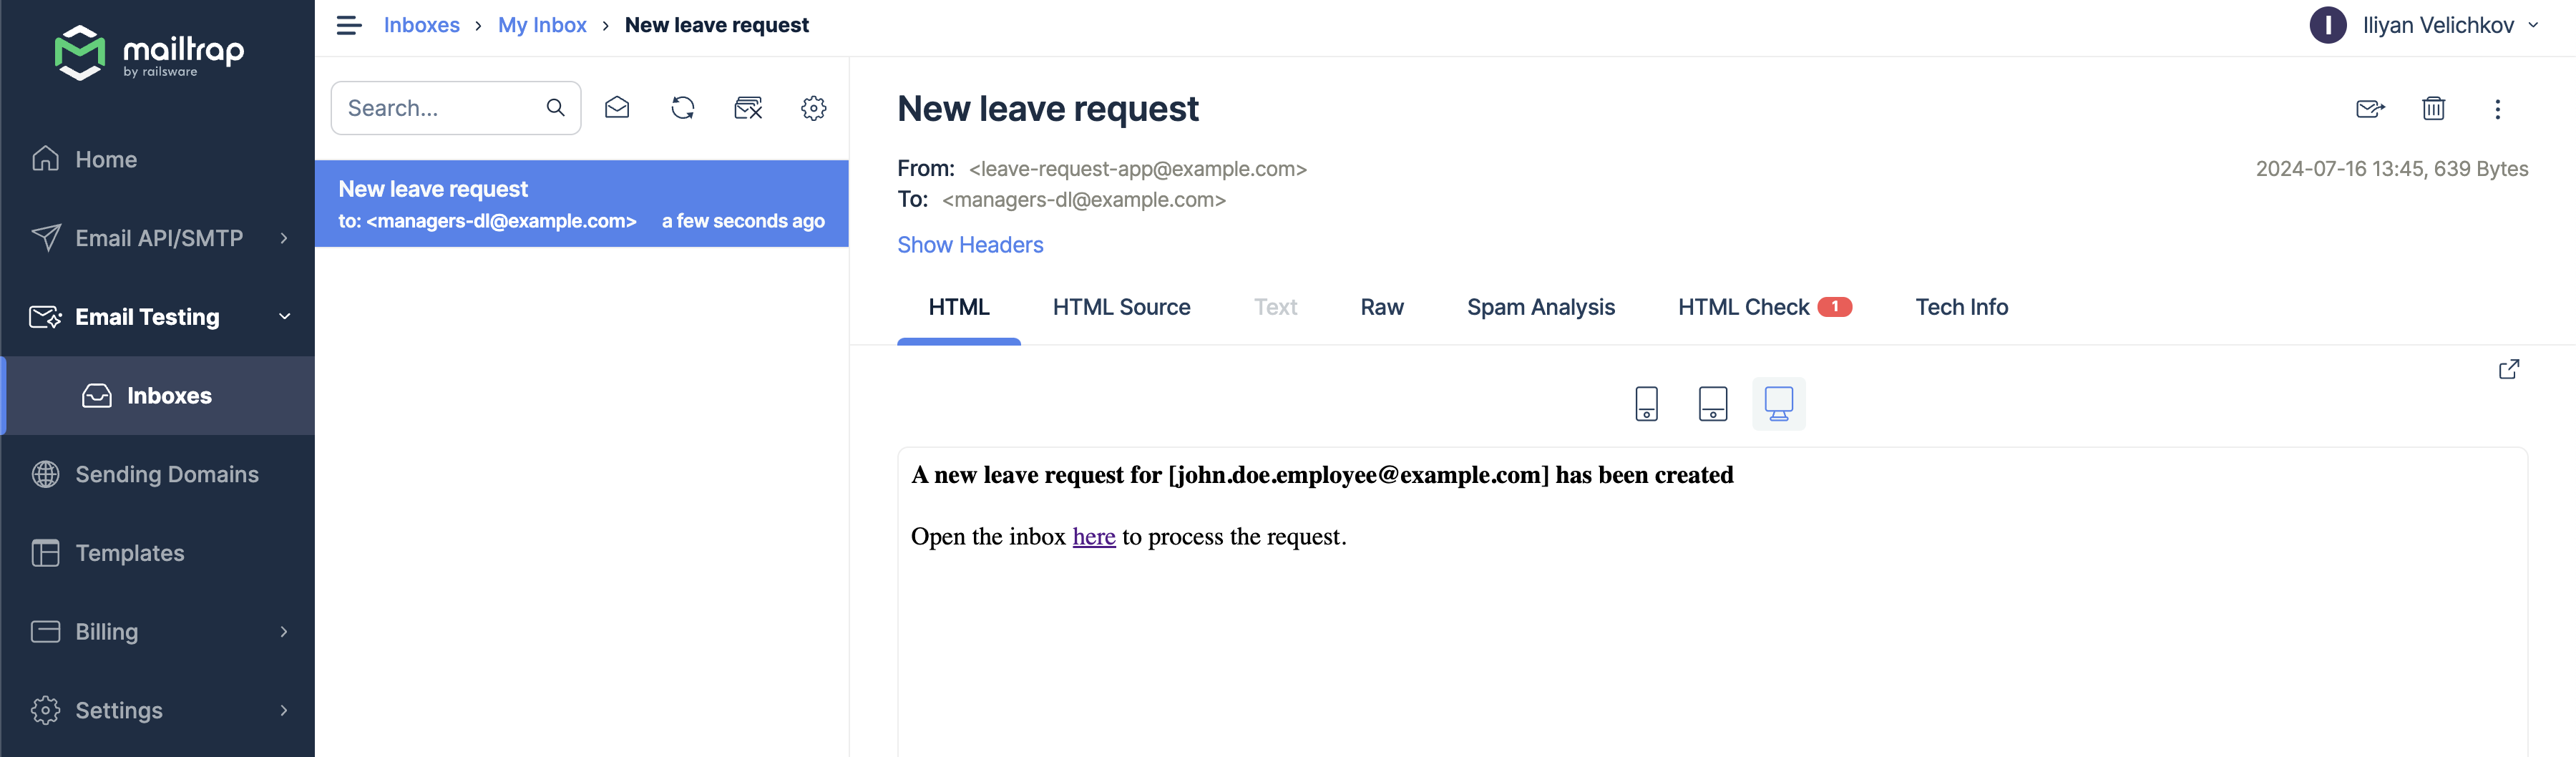
- employee managers want to receive emails when a new request is submitted
- employees want to receive an email when their requests are processed (approved or declined)
Implementation steps
Follow the steps below or watch the recorded video.
- Start a Hyperion instance using Docker
Open your terminal and execute the following:shell# mount a volume to preserve your changes during the image restarts HYPERION_WORKSPACE_DIR='/tmp/hyperion' IMAGE_VERSION='1.0.7' # use version 1.0.7 or later docker run --name codbex-hyperion --rm -p 80:80 \ -v "$HYPERION_WORKSPACE_DIR:/target/dirigible" \ ghcr.io/codbex/codbex-hyperion:$IMAGE_VERSION - Open Hyperion and create a simple BPM project starter
- open Hyperion at http://localhost
- login using the default user - username:
admin, password:admin - At the
Welcomeview search forBPMand selectBPM Project Startertemplate. If the view is missing -Window->Show View->Welcome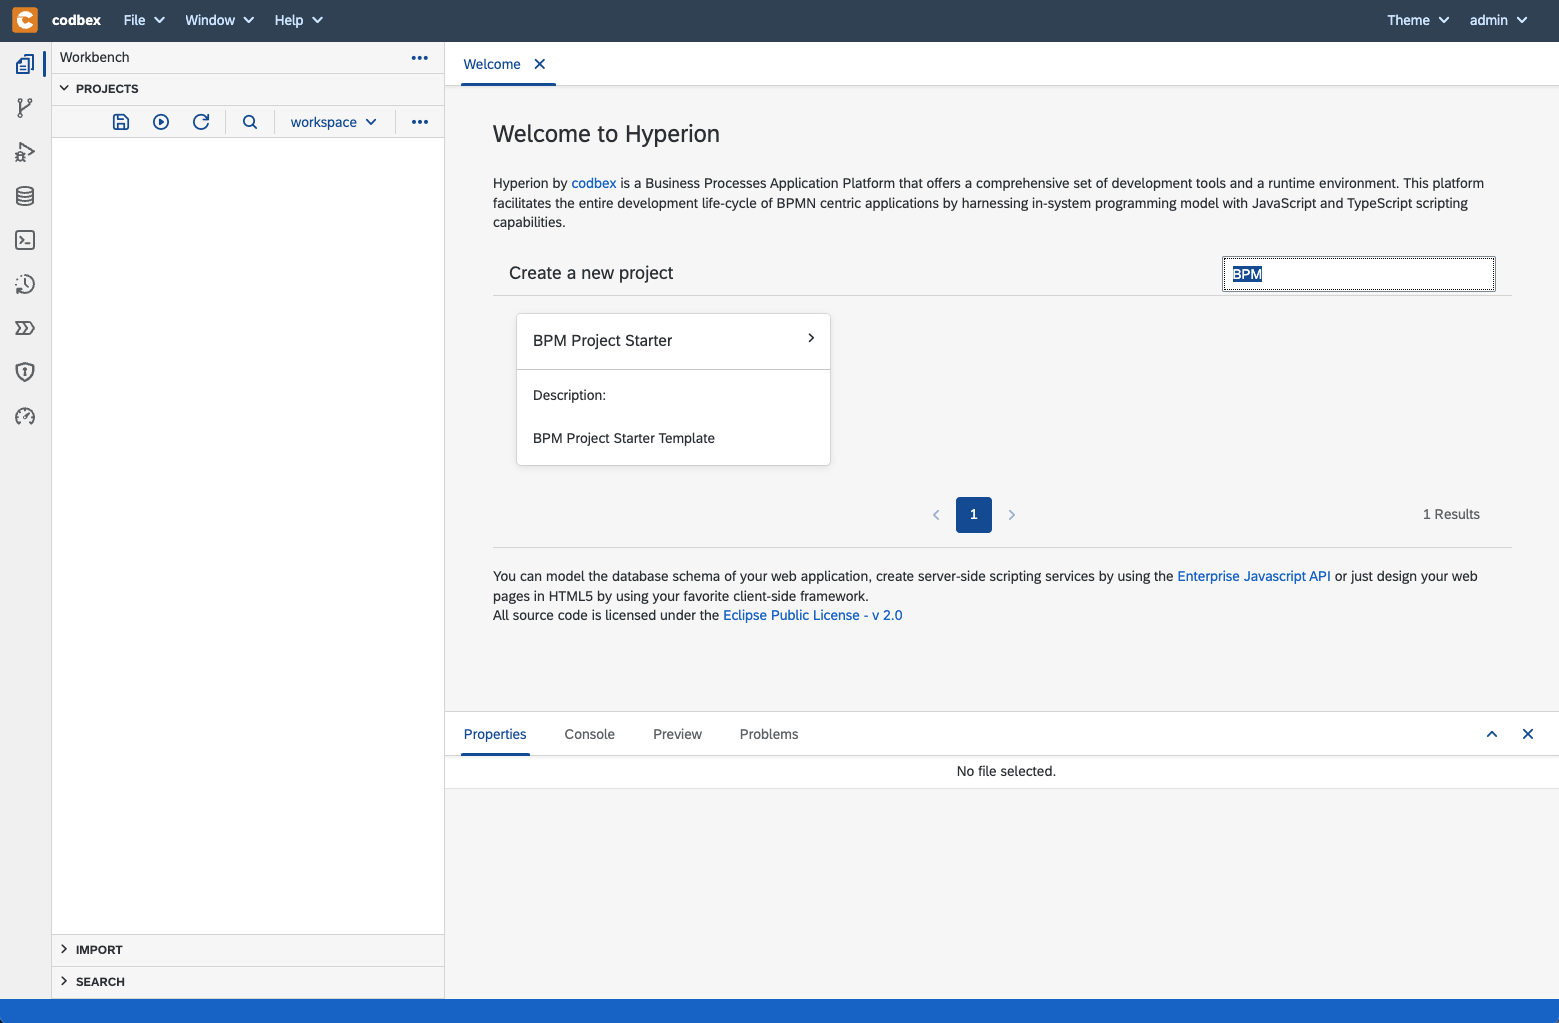
- type project, file name (process name) and process identifier - for example
leave-request,leave-request-processandleave-request-id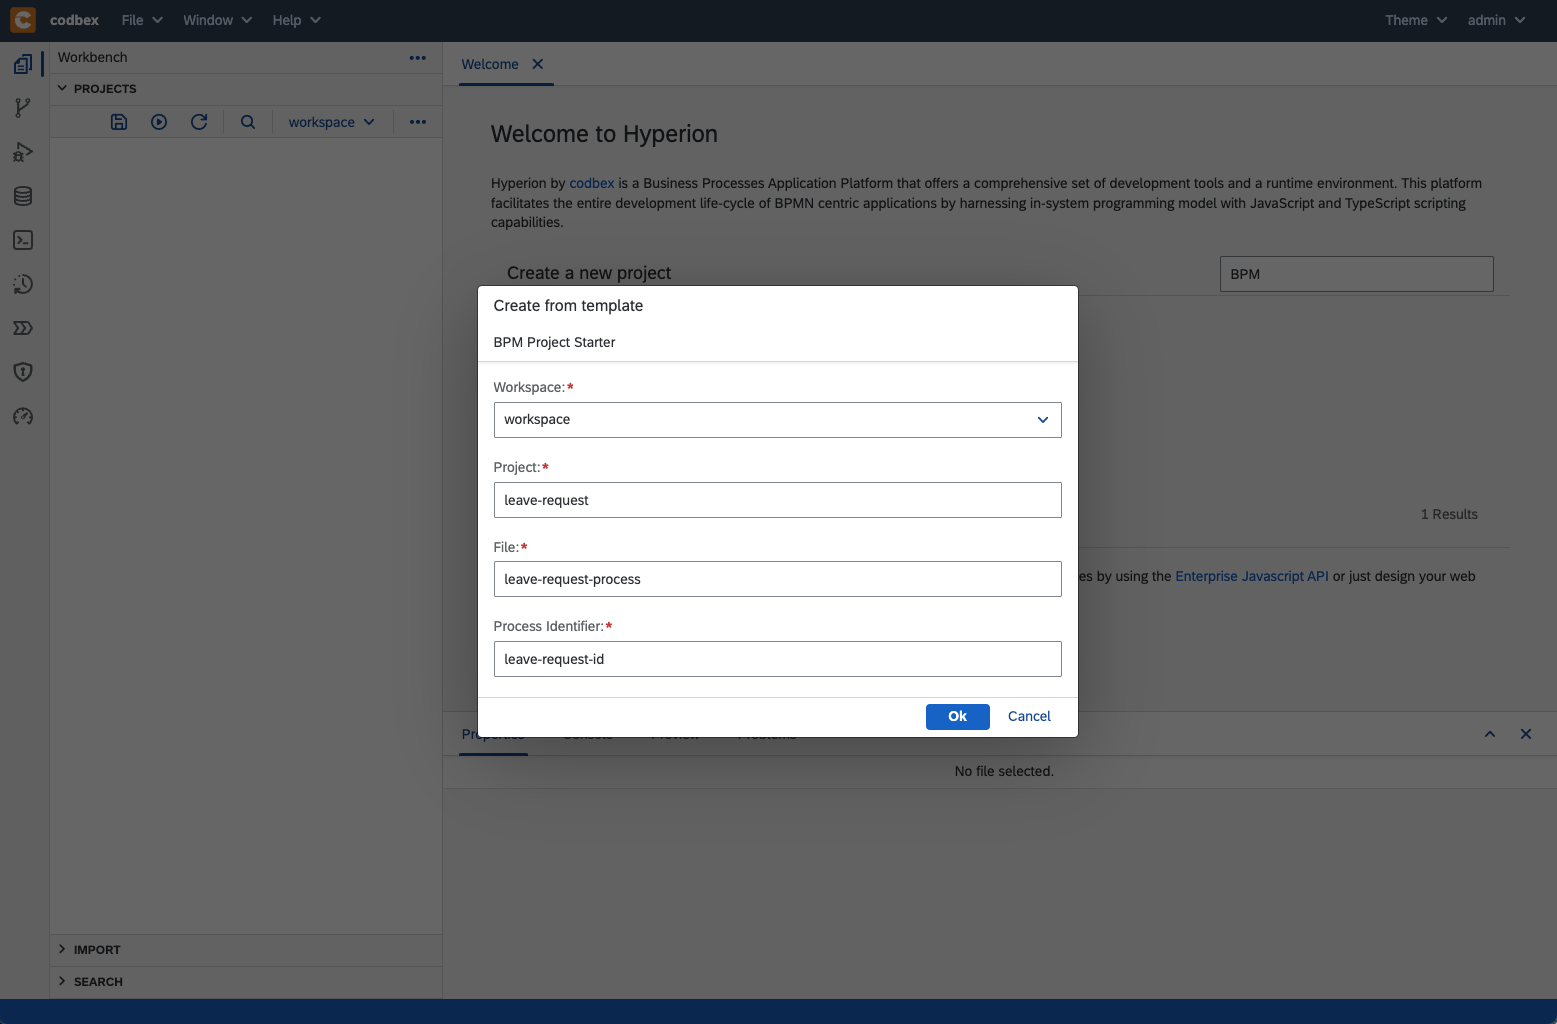
- click on
Okbutton - a BPM project starter will be automatically generated for you
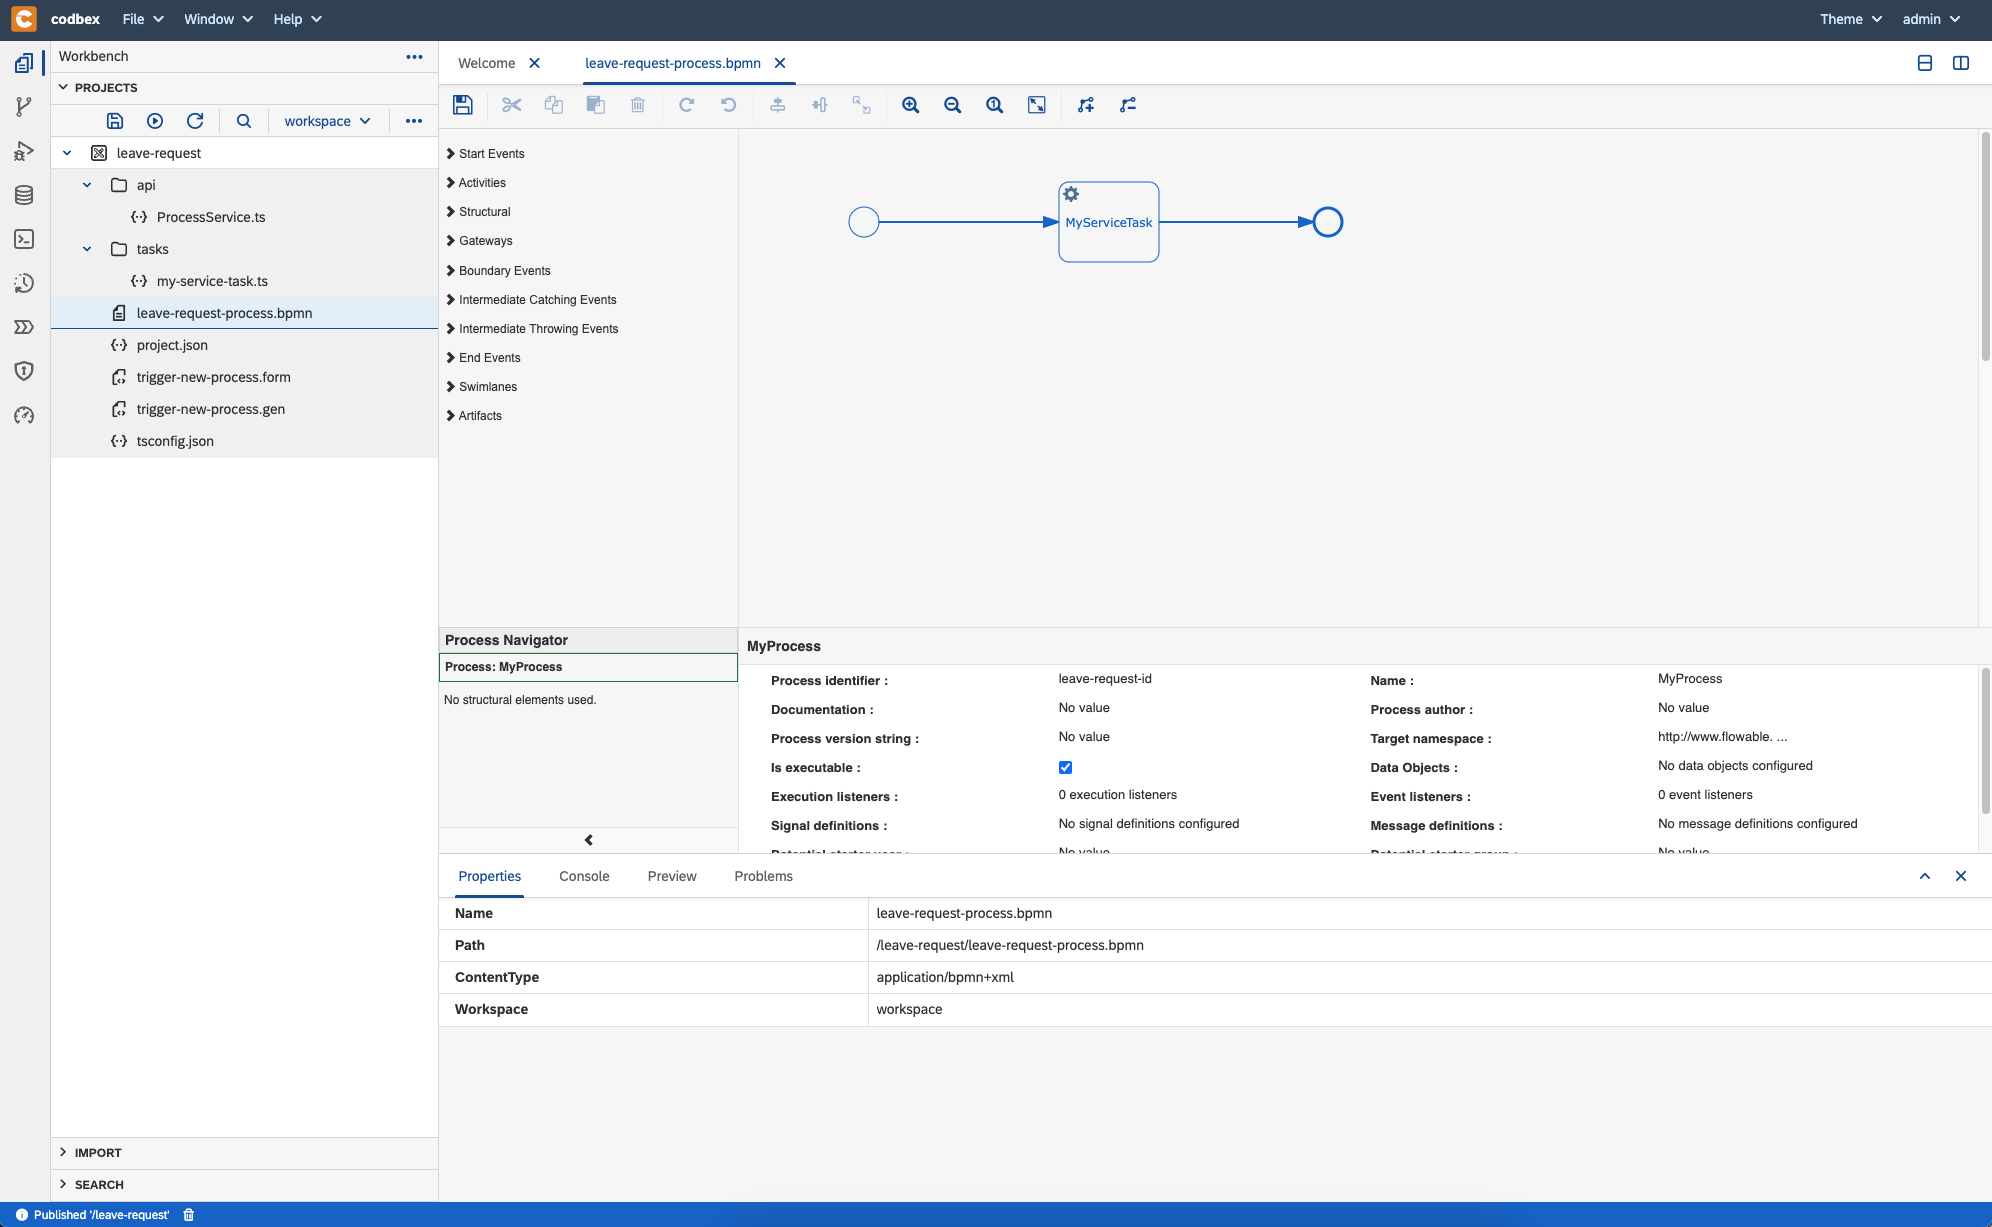


- Let's see what was generated
leave-request-process.bpmnis a simple BPM process with a single JavaScript service tasks- to have a JavaScript service task in Hyperion, you have to
- set
Delegate Expressionto${JSTask}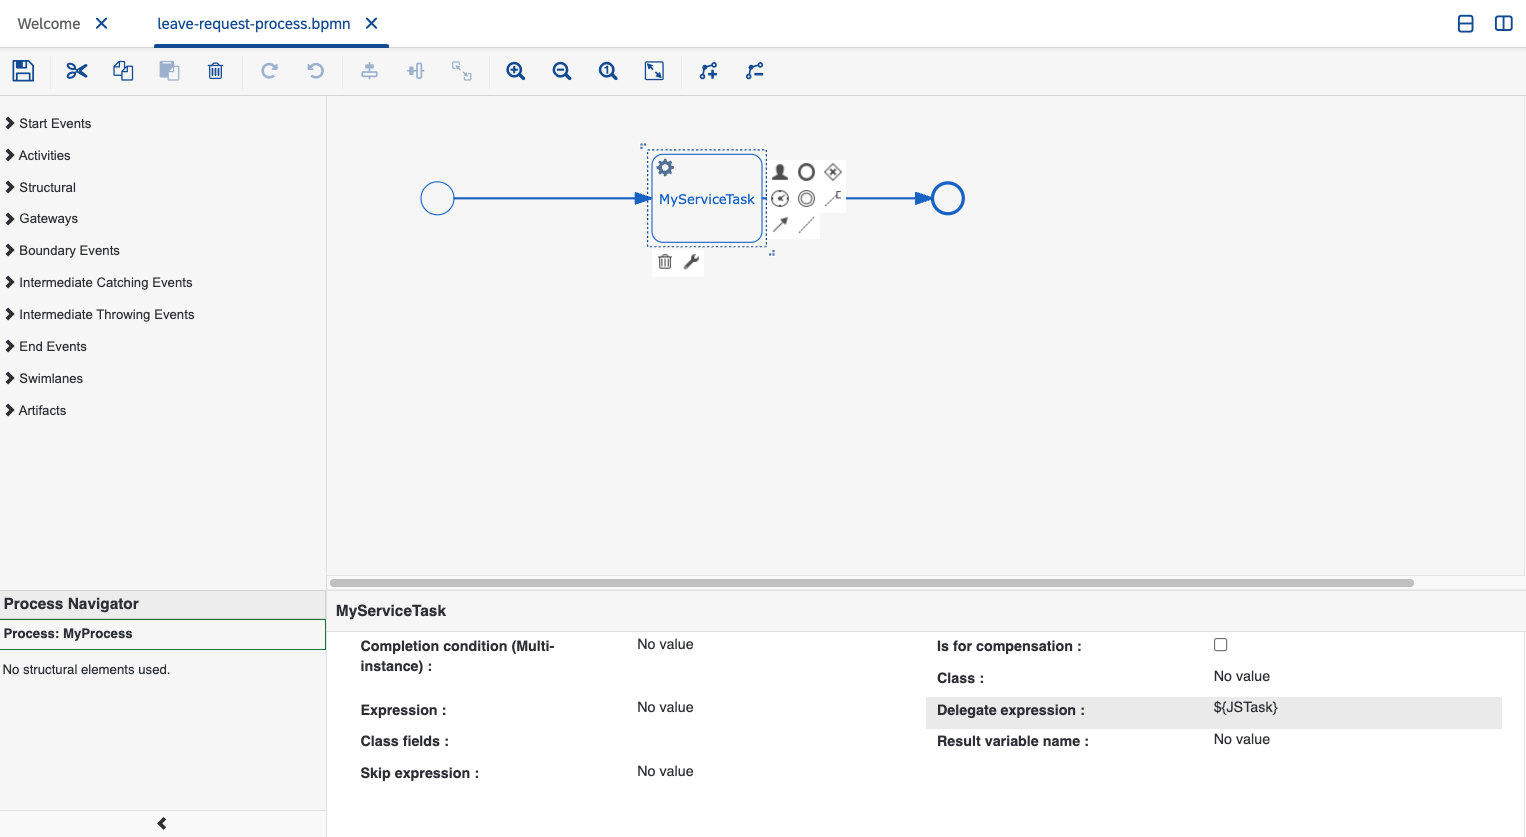
- specify the path of your JS task using class field called
handler. For exampleleave-request/tasks/my-service-task.ts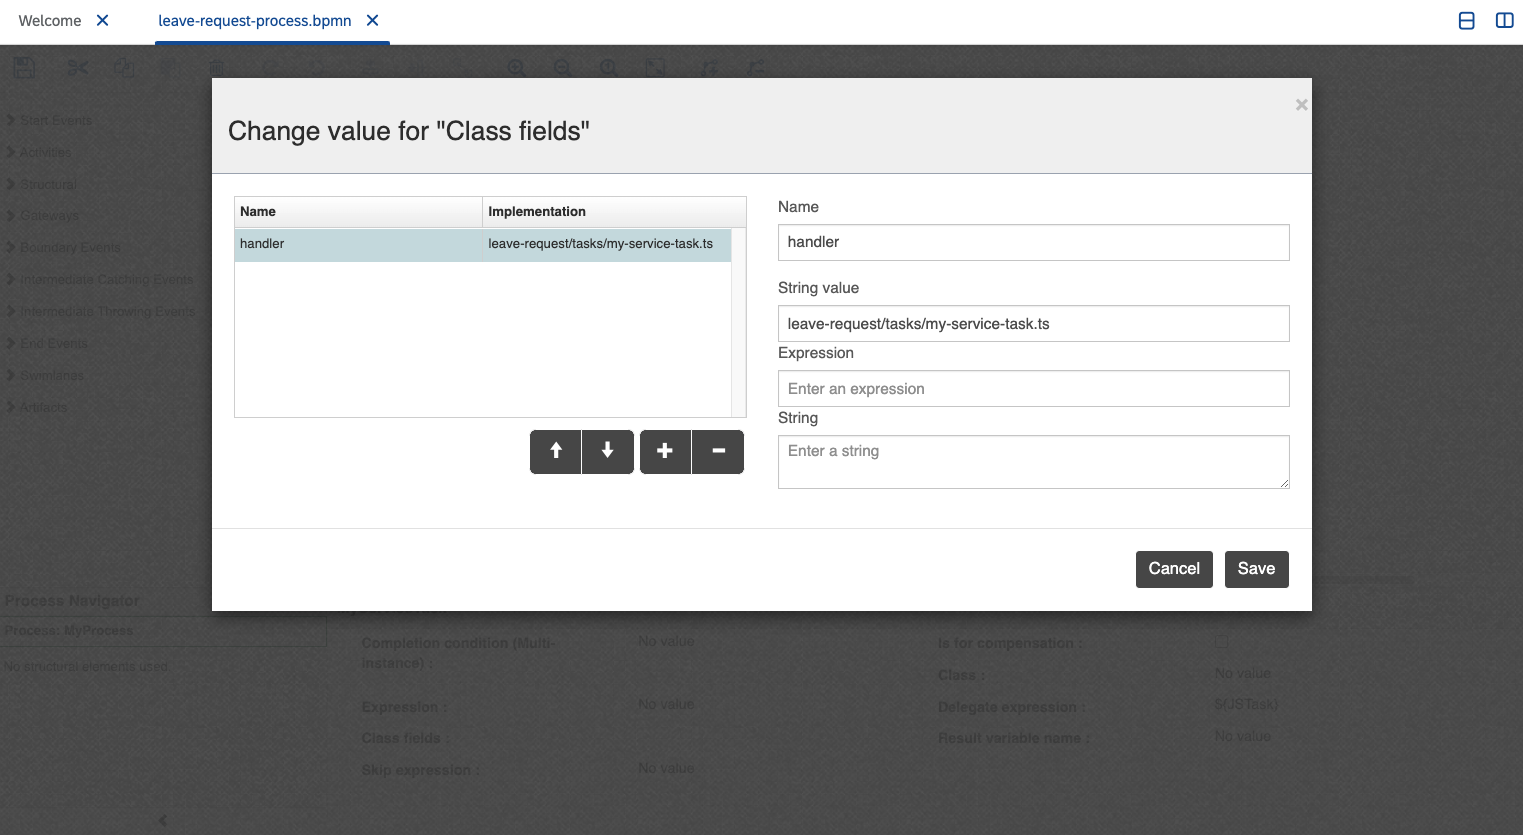
- set
- to have a JavaScript service task in Hyperion, you have to
tasks/my-service-task.tsis the task code which will be executed when taskMyServiceTaskis executedapi/ProcessService.tsis REST API which has only one method for triggering a new process instancetrigger-new-process.formis modeler for a form which will trigger an instance of the generated process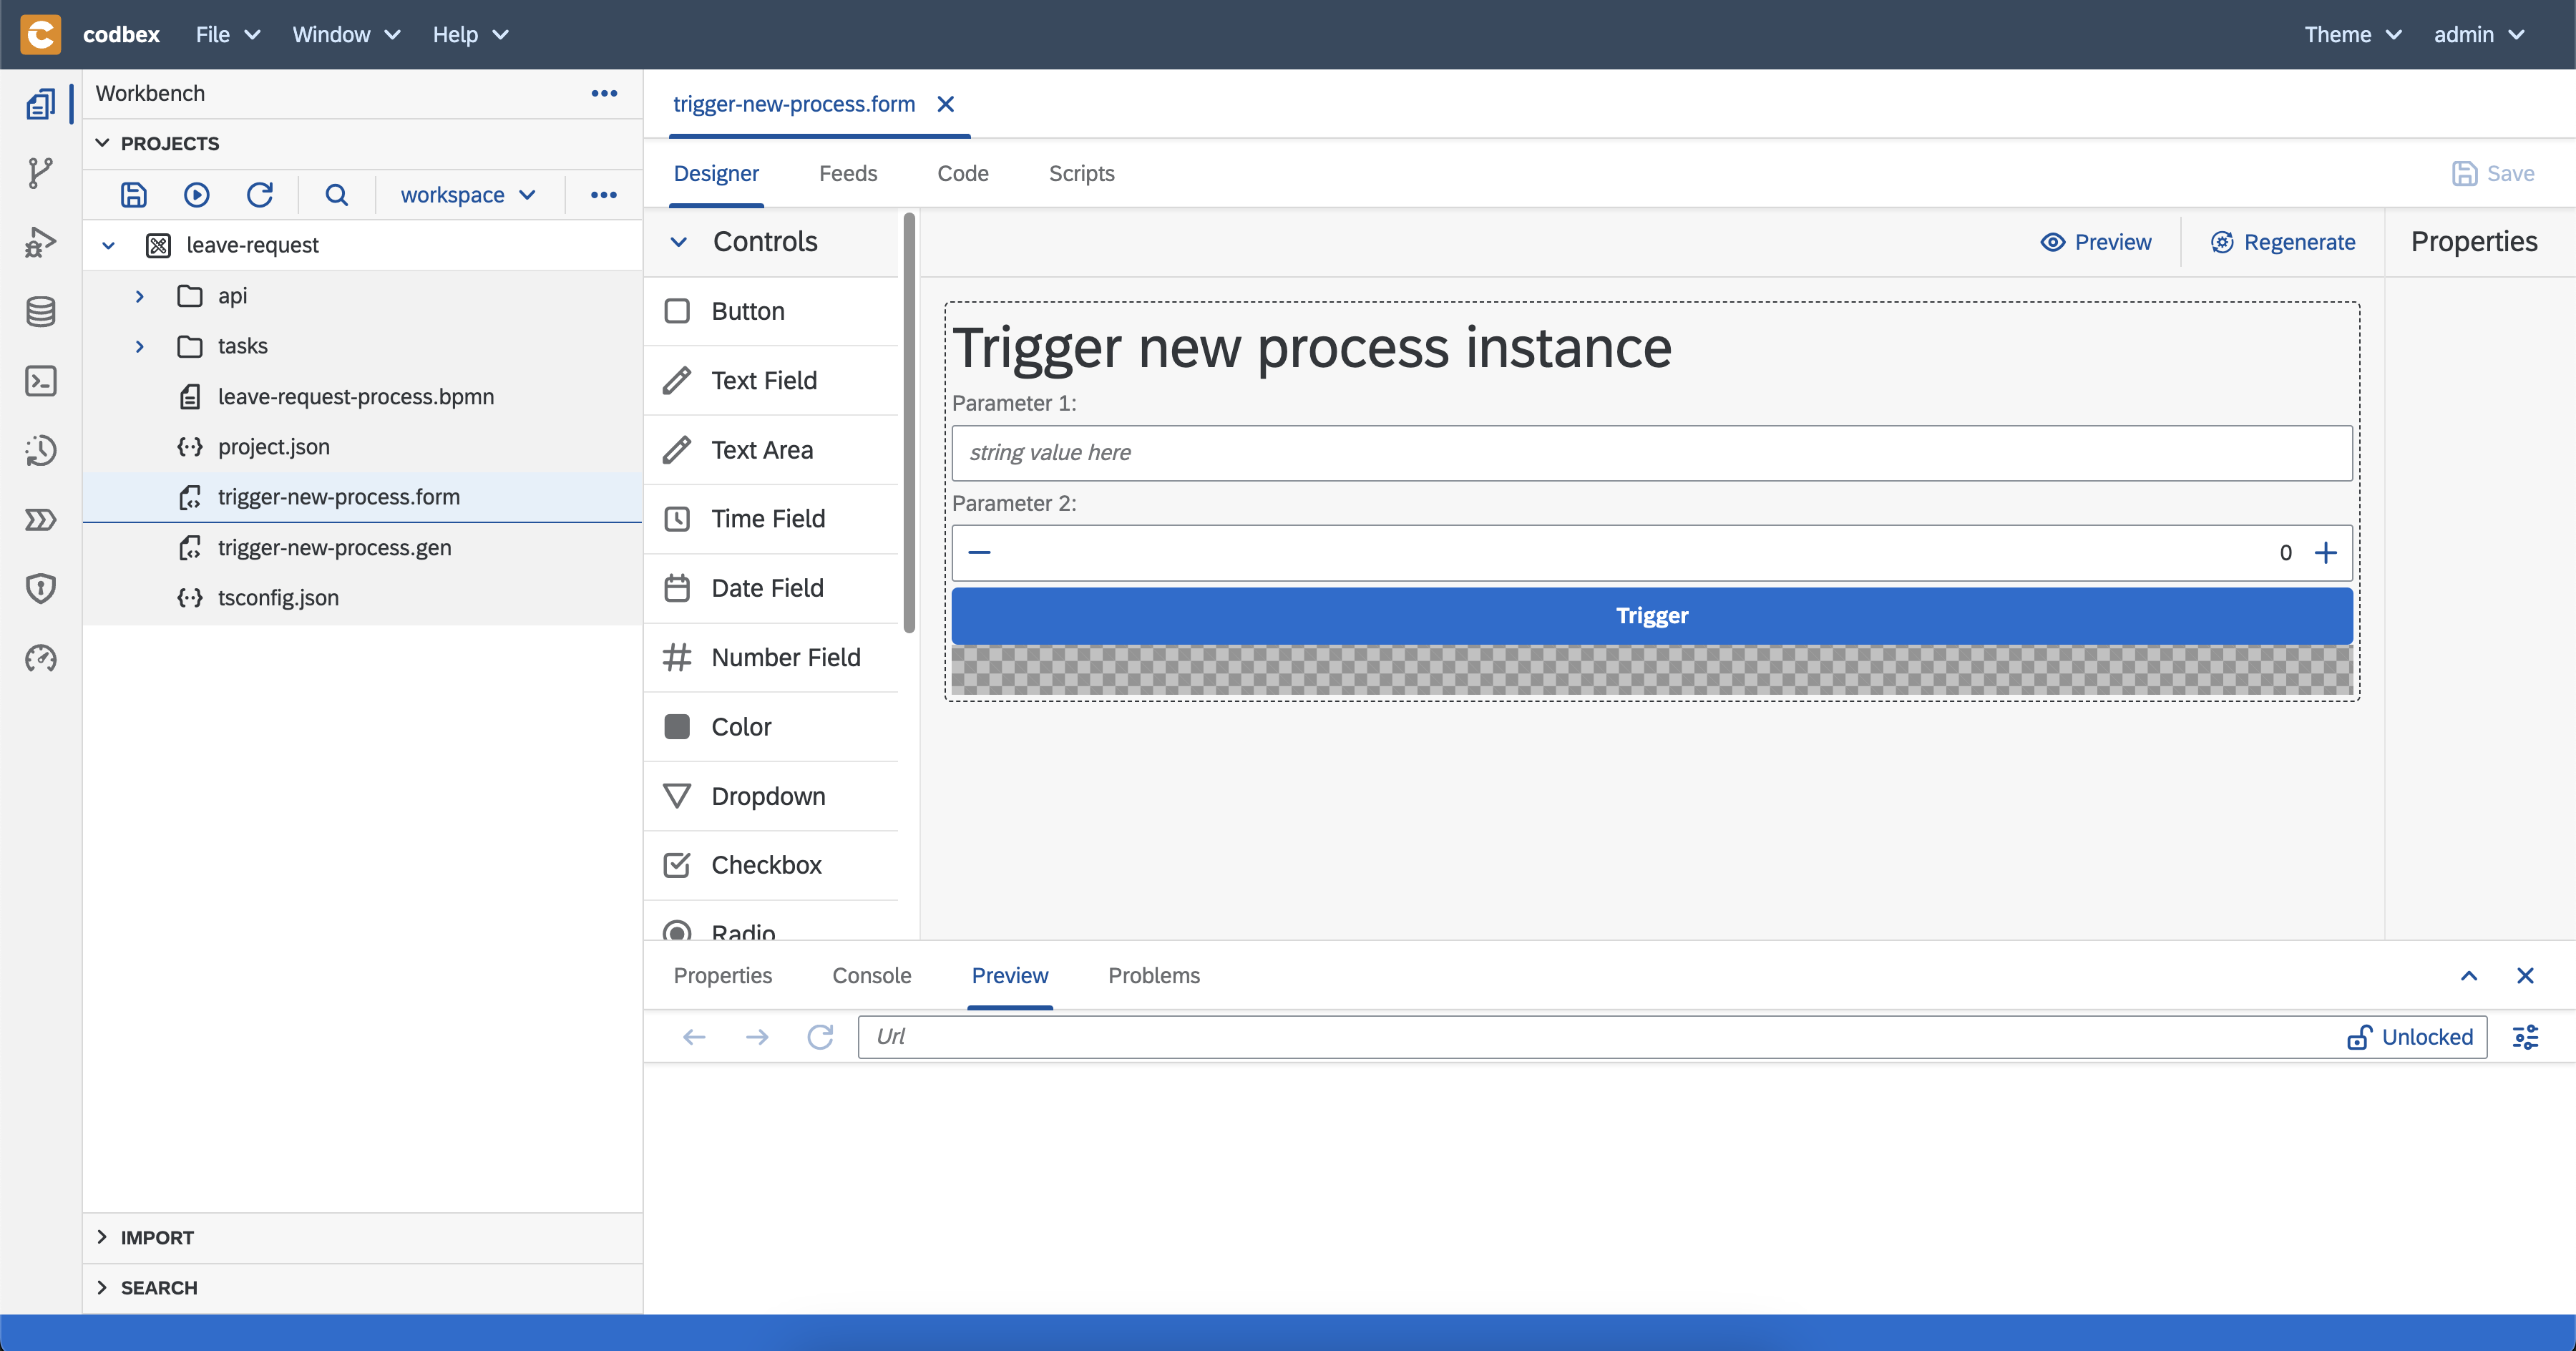
- In the
Codetab, you can find the controller code and the method which is executed when theTriggerbutton is clicked.
It basically sends the form data to the generated REST API for process triggering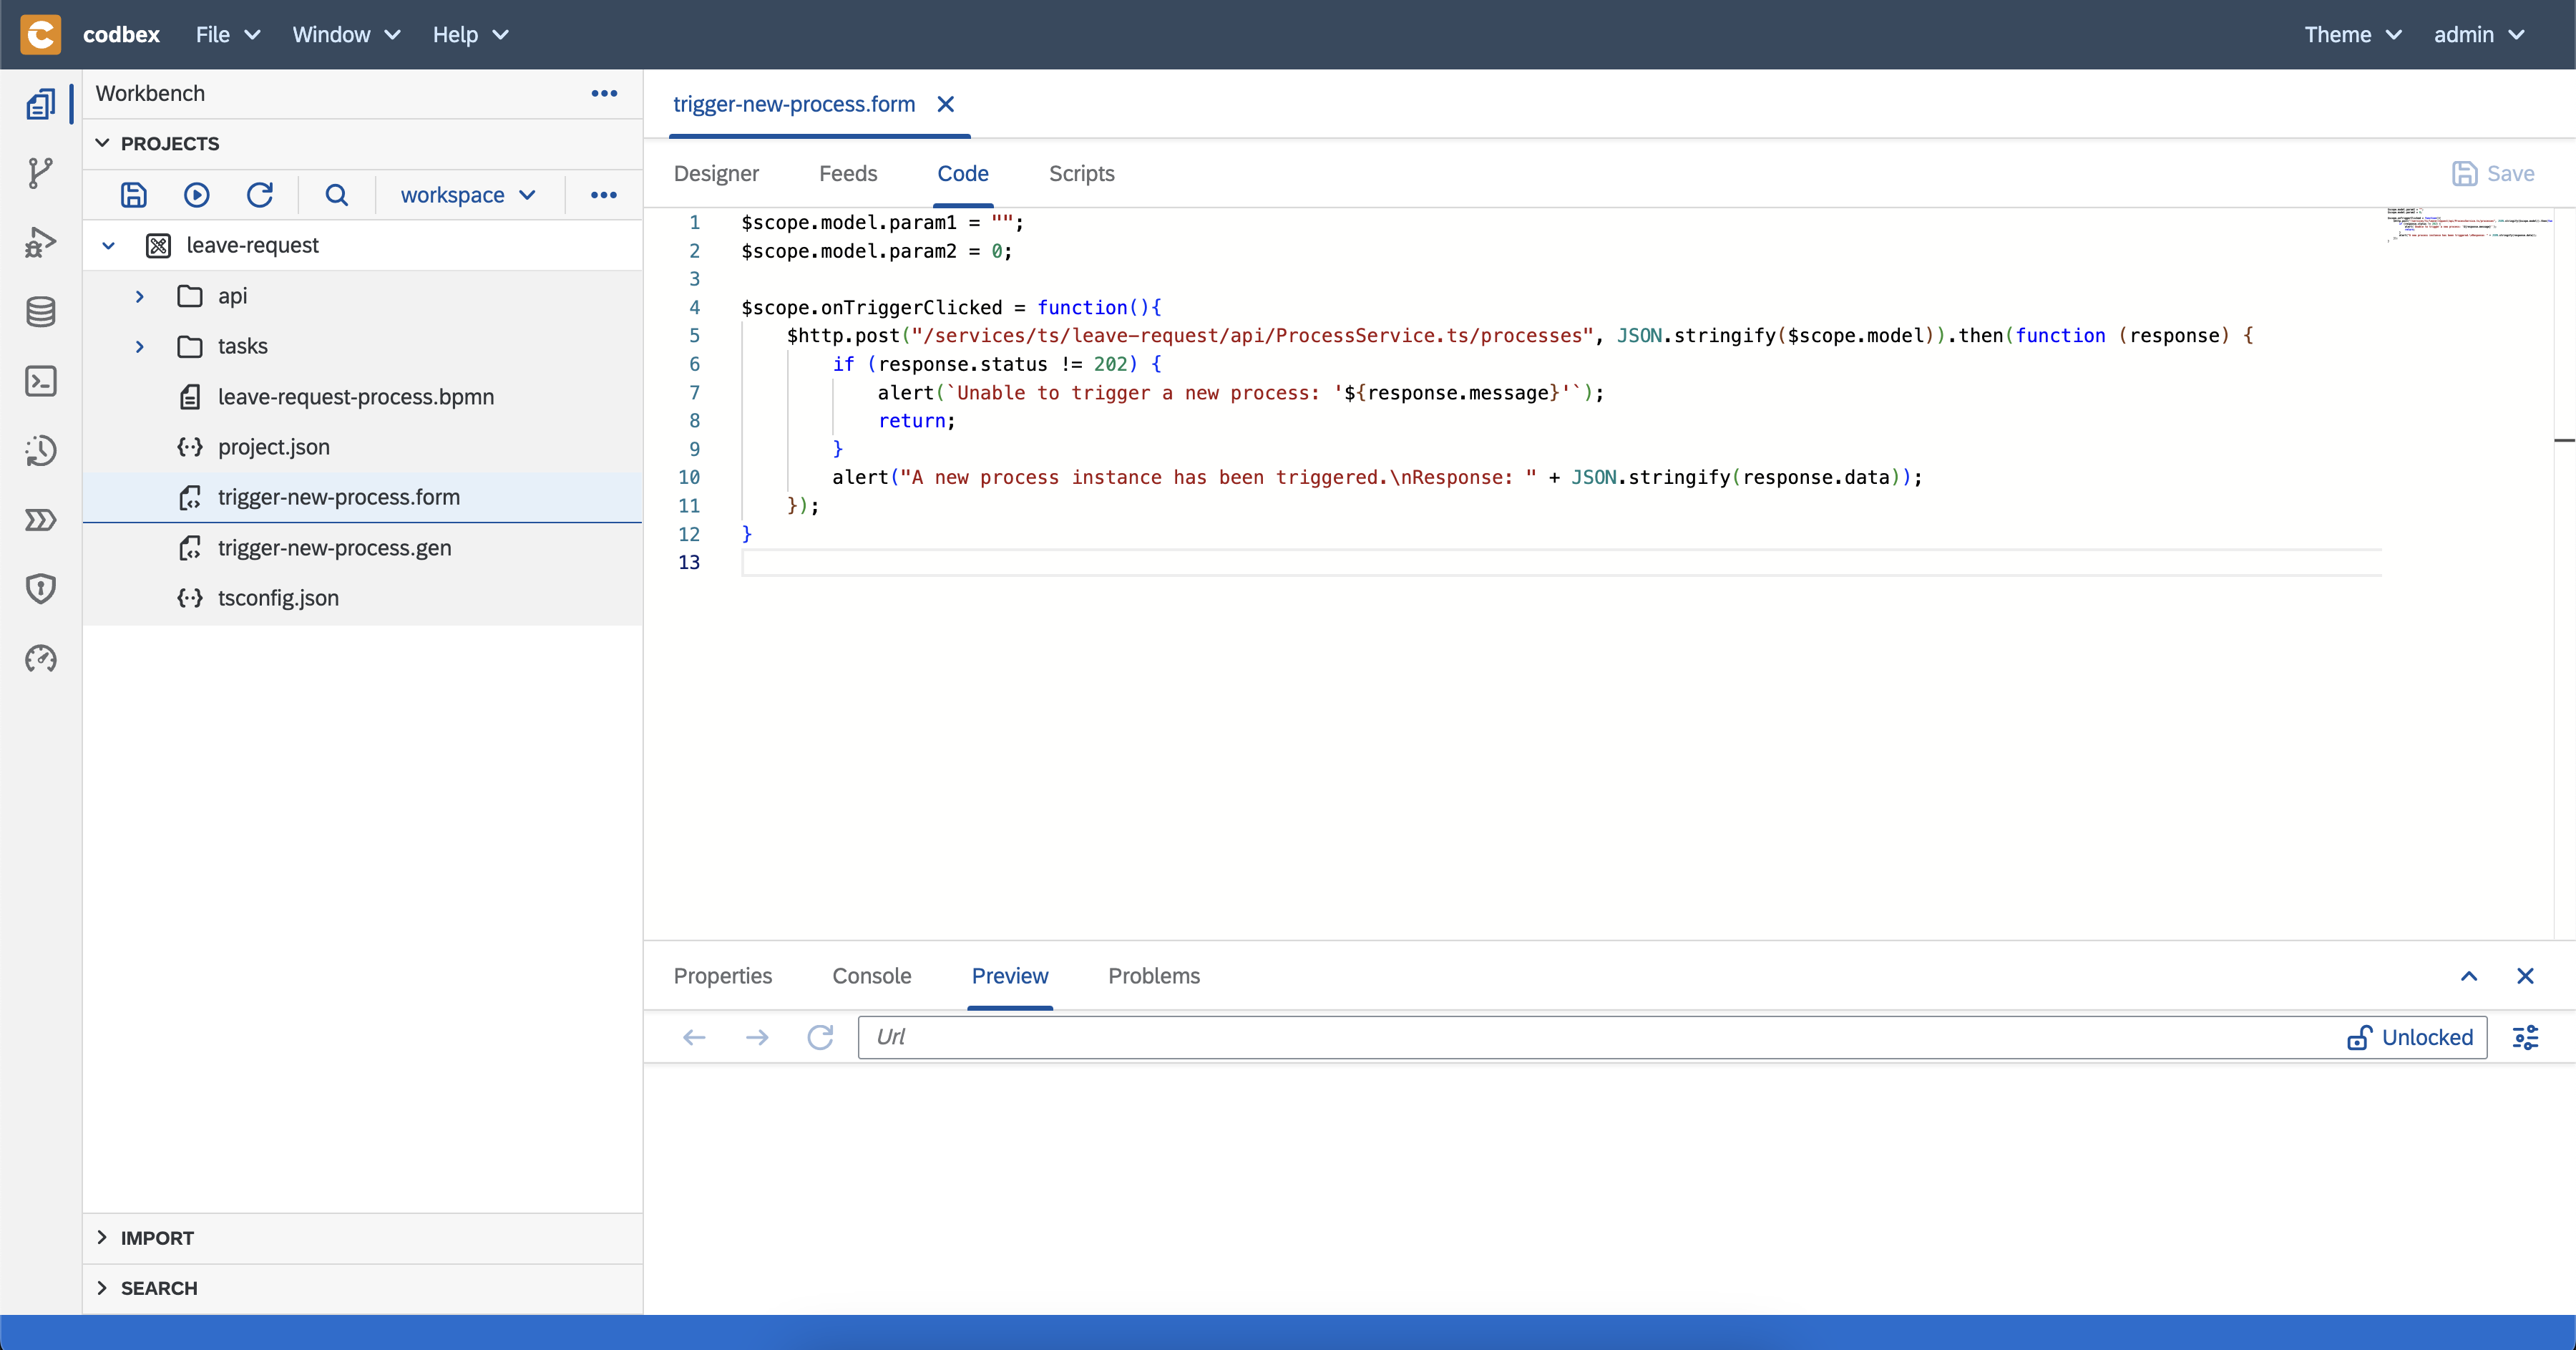
- In the
- Next, you have to generate a usable UI from the form


- open the form
trigger-new-process.form - click on
Regeneratebutton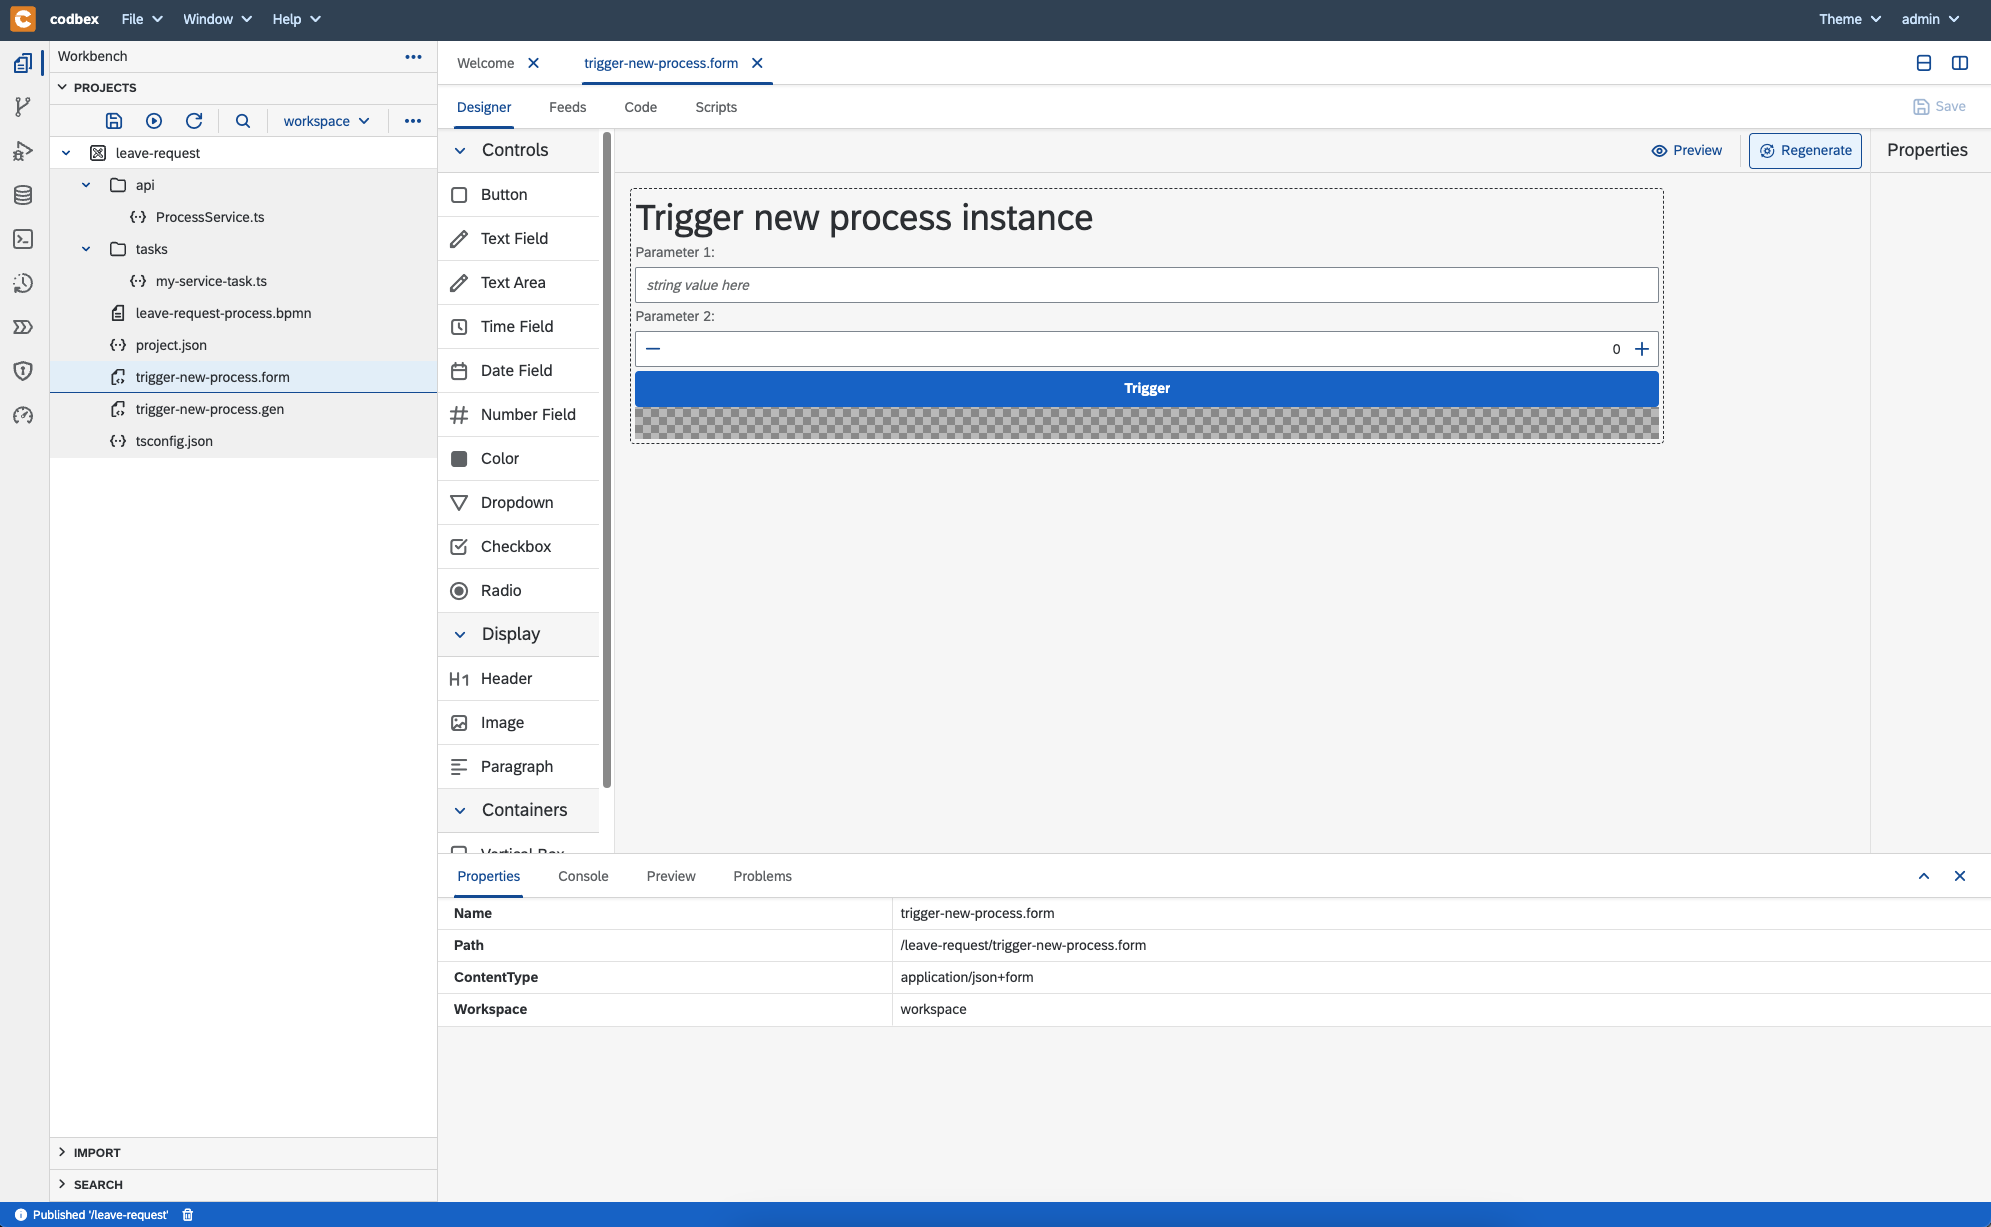

- Now, let's check whether the generated project works.
- navigate to generated
gen/trigger-new-process/forms/trigger-new-process/index.htmlfile and double-click on it - you should see the form in the
Previewtab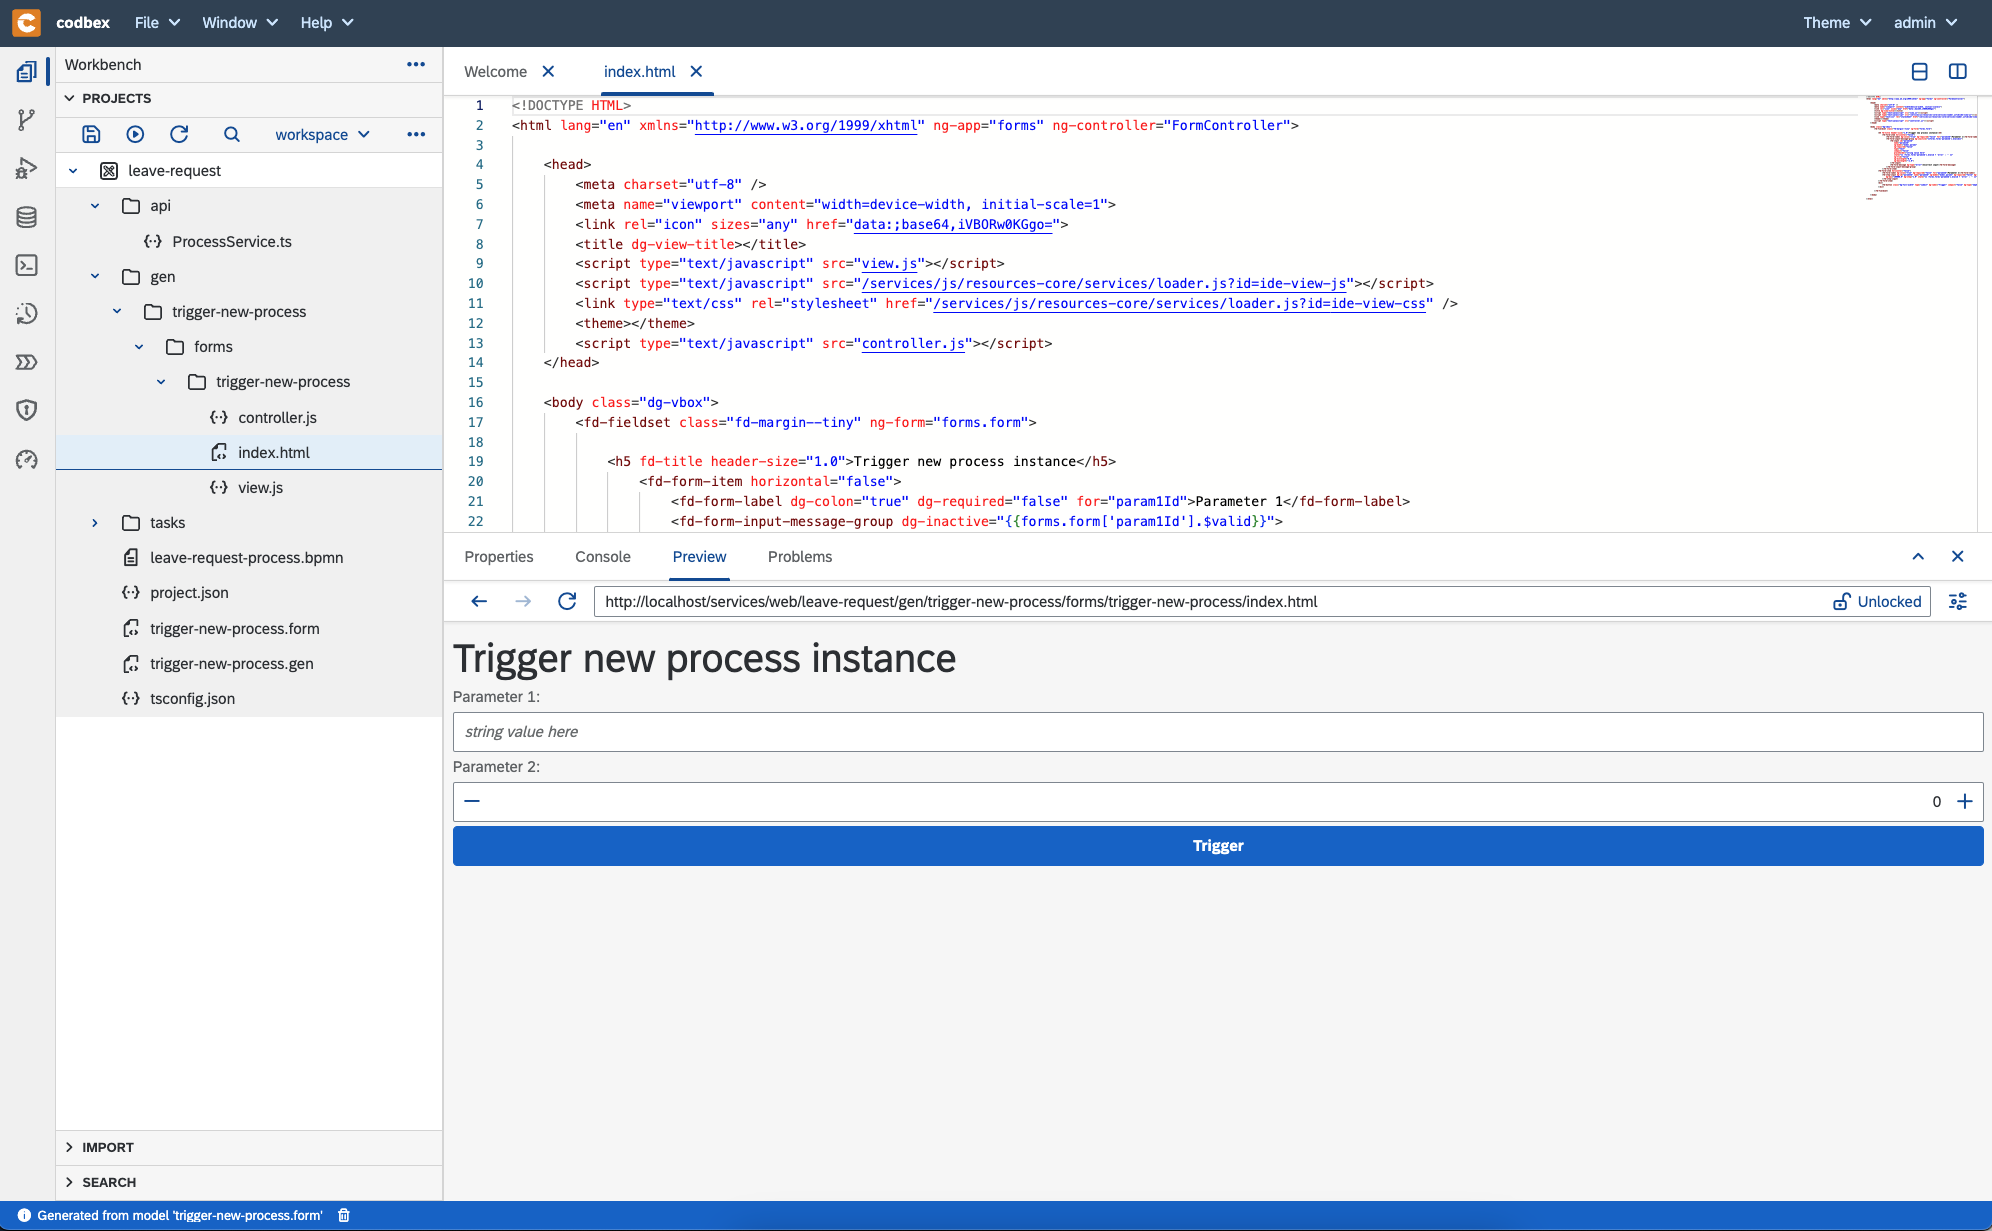
If it is easier for you, you can open the form in a separate browser tab http://localhost/services/web/leave-request/gen/trigger-new-process/forms/trigger-new-process/index.html.
The result will be the same. - add values for the input fields
Parameter 1andParameter 2 - click on
Triggerbutton - you should see a message which confirms that a process instance is triggered asynchronously
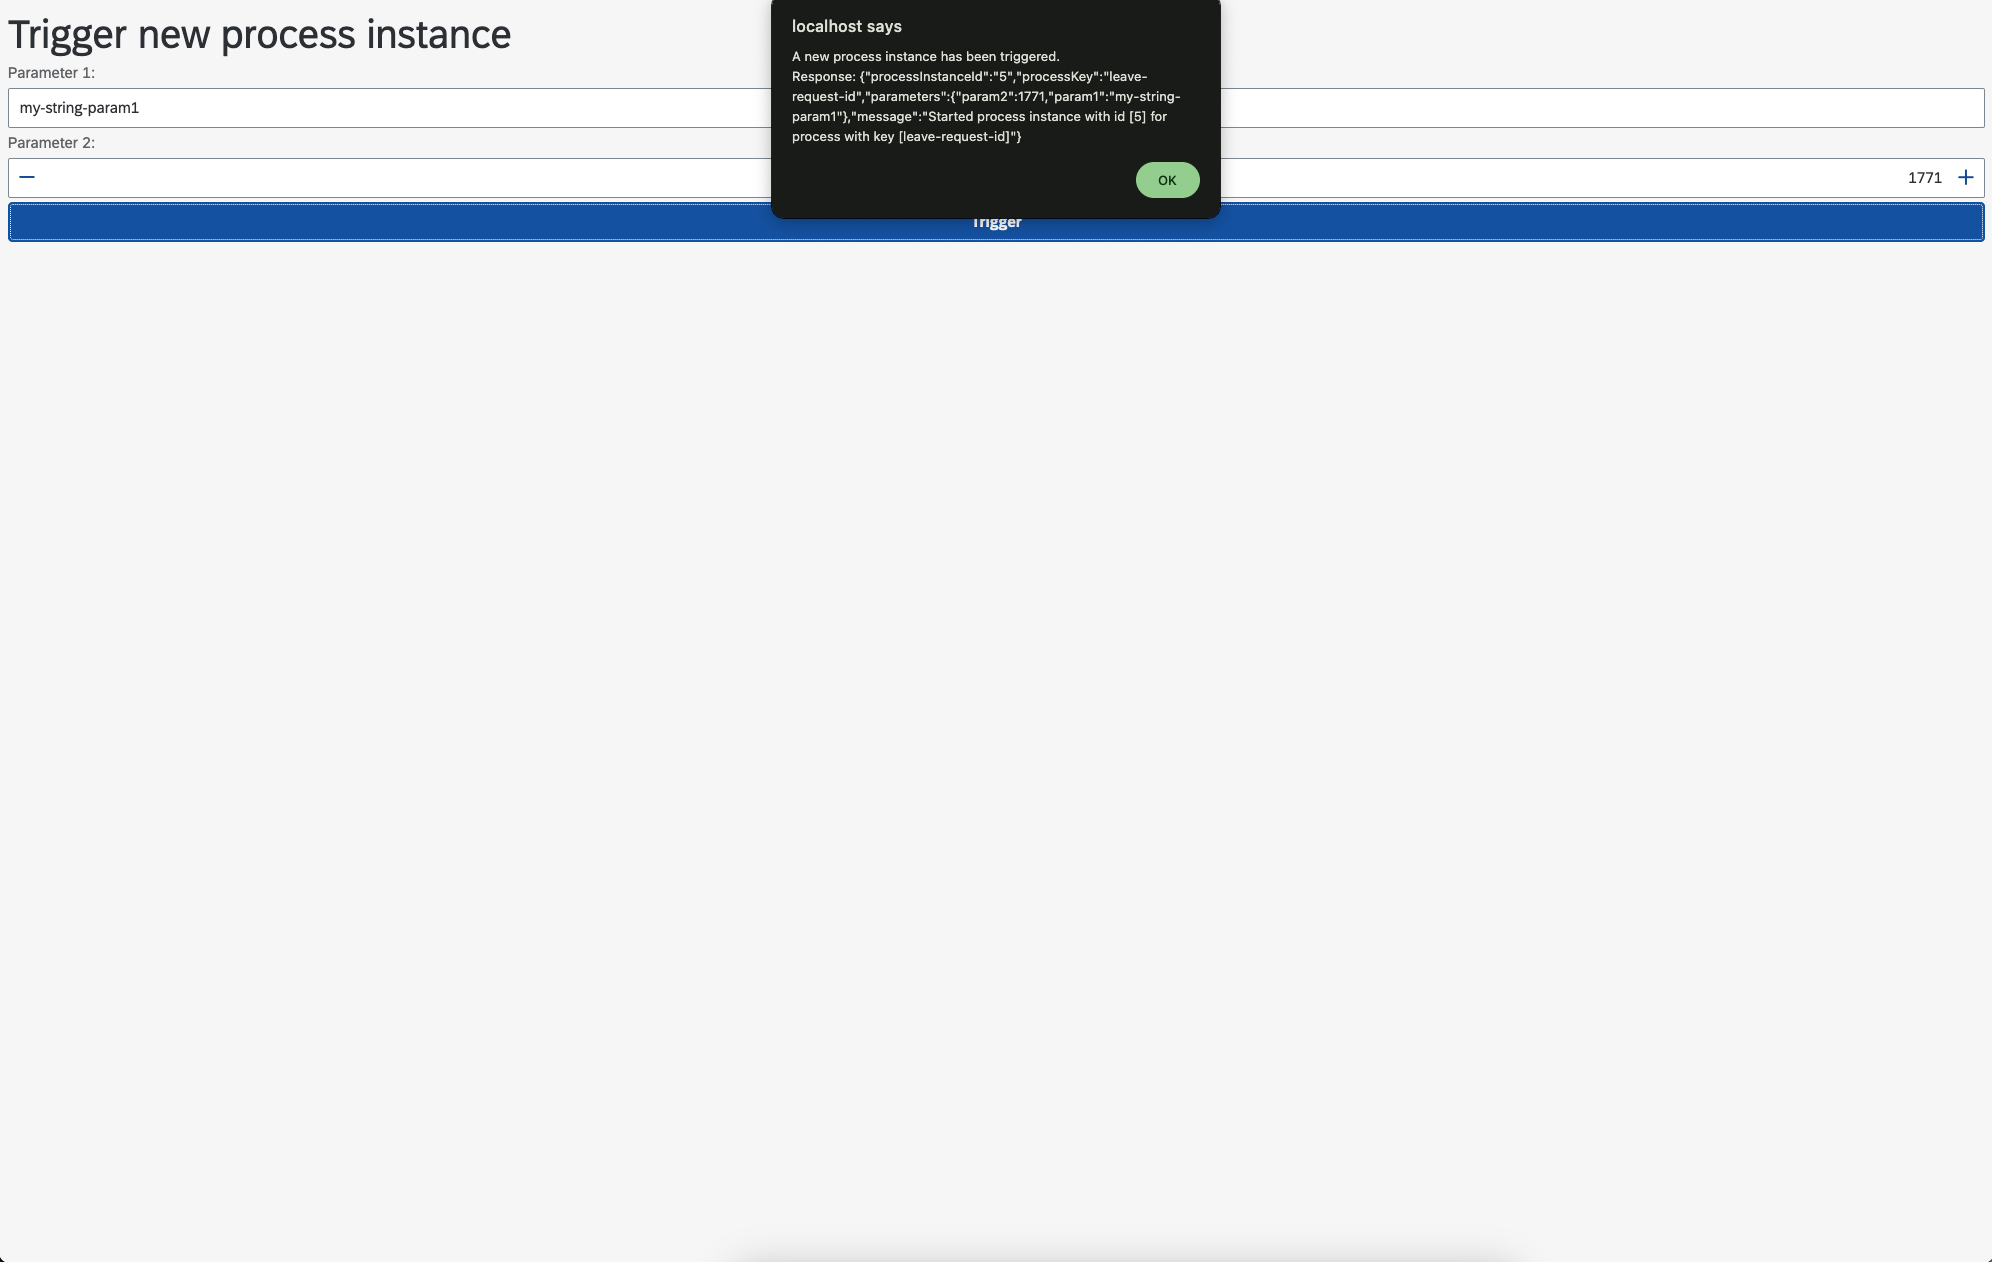
- Also, a log from the executed task
tasks/my-service-task.tsshould be available in the console once the task is executed
- Also, a log from the executed task


BPM process
We want to implement a process which has:- a service tasks which sends a notification email to all employee managers when a new leave request is submitted (a new process instance is created)
- a user task which waits for an employee manger to process (approve/decline) the leave request
- an exclusive gateway which routes the flow to different service task depending on a variable called
requestApproved - a task which notifies the requester that the request is approved
- a task which notifies the requester that the request is declined
In the end it will look like this: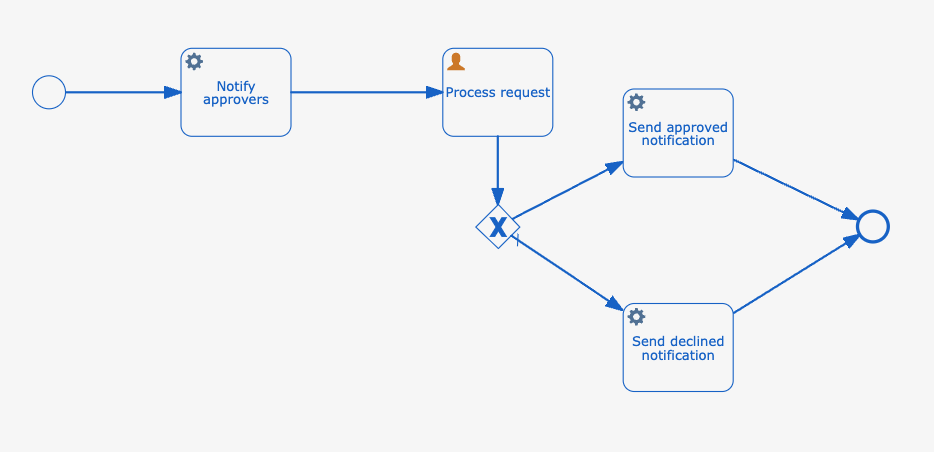
Model the BPM process
Let's open the processleave-request-process.bpmnand modify it- Employee managers notification task
- select task
MyServiceTask - set
Idtonotify-approvers - set
NametoNotify approvers - edit
Class fieldsand changeString valuefromleave-request/tasks/my-service-task.tstoleave-request/tasks/notify-approvers-task.ts - save the process file using the
Save the modelbutton - rename file
tasks/my-service-task.tstotasks/notify-approvers-task.ts - create a mail util file
mail-util.tsin foldertaskswith this content for sending emails or logging (if the mail configurations are not present) - delete the content of
tasks/notify-approvers-task.tsand put this content- Process request task
- drag and drop a
User taskfromActivities - set
Idtoprocess-request - set
NametoProcess request - We need to specify who can process this user task. For now, let's set
Assignmentsto candidate group calledADMINISTRATOR. Later on, we will create a dedicated group for employee managers.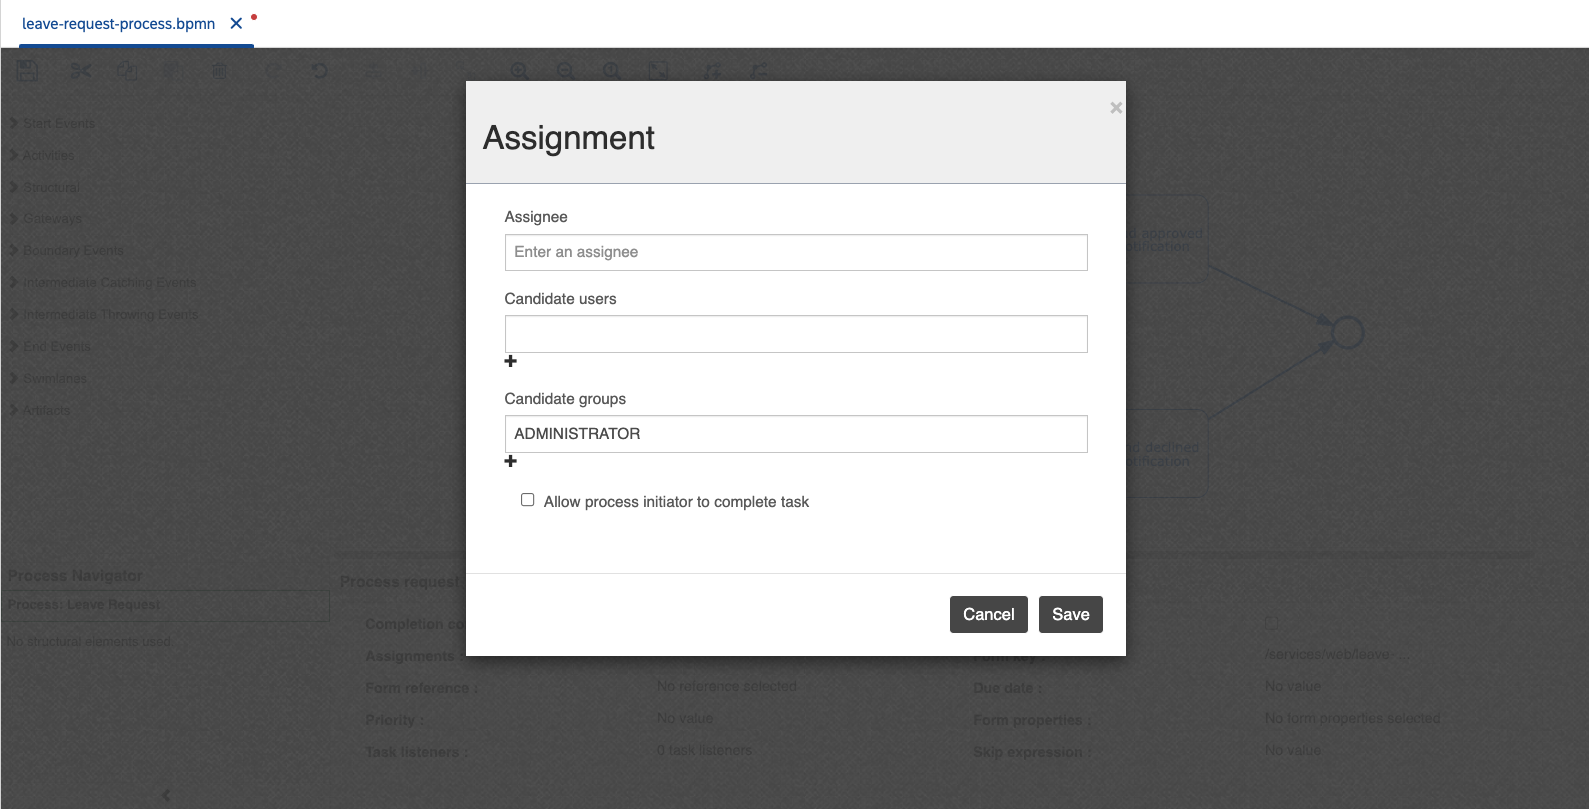
- connect service task
Notify approverstoProcess request
- Add exclusive gateway
- drag and drop a
Exclusive gatewayfromGateways - connect user task
Process requestto the gateway
- Approved request notification task
- drag and drop a
Service taskfromActivities - set
Idtosend-approved-notification - set
NametoSend approved notification - set
${JSTask}forDelegate Expression - add class field with name
handlerand string valueleave-request/tasks/send-approved-notification.ts
- create a file called
send-approved-notification.tsin foldertaskswith this content - connect the gateway with
Send approved notificationtask - select the flow arrow and set
Idtoapproved-flow${requestApproved}forFlow condition. This flow will be executed only when there is a process variablerequestApprovedwith valuetrue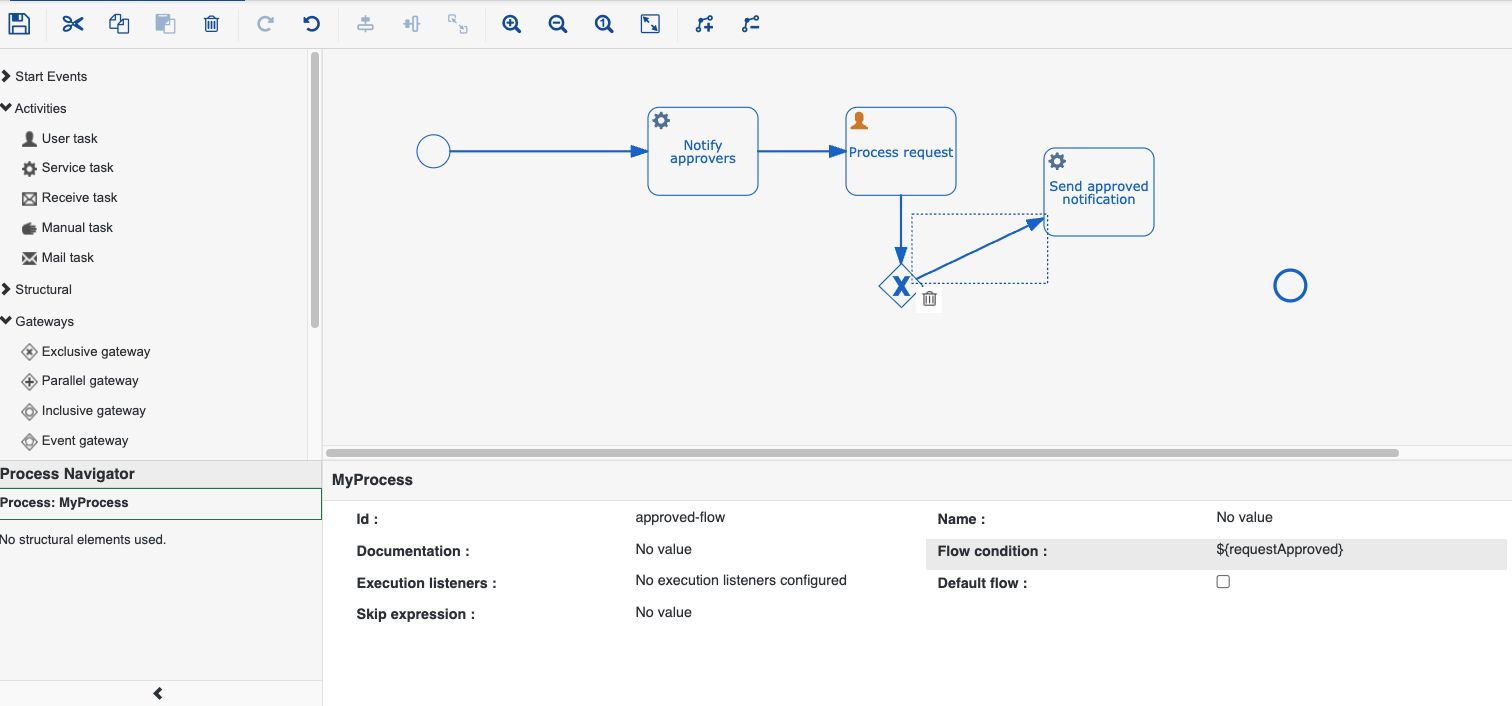
- connect task
Send approved notificationto the end event - save the process
- Declined request notification task
- drag and drop a
Service taskfromActivities - set
Idtosend-declined-notification - set
NametoSend declined notification - set
${JSTask}forDelegate Expression - add class field with name
handlerand string valueleave-request/tasks/send-declined-notification.ts - create a file called
send-declined-notification.tsin foldertaskswith this content - connect the gateway with
Send declined notificationtask - select the flow arrow
- set
Idtodeclined-flow - select
Default flowcheckbox
- set
- connect task
Send declined notificationto the end event - save the process
Here is the final version of the process: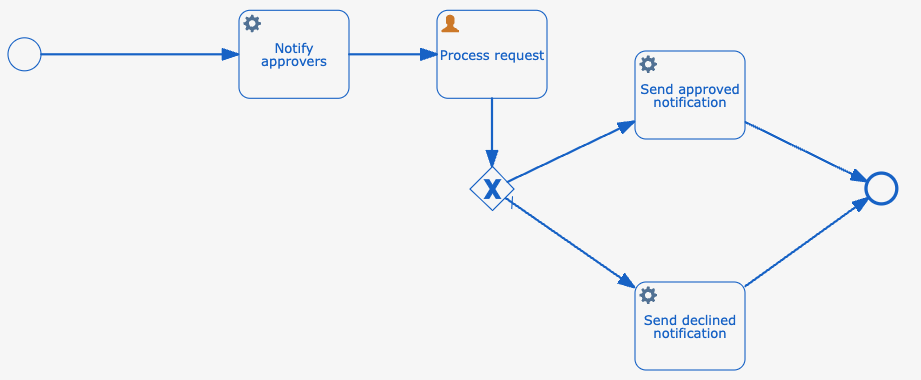
If you have any issues with the modeling, you can right-click on process fileleave-request-process.bpmn->Open With->Code Editorand put the file content from this link.
Implement REST API
Openapi/ProcessService.tsand replace the content with this one.
It uses the BPM and security APIs to trigger a new leave request process, approve/decline a request and to get details about a request.
Here are the implemented APIs:


- create a new leave request
Example:
curl --header 'Authorization: Basic YWRtaW46YWRtaW4=' \
    --header 'Content-Type: application/json' \
    --location 'http://localhost/services/ts/leave-request/api/ProcessService.ts/requests' \
    --data '{
        "fromDate": "2024-07-18T09:39:43.638Z",
        "toDate": "2024-07-19T09:39:43.638Z"
}'- approve a leave request
Example:
curl --header 'Authorization: Basic YWRtaW46YWRtaW4=' \
--location --request PUT 'http://localhost/services/ts/leave-request/api/ProcessService.ts/requests/46/approve'- decline a leave request
Example:
curl --header 'Authorization: Basic YWRtaW46YWRtaW4=' \
--location --request PUT 'http://localhost/services/ts/leave-request/api/ProcessService.ts/requests/46/decline'- get leave request details
Example:
curl --header 'Authorization: Basic YWRtaW46YWRtaW4=' \
    --location 'http://localhost/services/ts/leave-request/api/ProcessService.ts/requests/46/details'
Implement user interface for submitting new leave request
You can create easily user interfaces using the codbex forms functionality.
Let's create our first form.remove the generated form
trigger-new-process.formand correspondingtrigger-new-process.genfile, since we will create a new from scratchright-click on project
leave-request->New->Form Definitiontype
submit-leave-request.formfor nameclick on
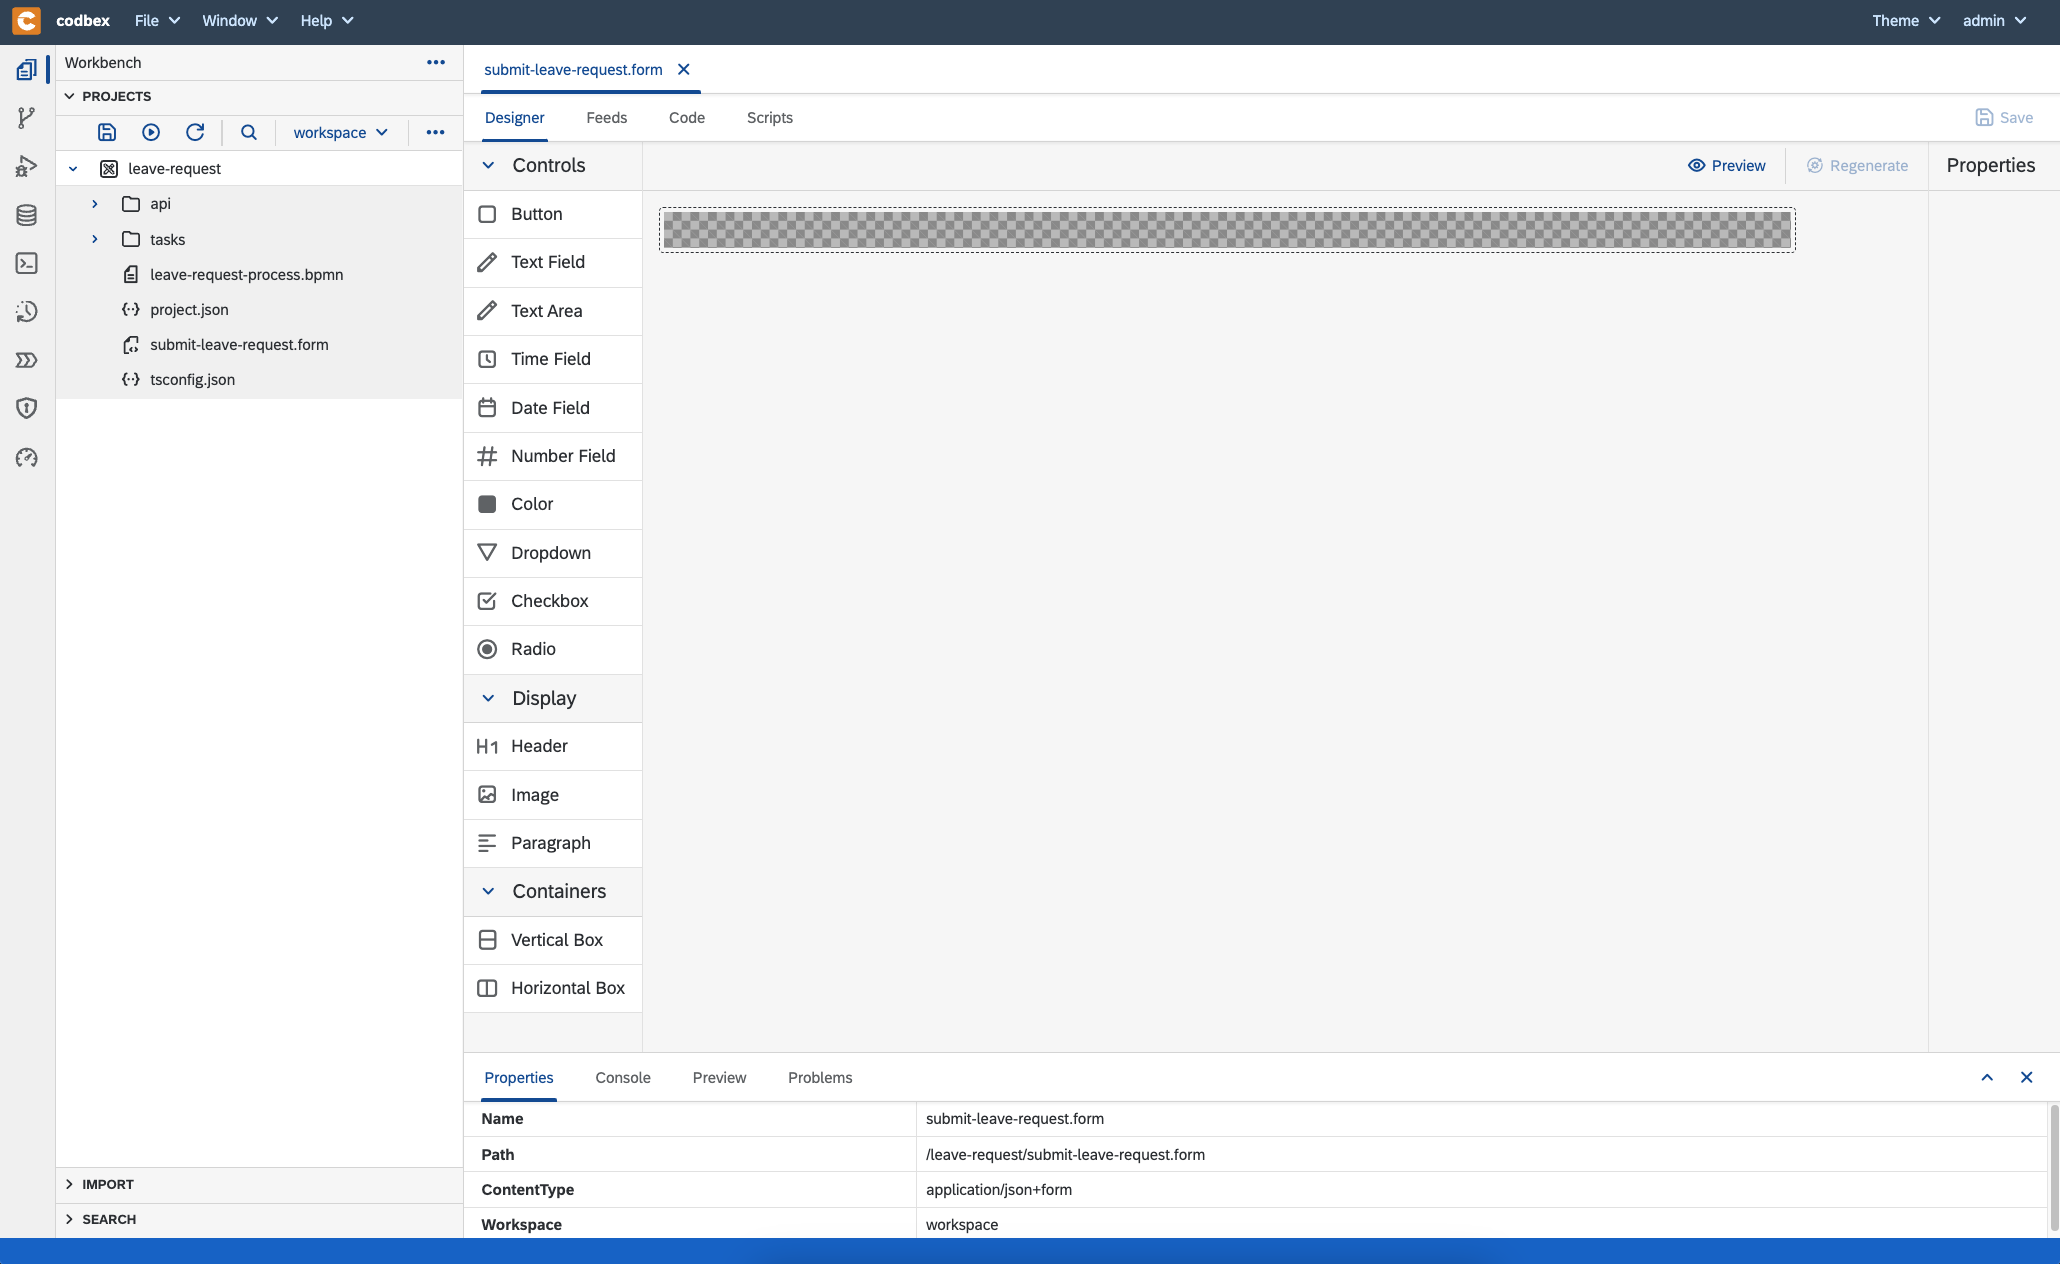
Createbuttonopen the created file
submit-leave-request.formnow, we see the form editor with empty content
drag and drop header, two date fields for from and to dates and a
Submitbutton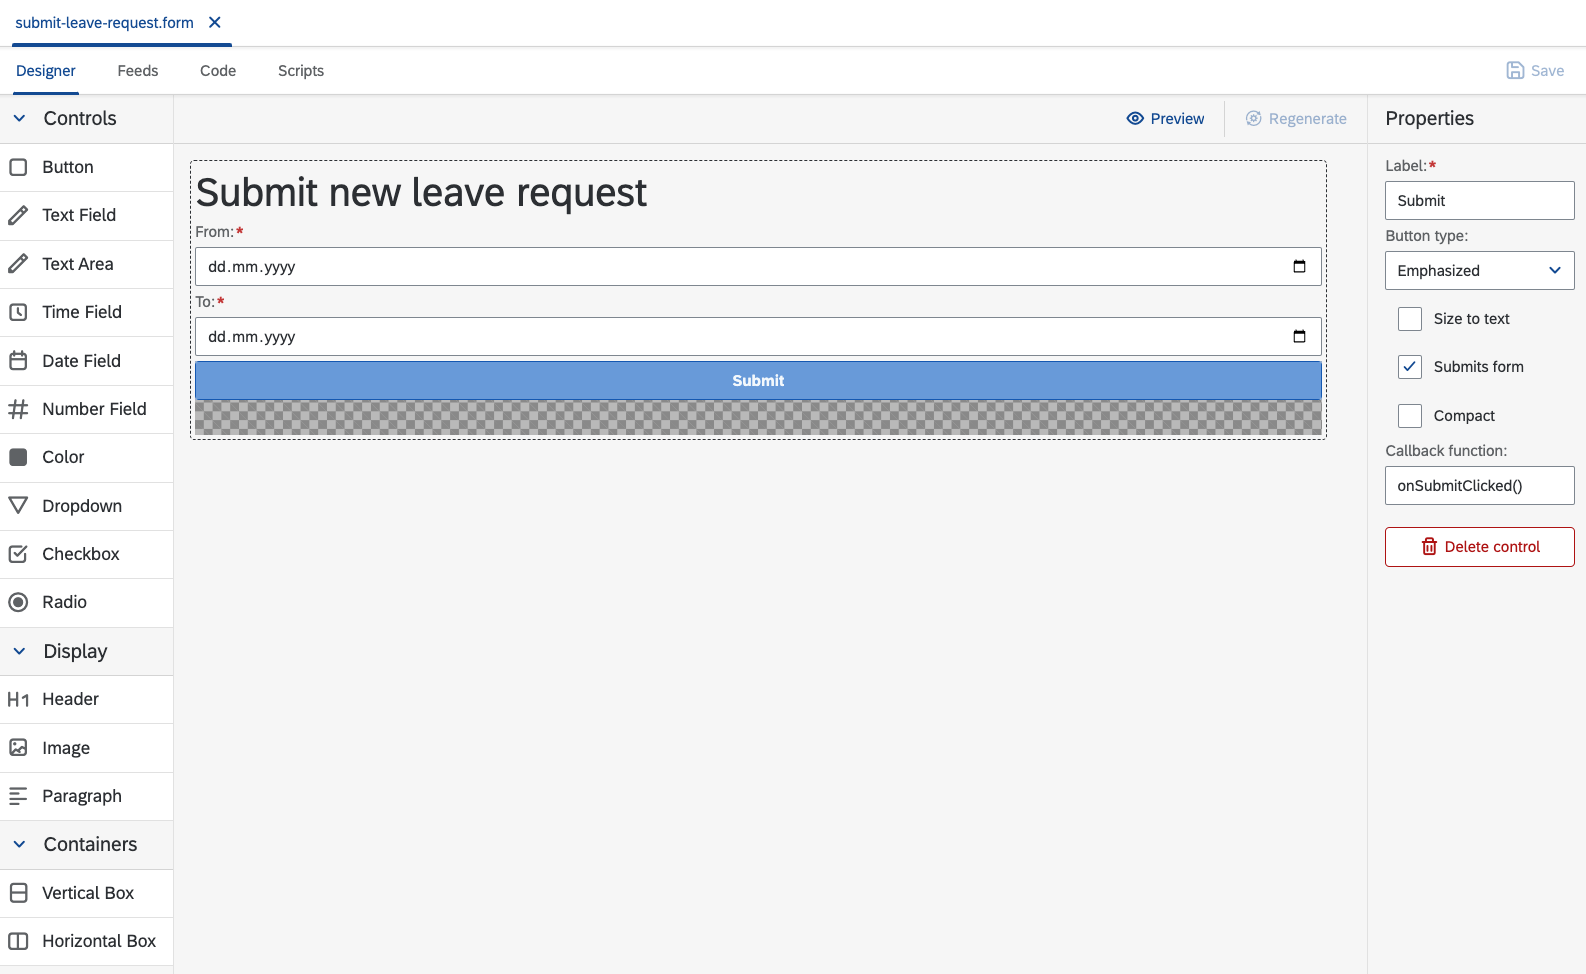
update the labels
set
fromDatefor from dateModelset
toDatefor to dateModelset
onSubmitClicked()for submit buttonCallback functionconfigurationthe
Codetab is the place where the controller logic resides- set initial date for
fromDateandtoDate - implement the function
onSubmitClickedwhich will send the model data to the implemented REST API - here is the code which you need
$scope.model.fromDate = new Date(); $scope.model.toDate = new Date(); $scope.onSubmitClicked = function () { const data = JSON.stringify($scope.model); $http.post("/services/ts/leave-request/api/ProcessService.ts/requests", data) .then(function (response) { if (response.status != 202) { alert(`Unable to create new leave request: '${response.message}'`); return; } alert("Leave request has been created.\nResponse: " + JSON.stringify(response.data)); }); }- set initial date for
save the form using
Savebuttongenerate the UI
- right-click on
submit-leave-request.form->Generate - choose template
AngularJS Generator from Form Model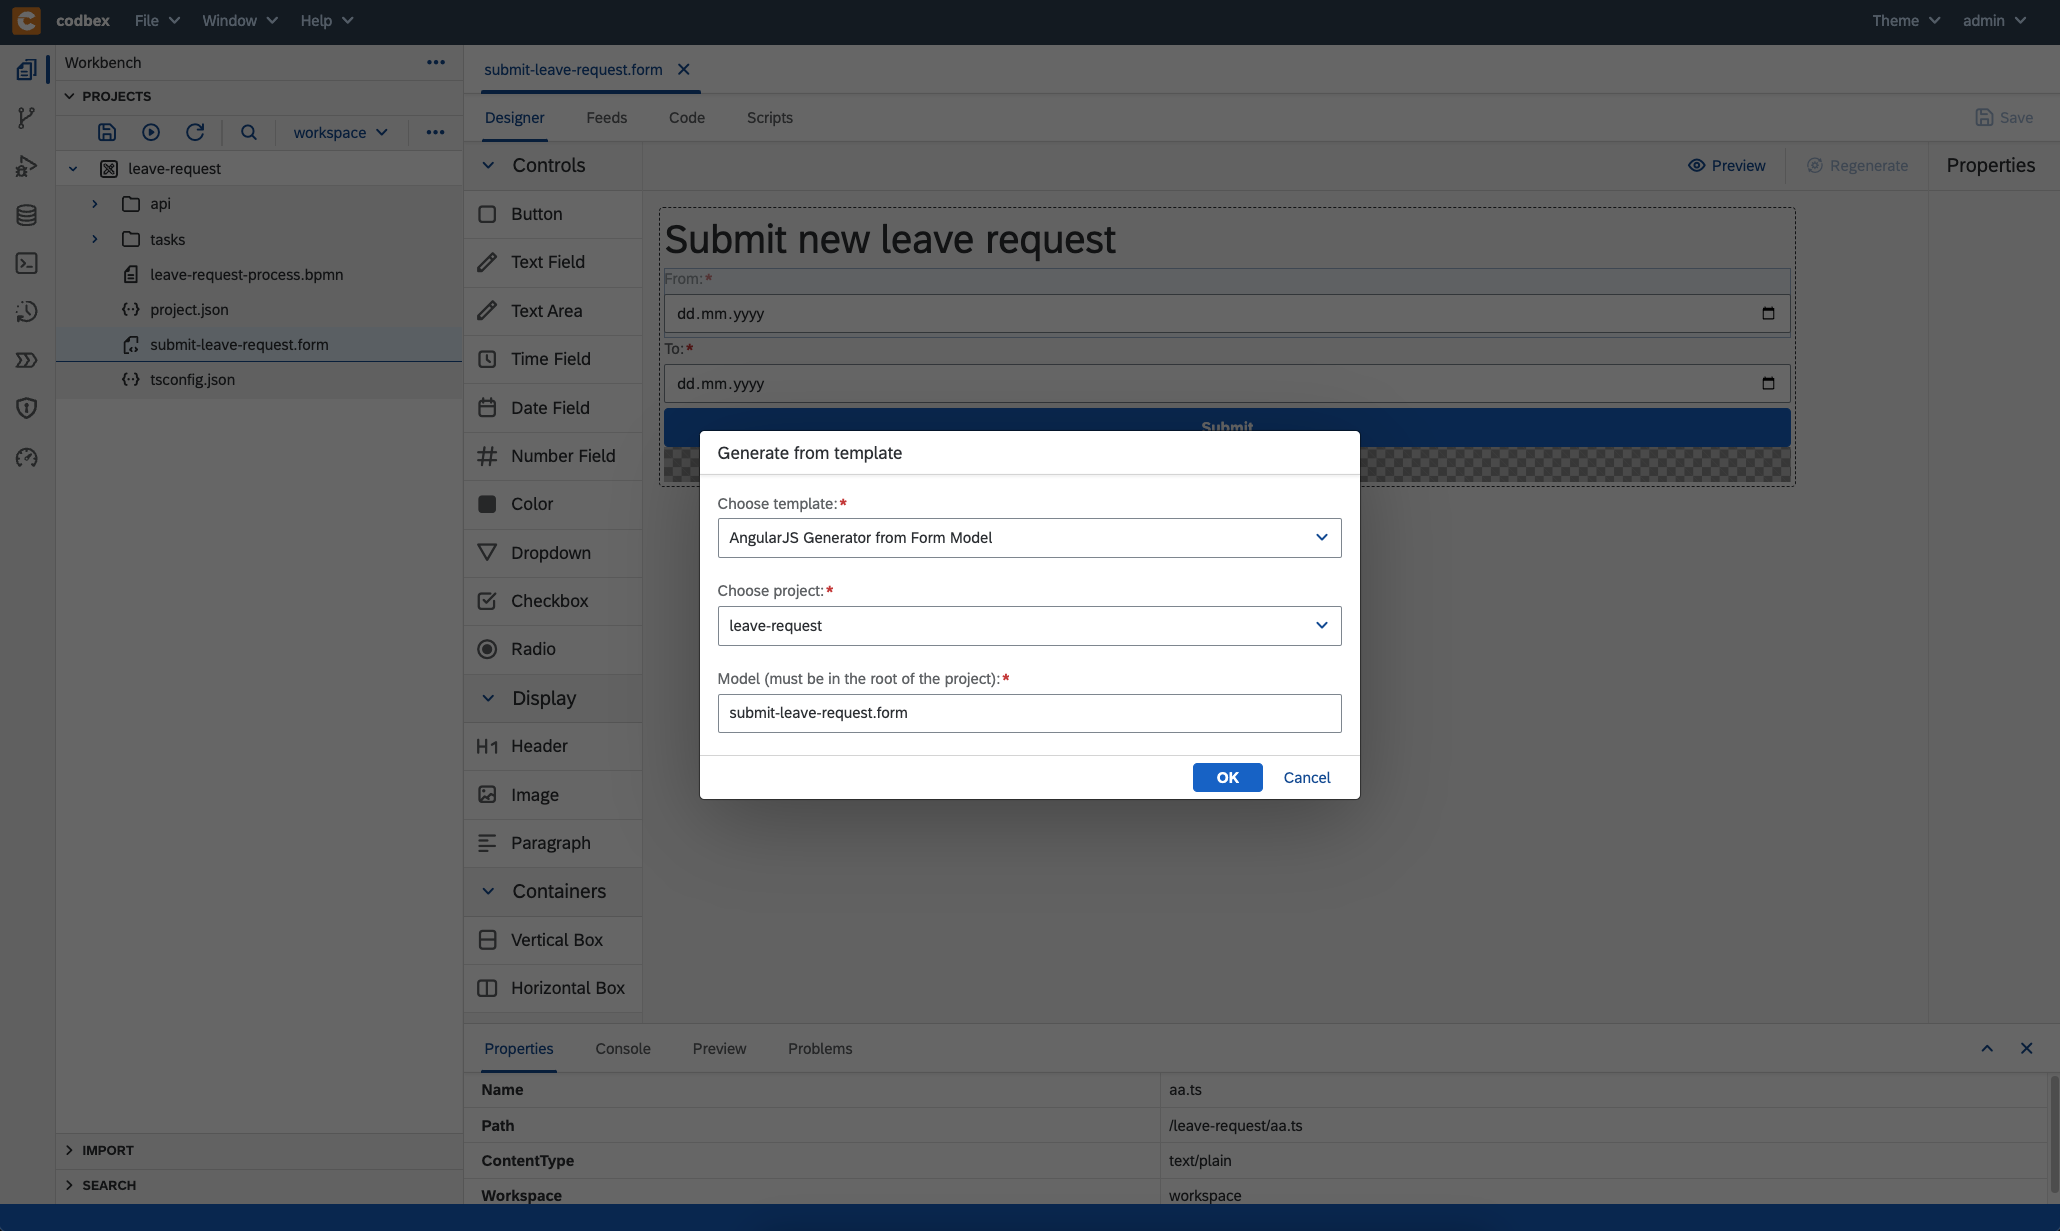
- click on
OKbutton - close file
submit-leave-request.formif it is opened - open
submit-leave-request.form - click on
Regeneratebutton underDesignertab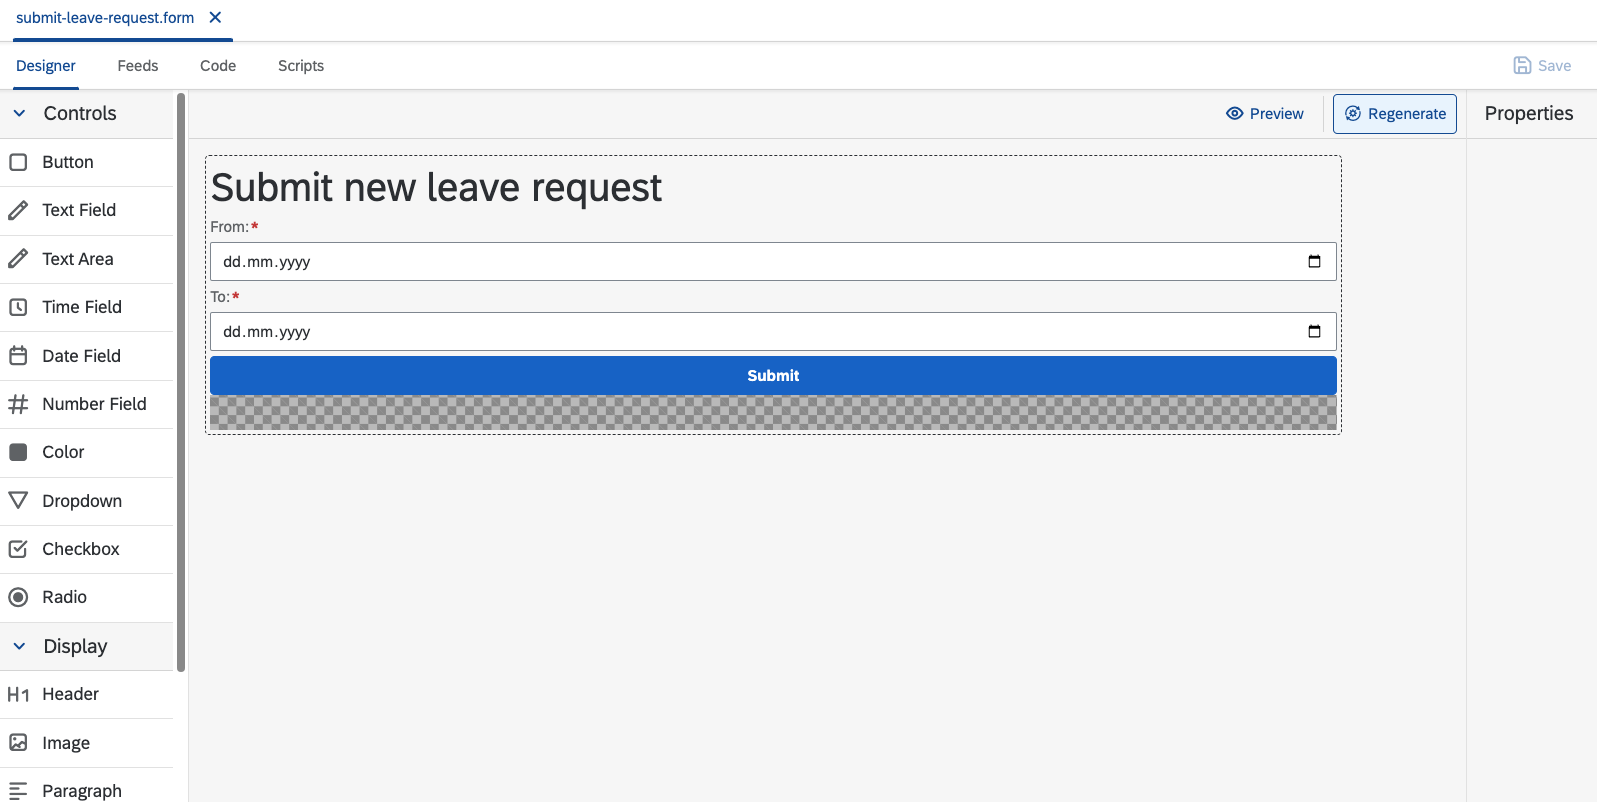
- the generated UI should be located in folder
gen/submit-leave-request/forms/submit-leave-request - if you have issues with the form modeling, you can get the from code from here
- right-click on
Implement user interface for leave request processing
- create new form with name
process-leave-request.form - drag and drop
- header for the form title
- text field for the requester
- two date fields for from and to dates
ApproveandDeclinebuttons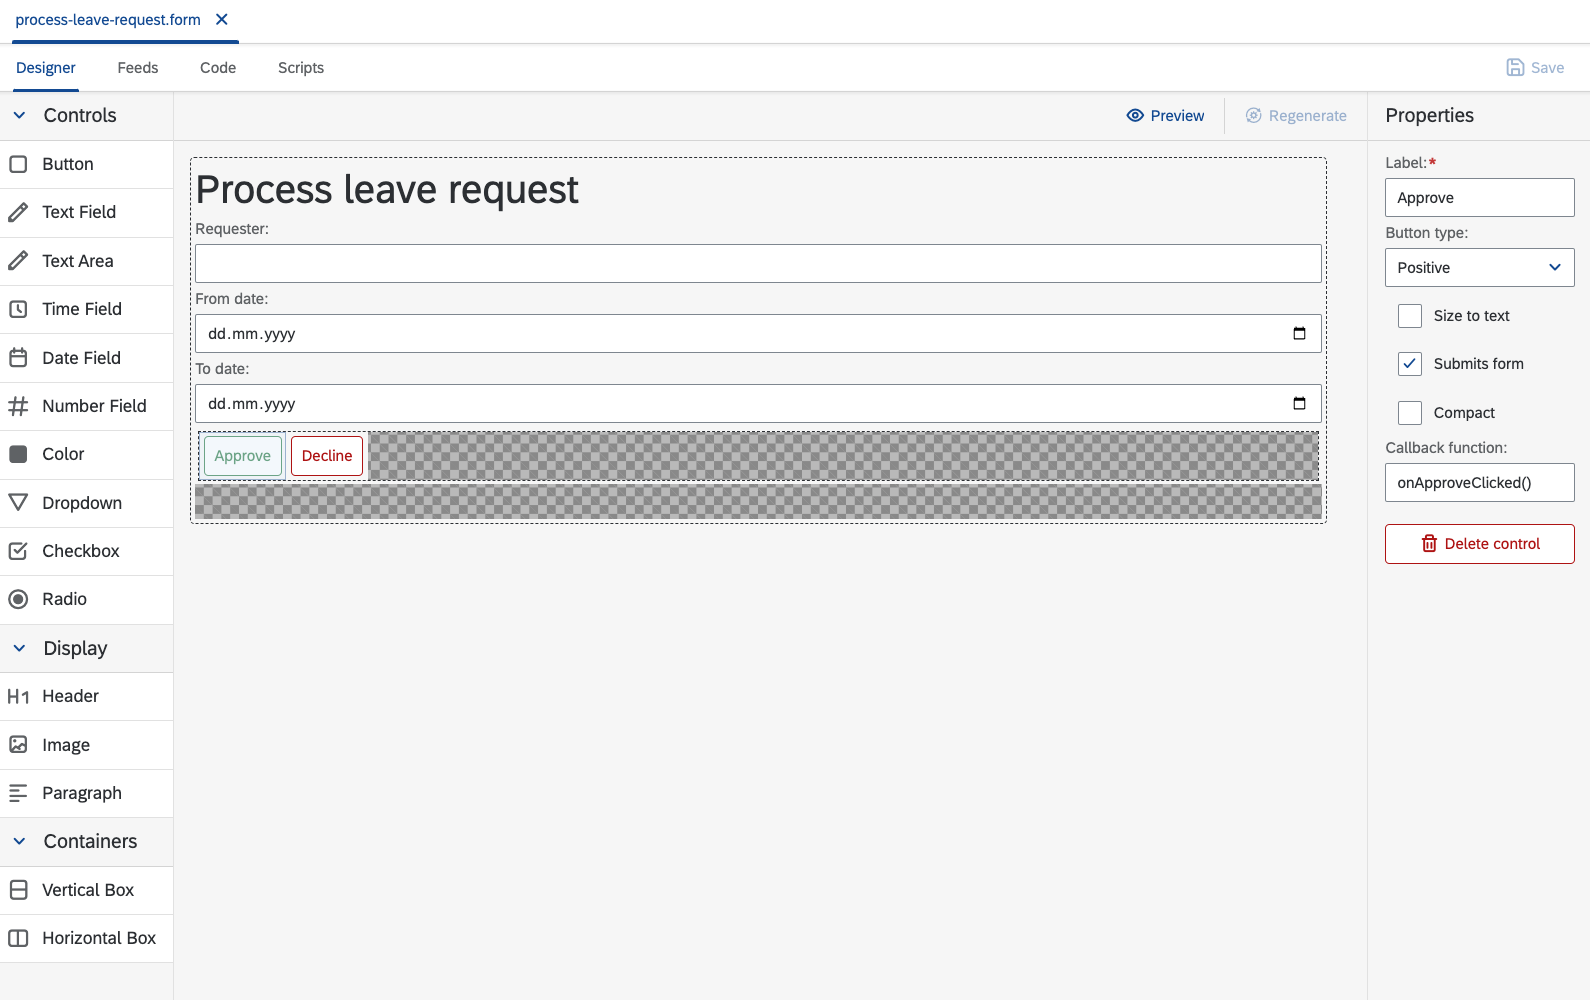
- update the labels
- set
requesterfor requesterModelconfiguration - set
fromDateforFrom dateModelconfiguration - set
toDateforTo dateModelconfiguration - set
onApproveClicked()for approve buttonCallback functionconfiguration - set
onDeclineClicked()for decline buttonCallback functionconfiguration - under the
Codetab, put the following logicconst url = new URL(window.location); const params = new URLSearchParams(url.search); const taskId = params.get("taskId"); $scope.onApproveClicked = function () { const url = `/services/ts/leave-request/api/ProcessService.ts/requests/${taskId}/approve`; $http.put(url) .then(function (response) { if (response.status != 200) { alert(`Unable to approve request: '${response.message}'`); return; } $scope.entity = {}; alert("Request Approved"); }); }; $scope.onDeclineClicked = function () { const url = `/services/ts/leave-request/api/ProcessService.ts/requests/${taskId}/decline`; $http.put(url) .then(function (response) { if (response.status != 200) { alert(`Unable to decline request: '${response.message}'`); return; } $scope.entity = {}; alert("Request Declined"); }); }; const detailsUrl = `/services/ts/leave-request/api/ProcessService.ts/requests/${taskId}/details`; $http.get(detailsUrl) .then(function (response) { if (response.status != 200) { alert(`Unable to get details for the request: '${response.message}'`); return; } const details = response.data; // fill details $scope.model.requester = details.requester; $scope.model.fromDate = new Date(details.fromDate); $scope.model.toDate = new Date(details.toDate); }); - save the form using
Savebutton - generate the UI
- right-click on
process-leave-request.form->Generate - choose template
AngularJS Generator from Form Model - click on
OKbutton - close file
process-leave-request.formif it is opened - open
process-leave-request.form - click on
Regeneratebutton underDesignertab - the generated UI should be located in folder
leave-request/gen/process-leave-request/forms/process-leave-request - if you have issues with the form modeling, you can get the from code from here
- right-click on
- now, we have to register the form in the BPM process
- open the generated UI page
gen/process-leave-request/forms/process-leave-request/index.html - copy the path
/services/web/leave-request/gen/process-leave-request/forms/process-leave-request/index.htmlfrom thePreviewtab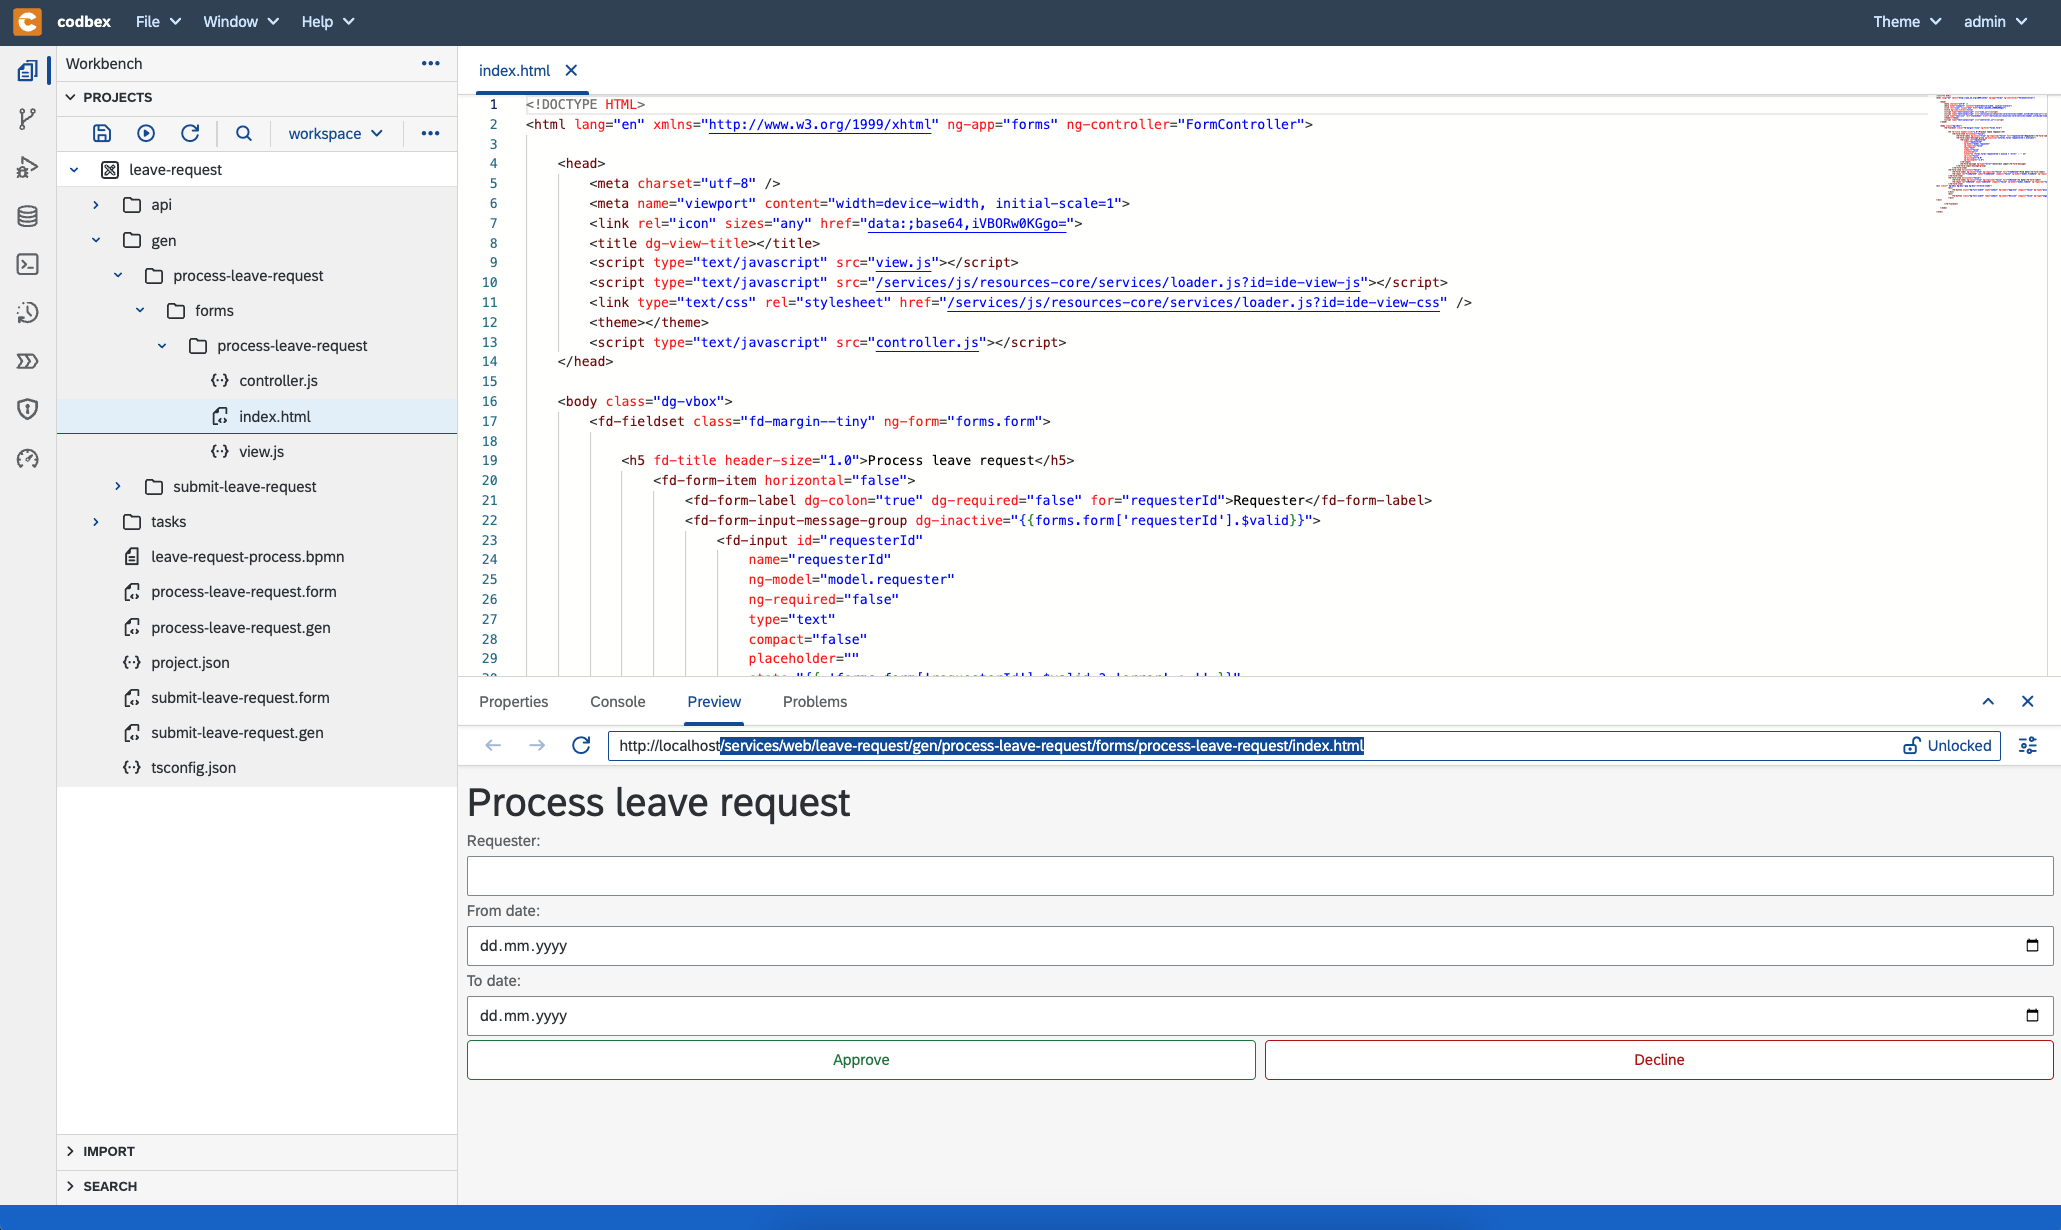
- open
leave-request-process.bpmn - select task
Process request - set the copied path
/services/web/leave-request/gen/process-leave-request/forms/process-leave-request/index.htmltoForm keyconfiguration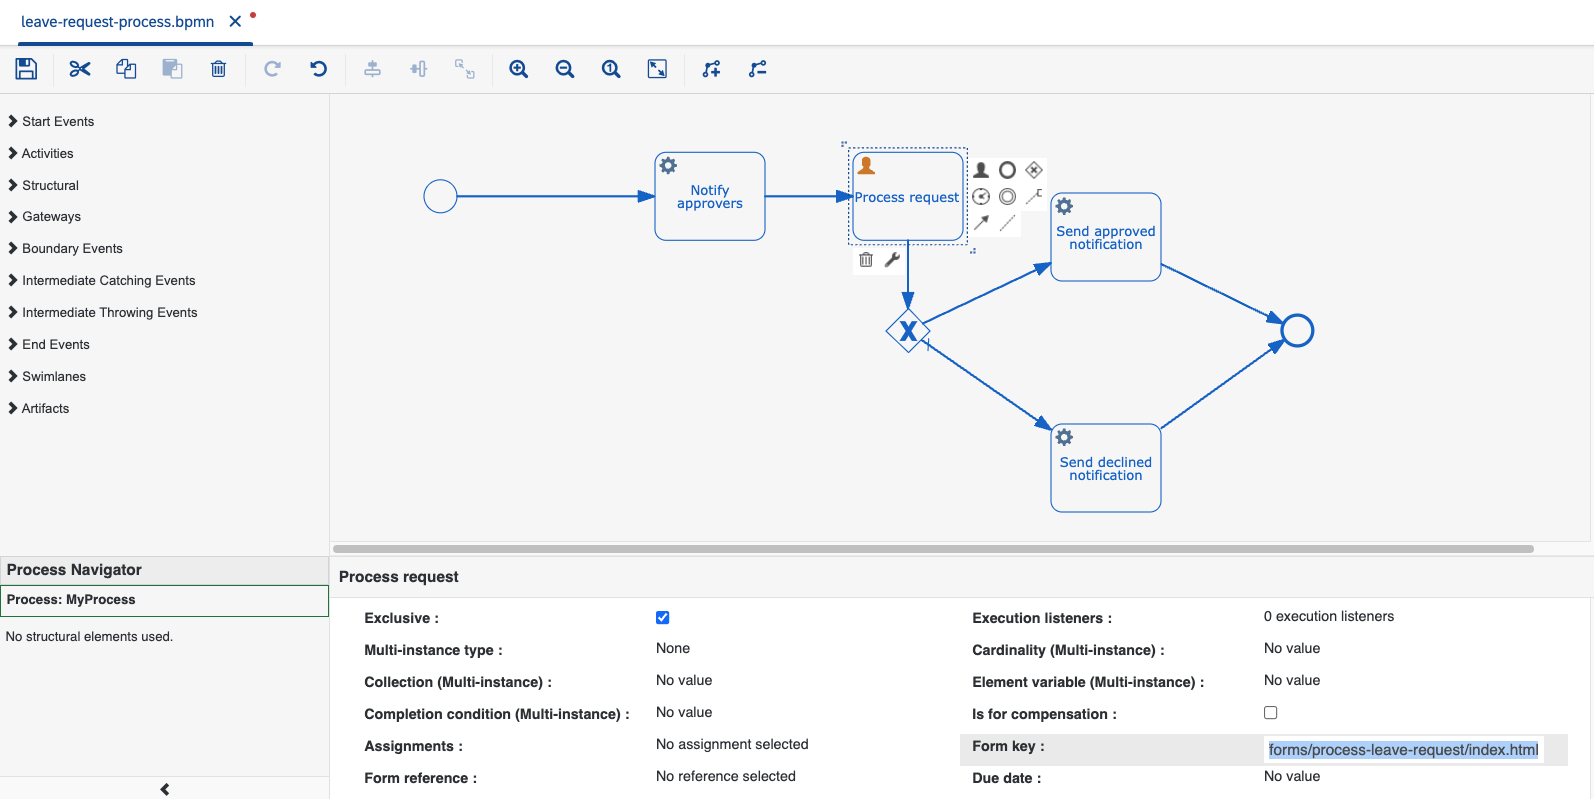
- open the generated UI page
- create new form with name
Mail configurations
We will need some mail configurations if we want to send real emails. Otherwise, mails will be logged in the console.
You can easily get a email testing account from mailtrap.io
UnderIntegration->SMTP, you can find the needed credentials.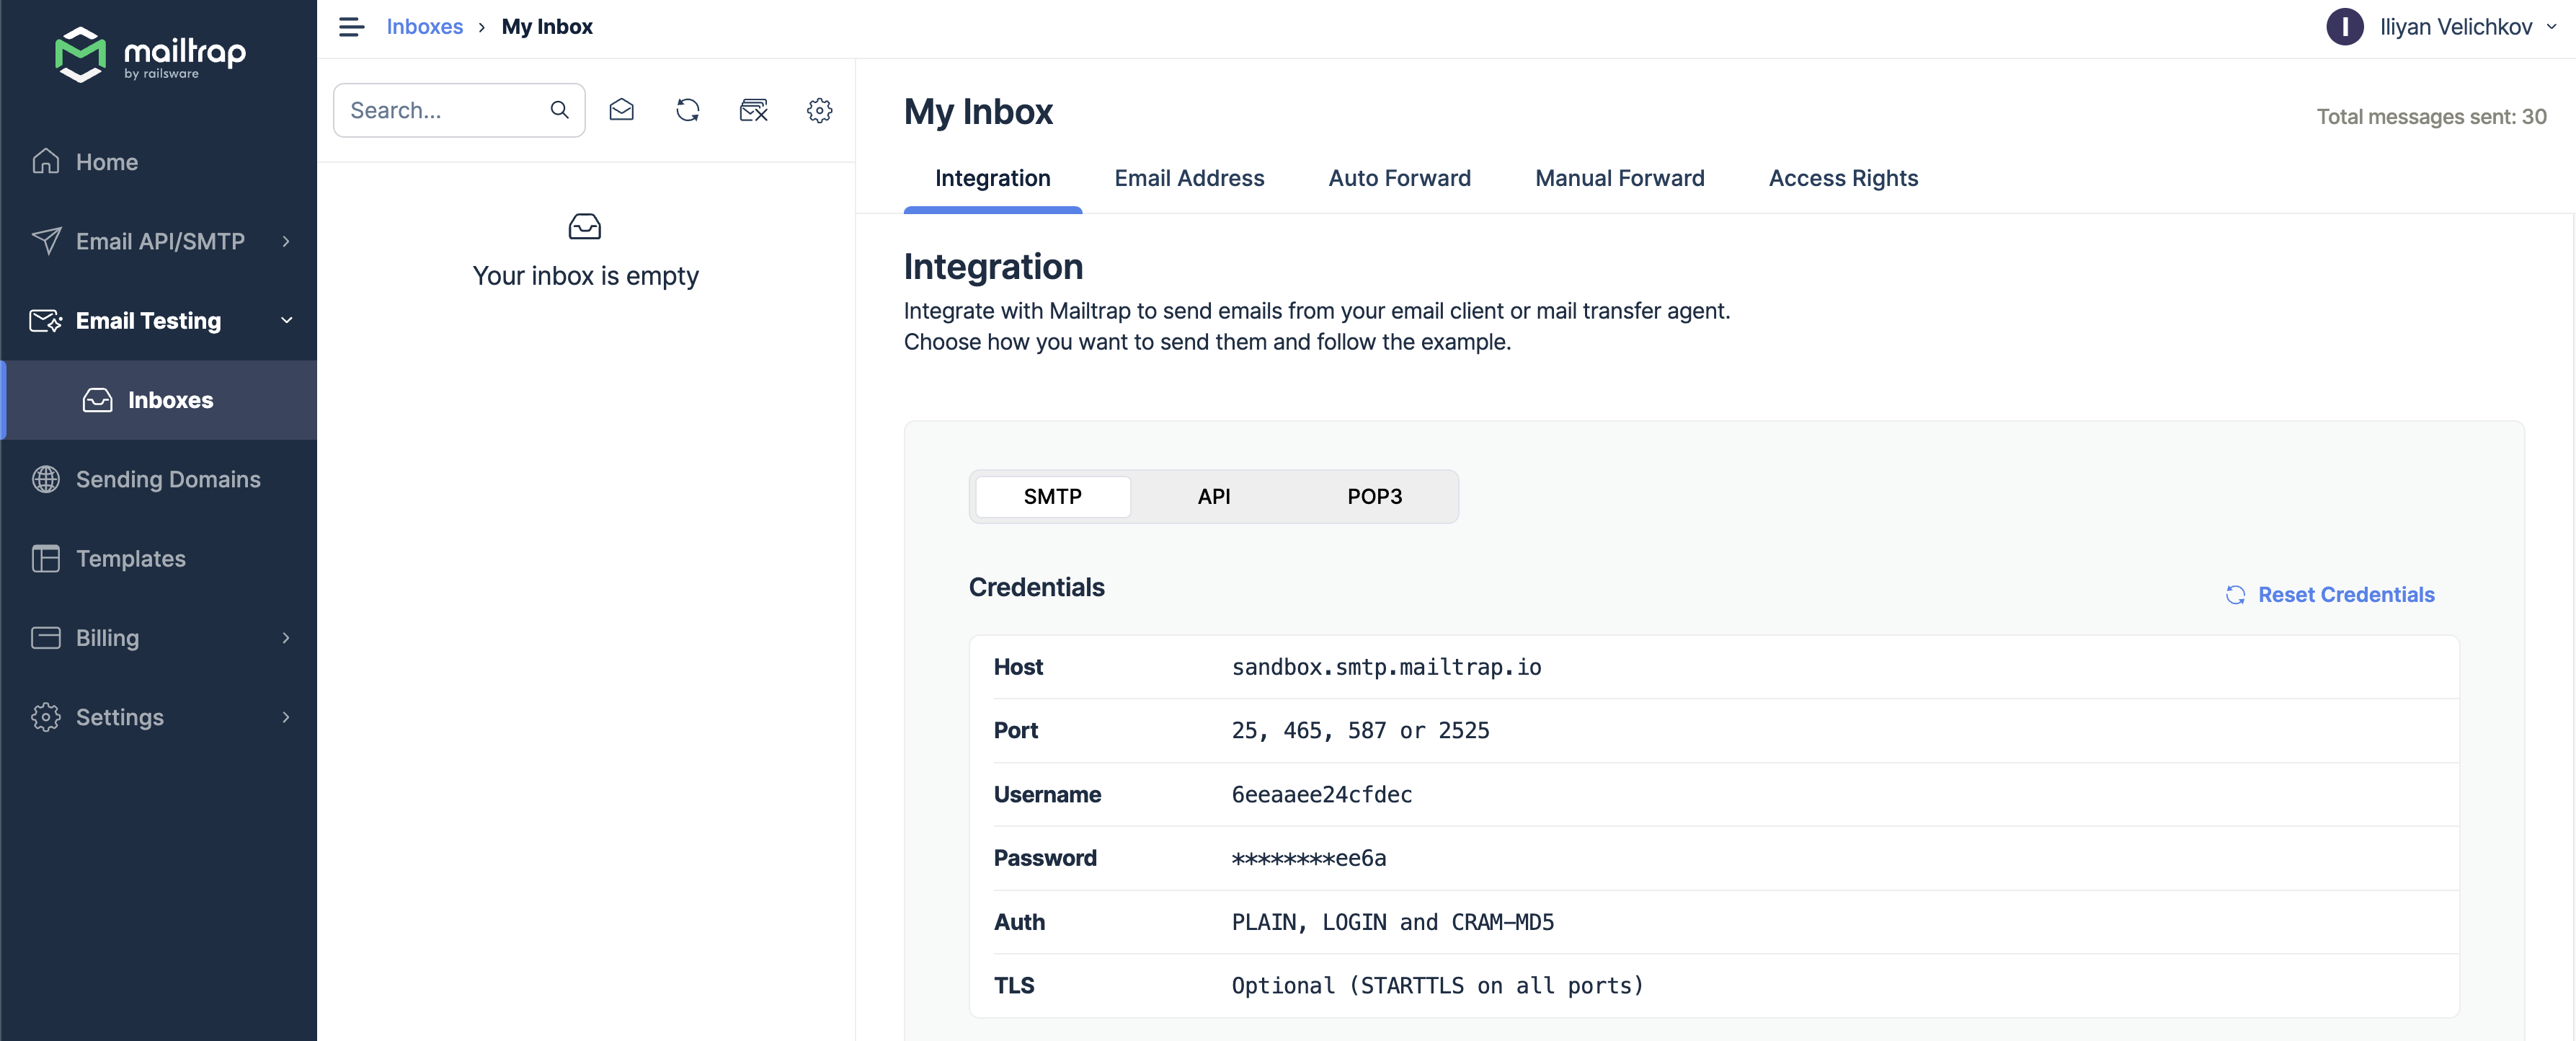


for SMTP you need the following variables:
Variable Name Description Example value DIRIGIBLE_MAIL_USERNAME username my_usernameDIRIGIBLE_MAIL_PASSWORD password my_password_123DIRIGIBLE_MAIL_TRANSPORT_PROTOCOL transport protocol smtpDIRIGIBLE_MAIL_SMTP_HOST SMTP host sandbox.smtp.mailtrap.ioDIRIGIBLE_MAIL_SMTP_PORT SMTP port 2525DIRIGIBLE_MAIL_SMTP_AUTH whether authentication is required true/falsetrue- for SMTPS you need the following variables:
| Variable Name | Description | Example value |
|---|---|---|
| DIRIGIBLE_MAIL_USERNAME | username | my_username |
| DIRIGIBLE_MAIL_PASSWORD | password | my_password_123 |
| DIRIGIBLE_MAIL_TRANSPORT_PROTOCOL | transport protocol | smtps |
| DIRIGIBLE_MAIL_SMTPS_HOST | SMTPS host | sandbox.smtp.mailtrap.io |
| DIRIGIBLE_MAIL_SMTPS_PORT | SMTPS port | 2525 |
| DIRIGIBLE_MAIL_SMTPS_AUTH | whether authentication is required true/false | true |
- to start the Hyperion image with the needed mail configurations use the following command
    ```shell
    HYPERION_WORKSPACE_DIR='/tmp/hyperion'
    IMAGE_VERSION='1.0.7' # use version 1.0.7 or later

    docker run --name codbex-hyperion --rm -p 80:80 \
        -v "$HYPERION_WORKSPACE_DIR:/target/dirigible" \
        -e DIRIGIBLE_MAIL_USERNAME=<username> \
        -e DIRIGIBLE_MAIL_PASSWORD=<pass> \
        -e DIRIGIBLE_MAIL_TRANSPORT_PROTOCOL=smtp \
        -e DIRIGIBLE_MAIL_SMTP_HOST=sandbox.smtp.mailtrap.io \
        -e DIRIGIBLE_MAIL_SMTP_PORT=<port> \
        -e DIRIGIBLE_MAIL_SMTP_AUTH=true \
        ghcr.io/codbex/codbex-hyperion:$IMAGE_VERSION
    ```
Now, we can test our application
- Create new leave request
- make sure that all files are saved
- publish the project using
Publish allbutton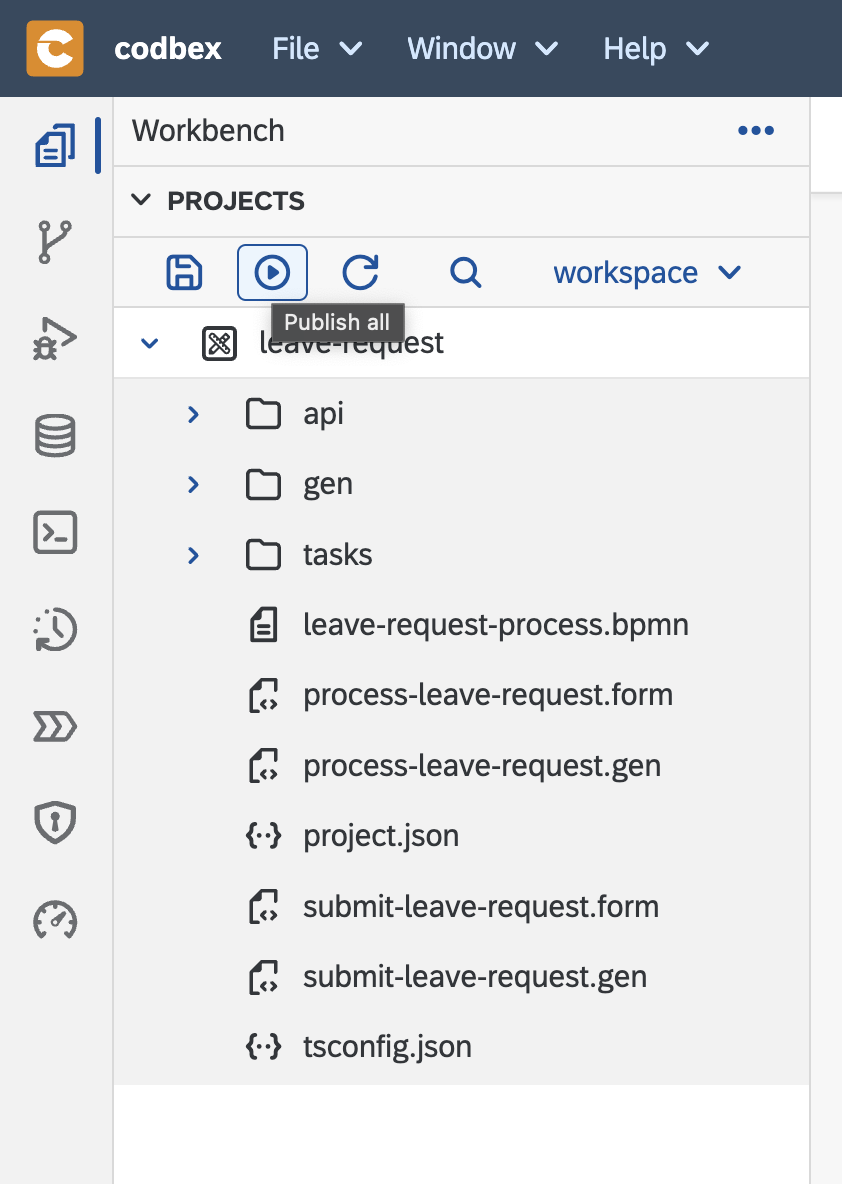
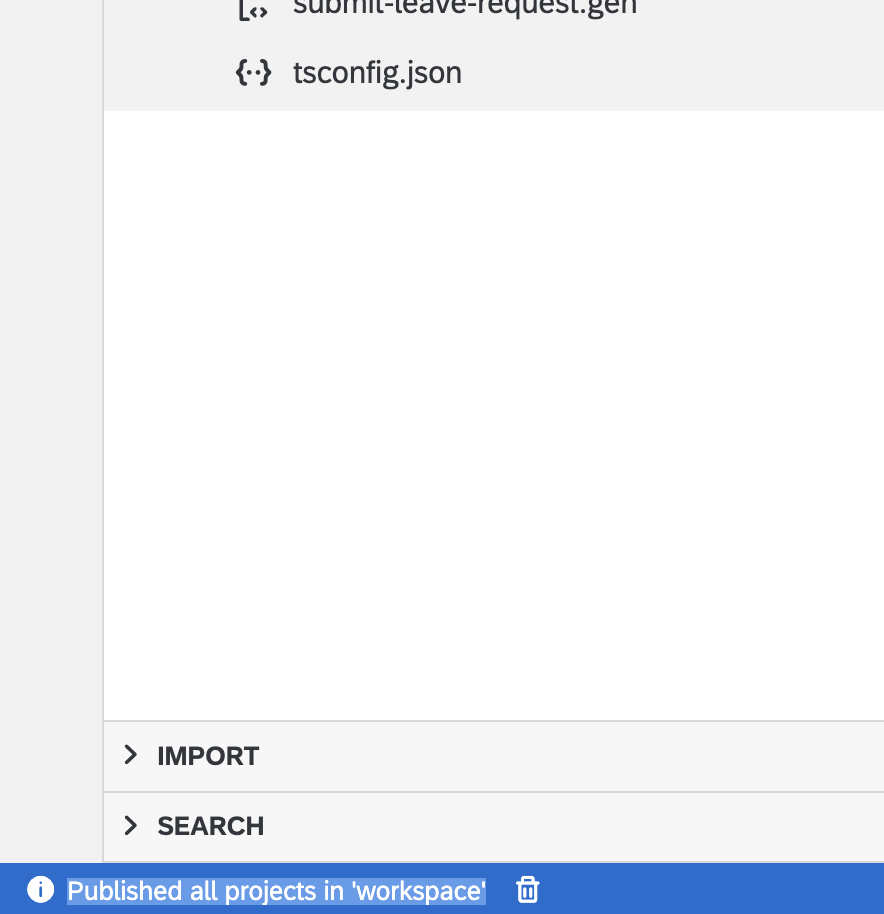
- wait until the project is published successfully
- open the submit form at http://localhost/services/web/leave-request/gen/submit-leave-request/forms/submit-leave-request/index.html
- select dates for
FromandTo - click on
Submitbutton - you should see a confirmation alert
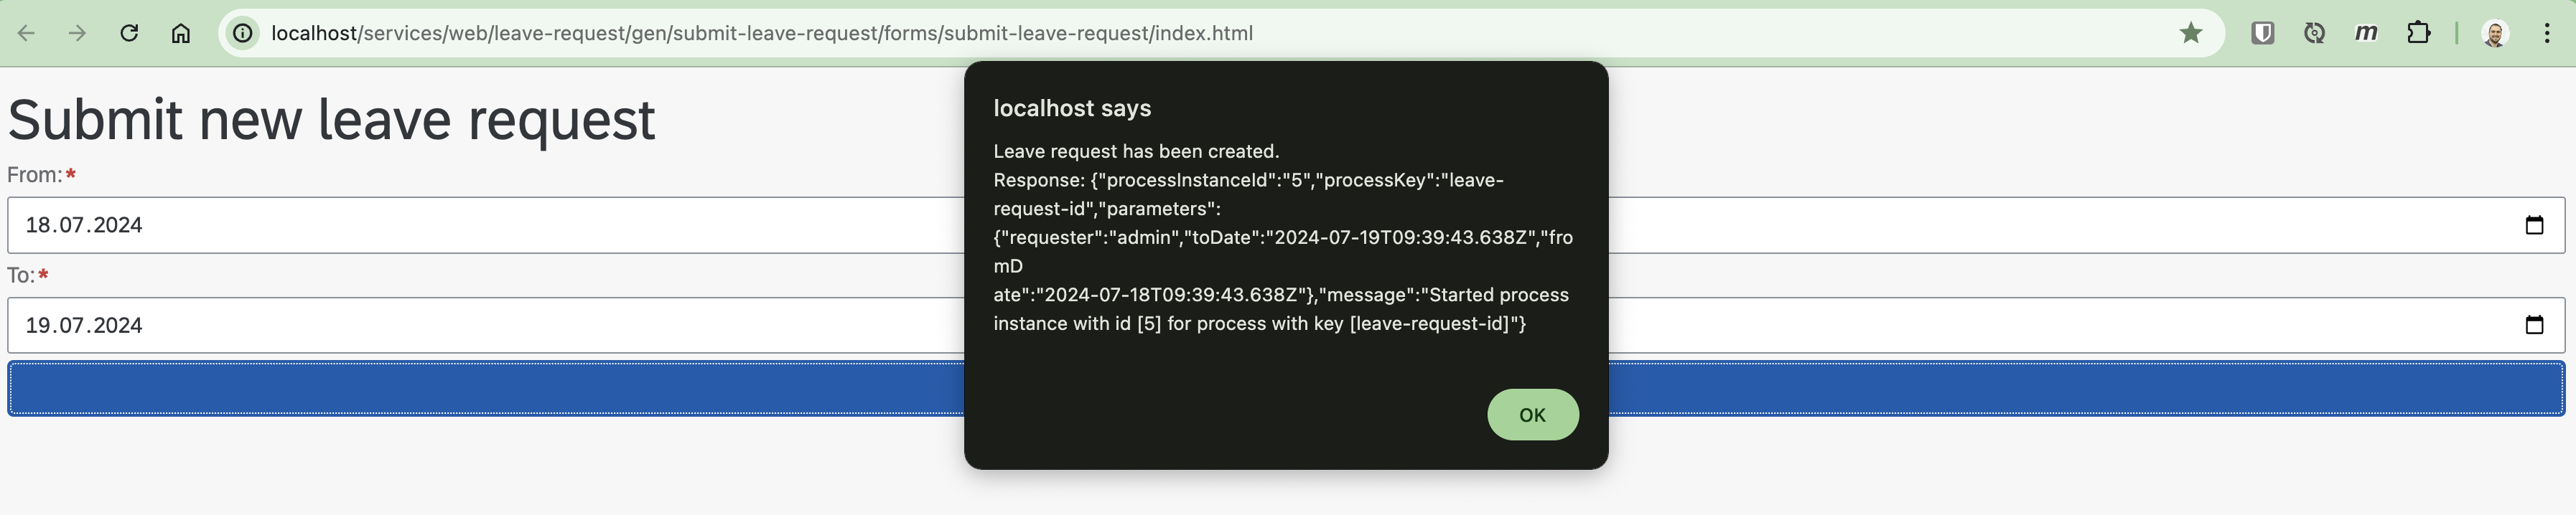
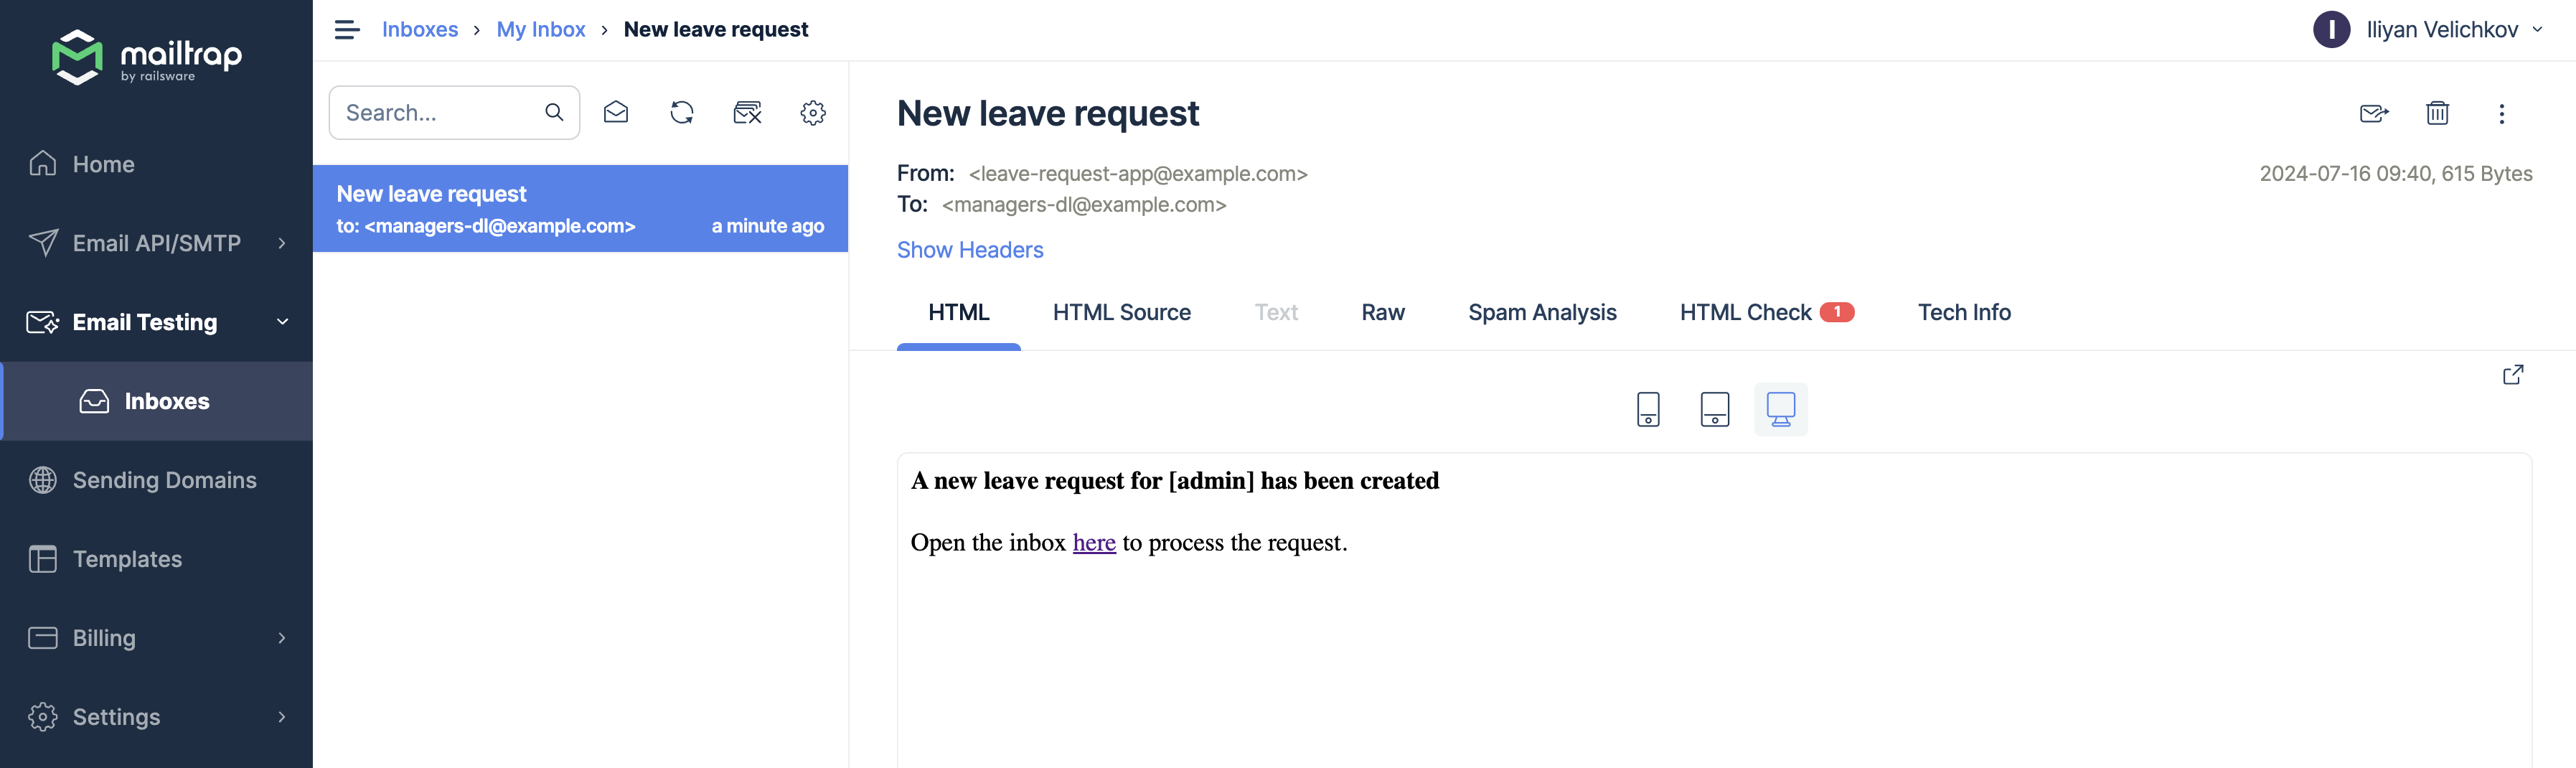
- a new email should be received in your mailbox
- you can open the BPM perspective using the Processes Workspace button and check the created process

- Here you can select our process instance (in my case the instance with id
5) and see that the process is stopped at user taskProcess request. It will wait there until the leave request is processed.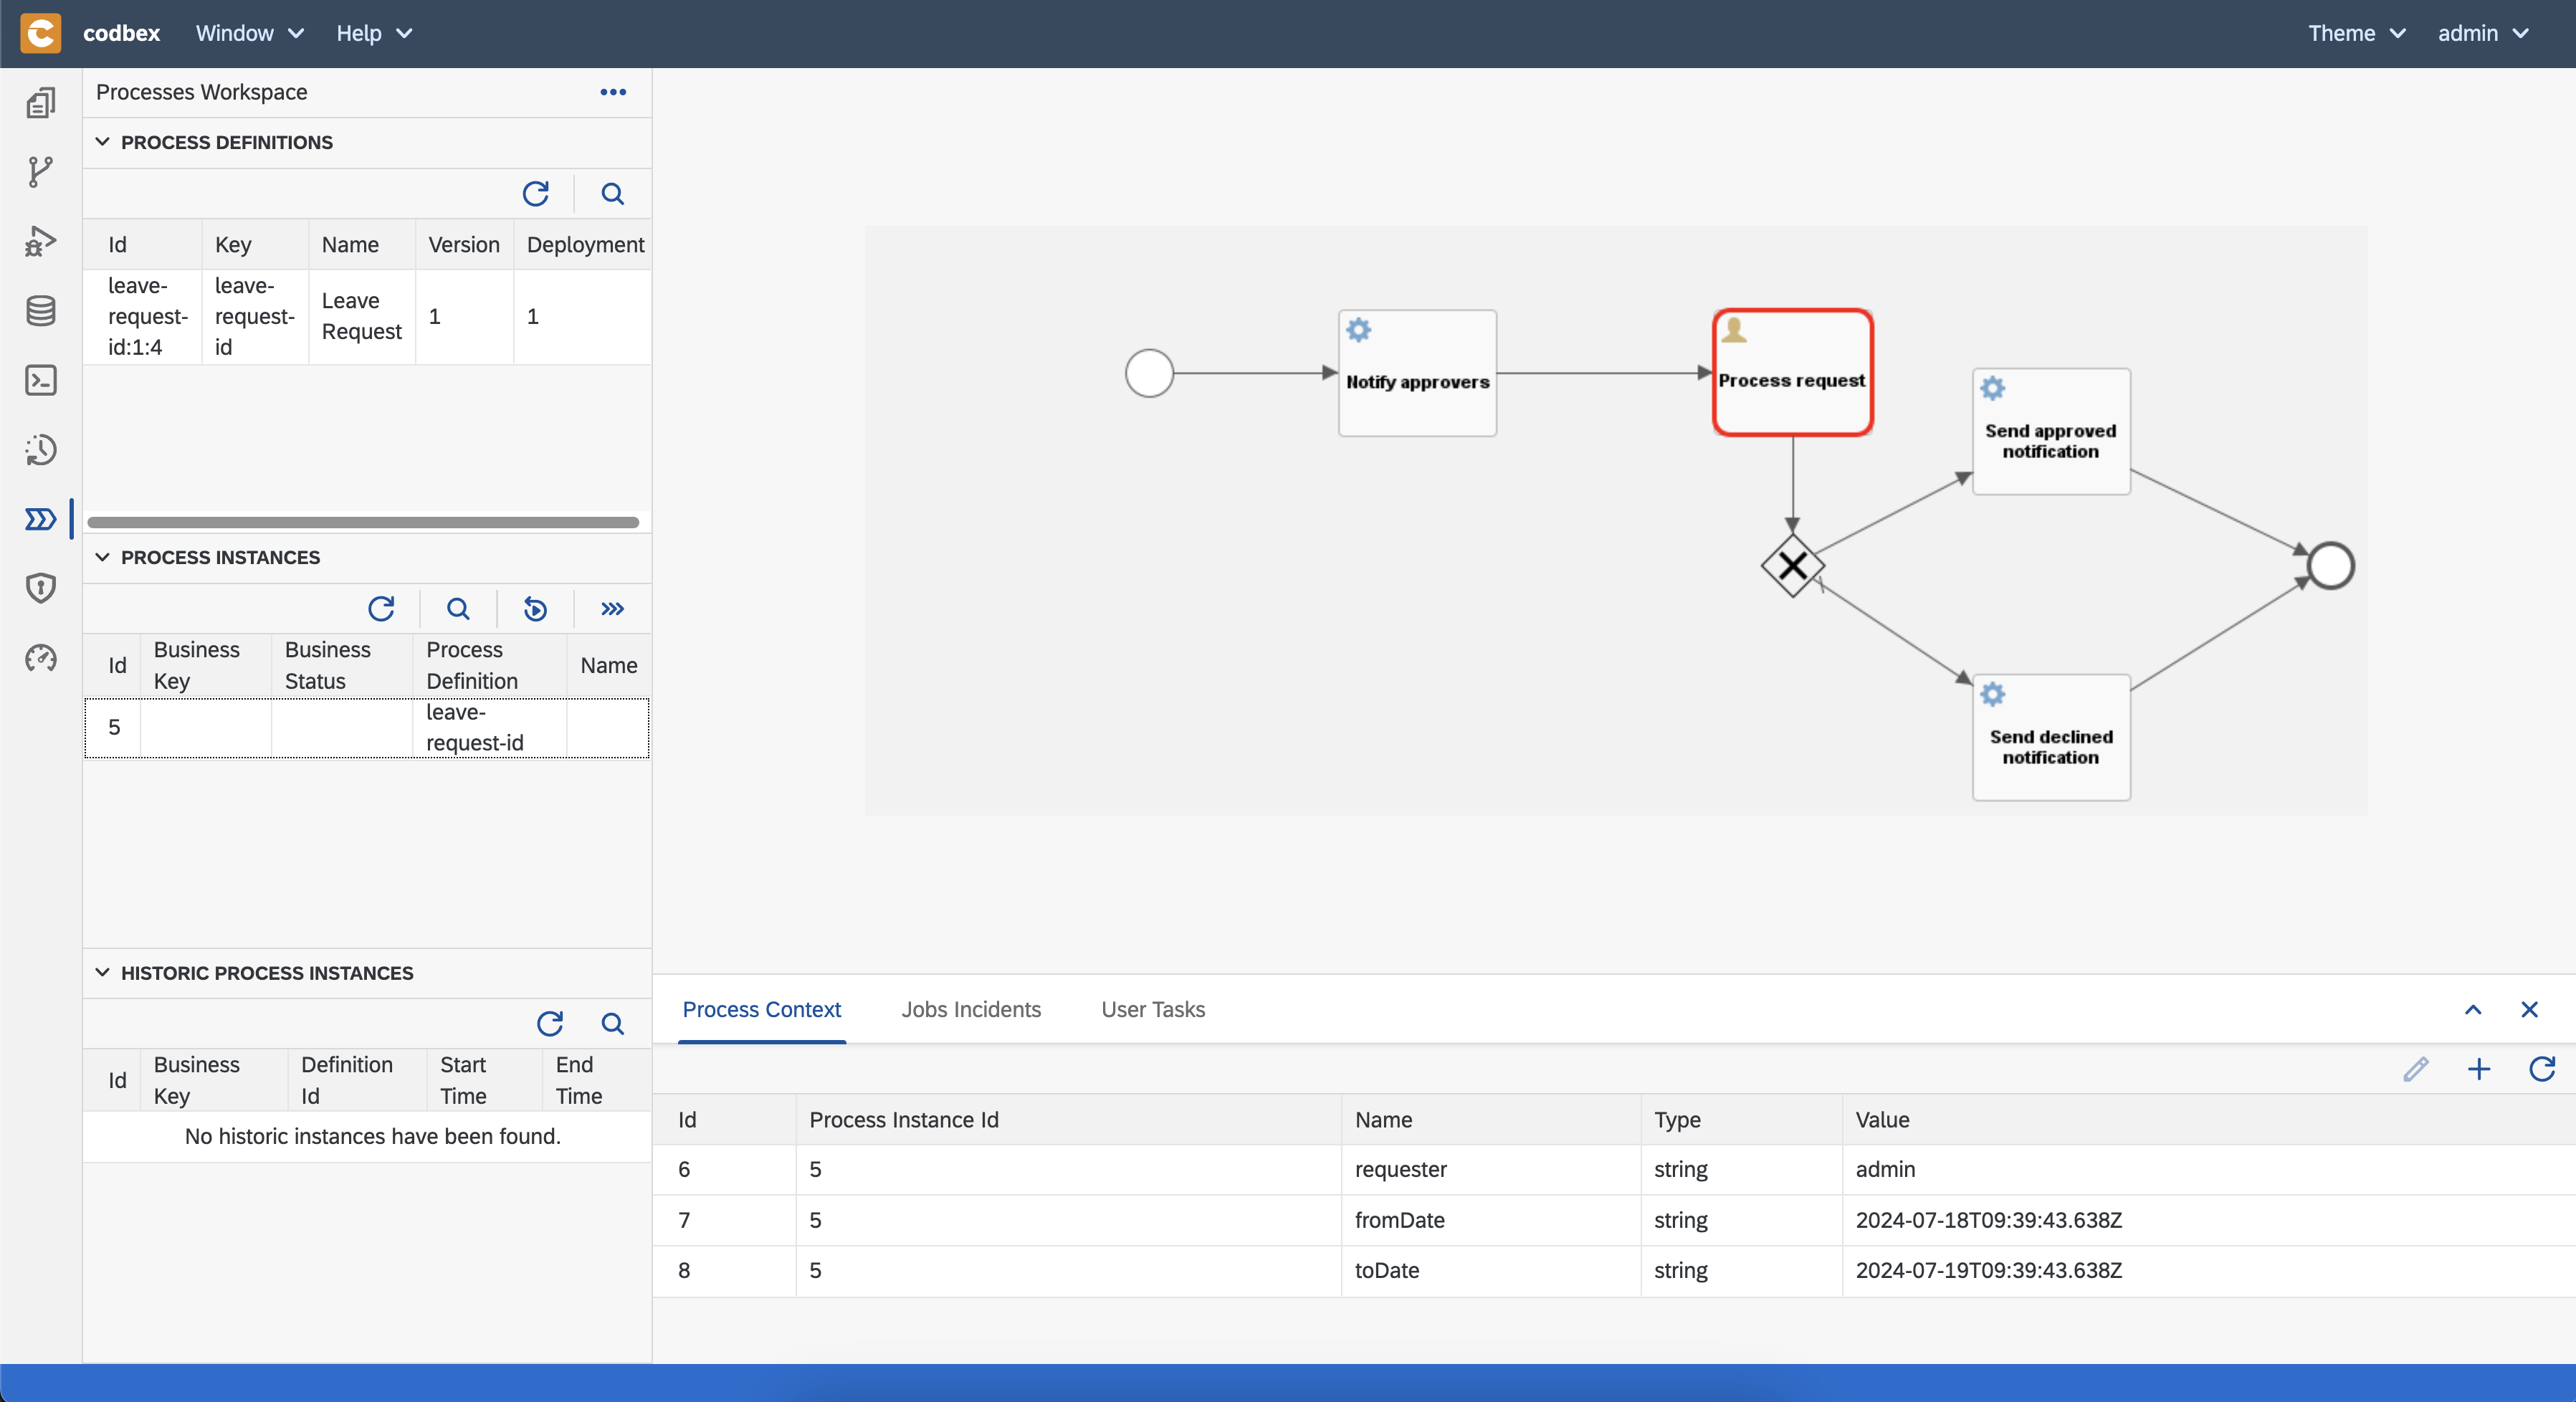
- In
Process Contexttab you can check the process variables. In our case, there are values for the leave request. - the UI has a lot of useful views and actions which can help you to manage your BPM processes
- Process the submitted leave request
- open the inbox UI at http://localhost/services/web/inbox/ or use the link from the email. Inbox UI is the place where you can find all tasks (BPM user tasks in our case) which are applicable for the current user.
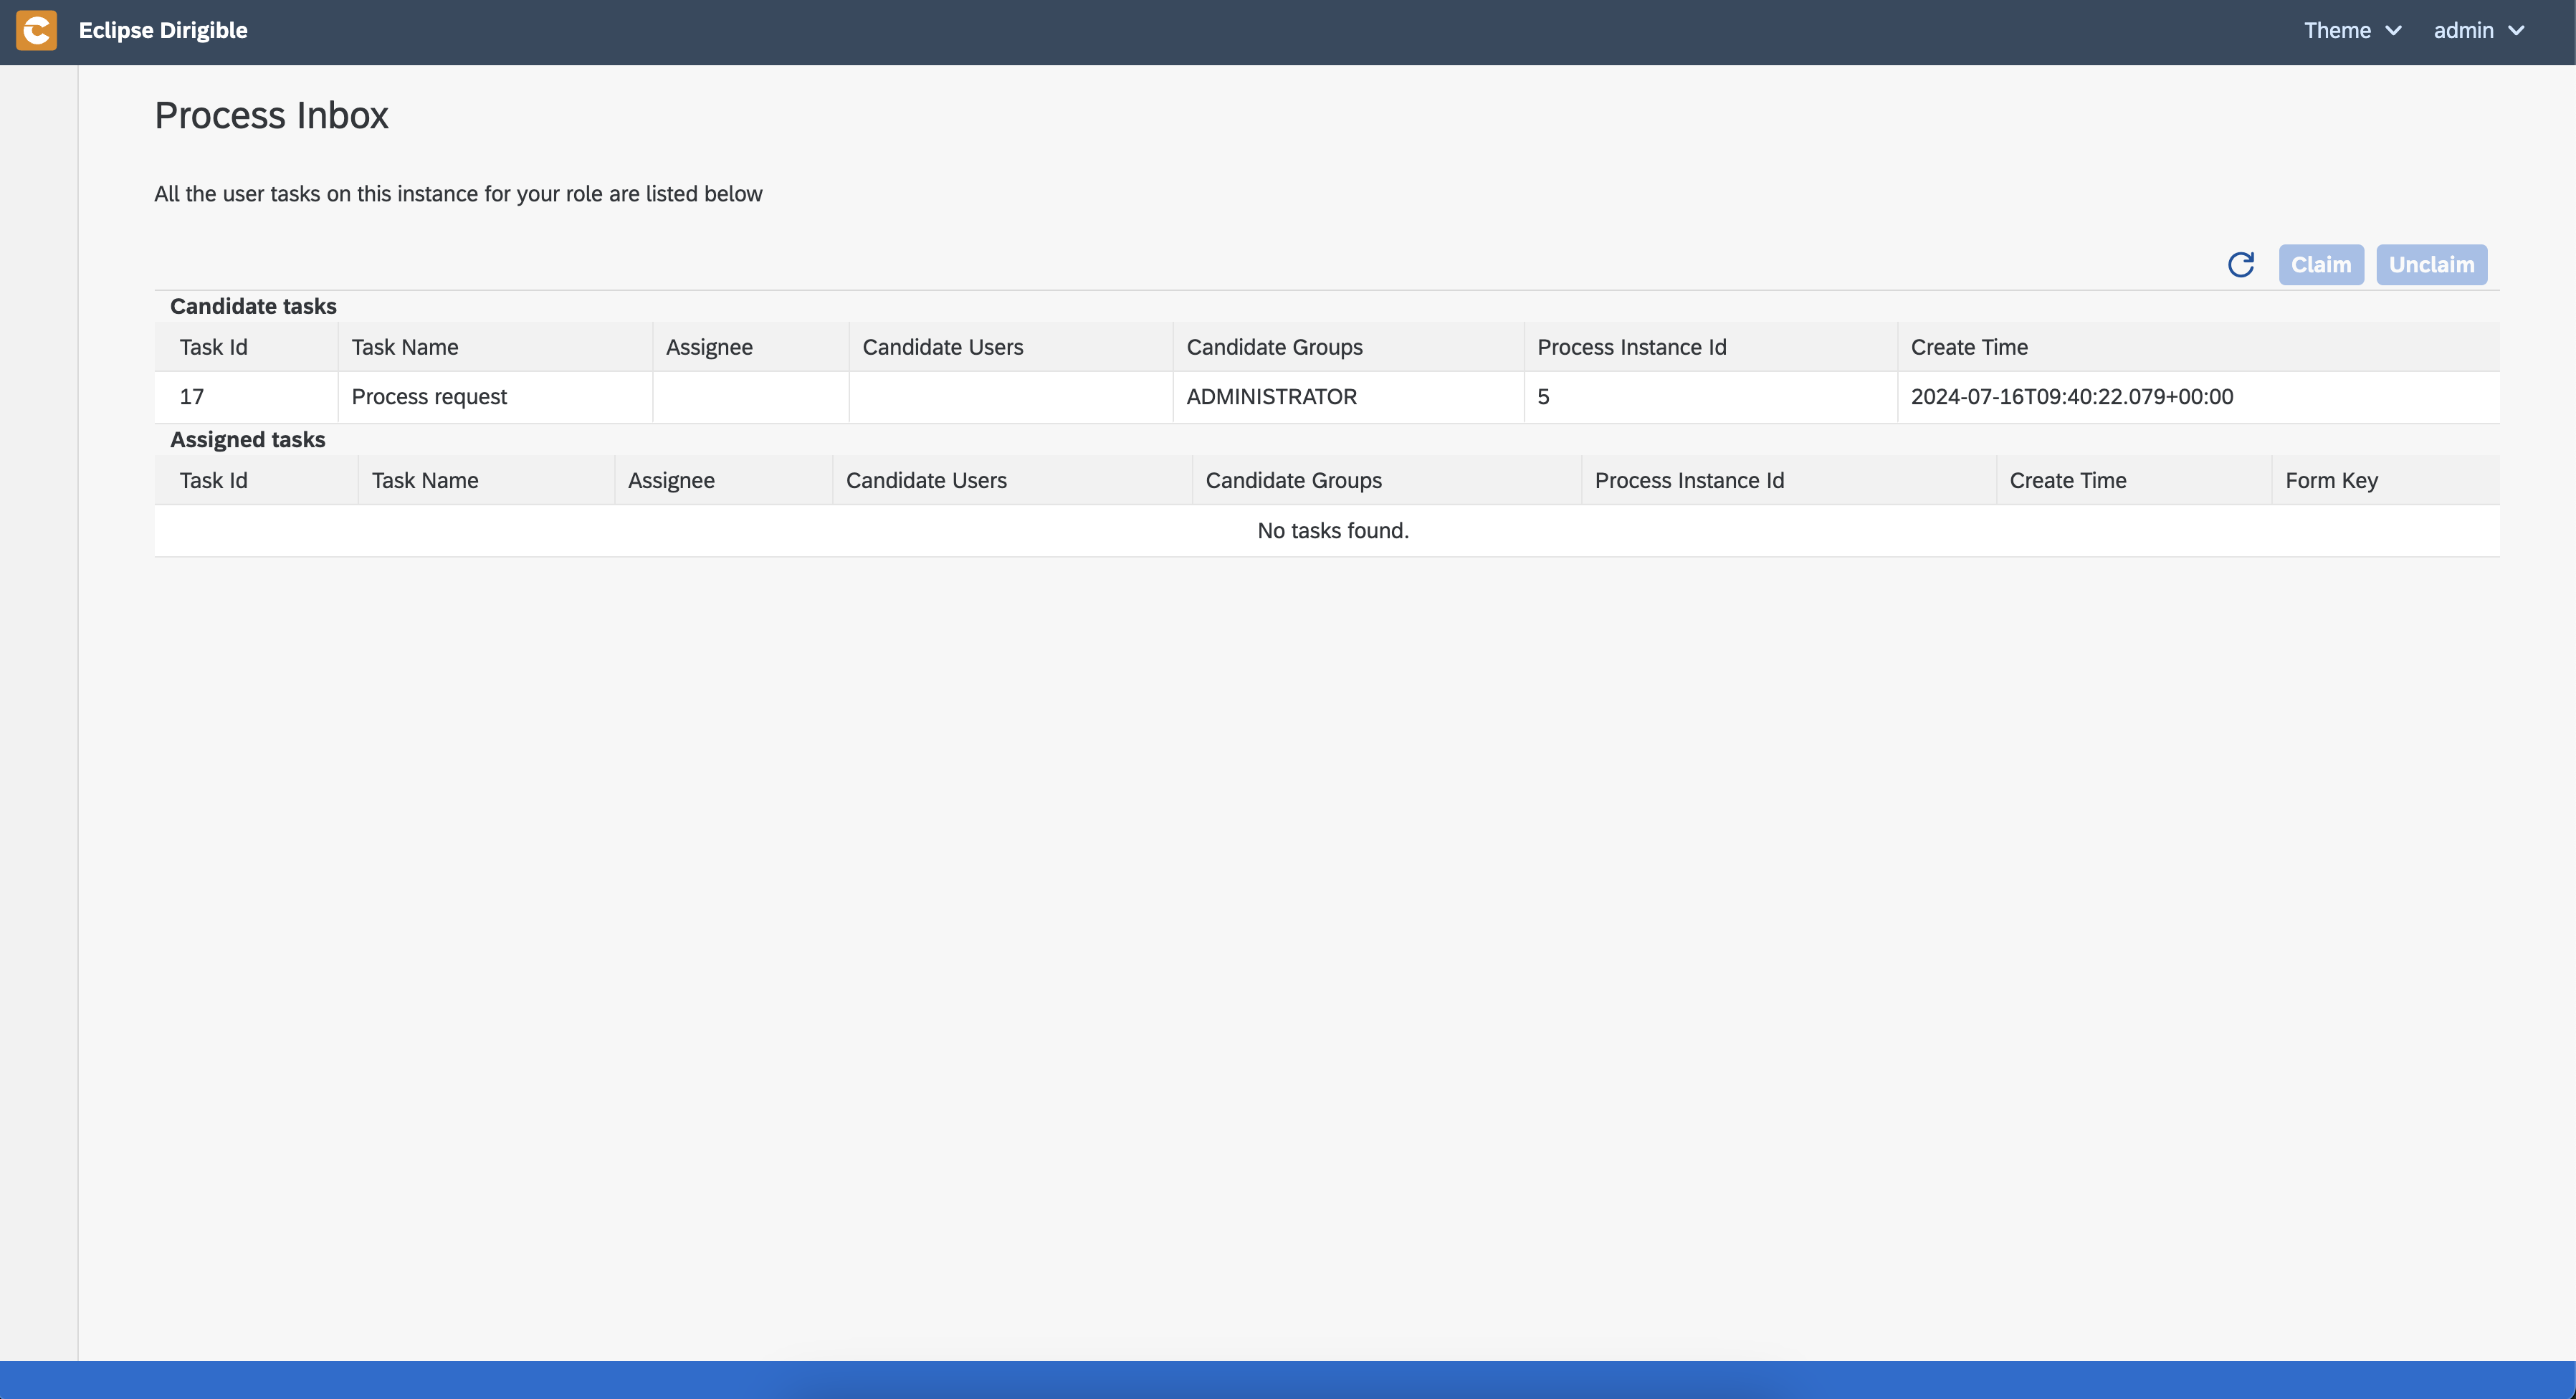
- select the created task and claim it using the
Claimbutton - now, you can open the registered form for processing using the
Open Formbutton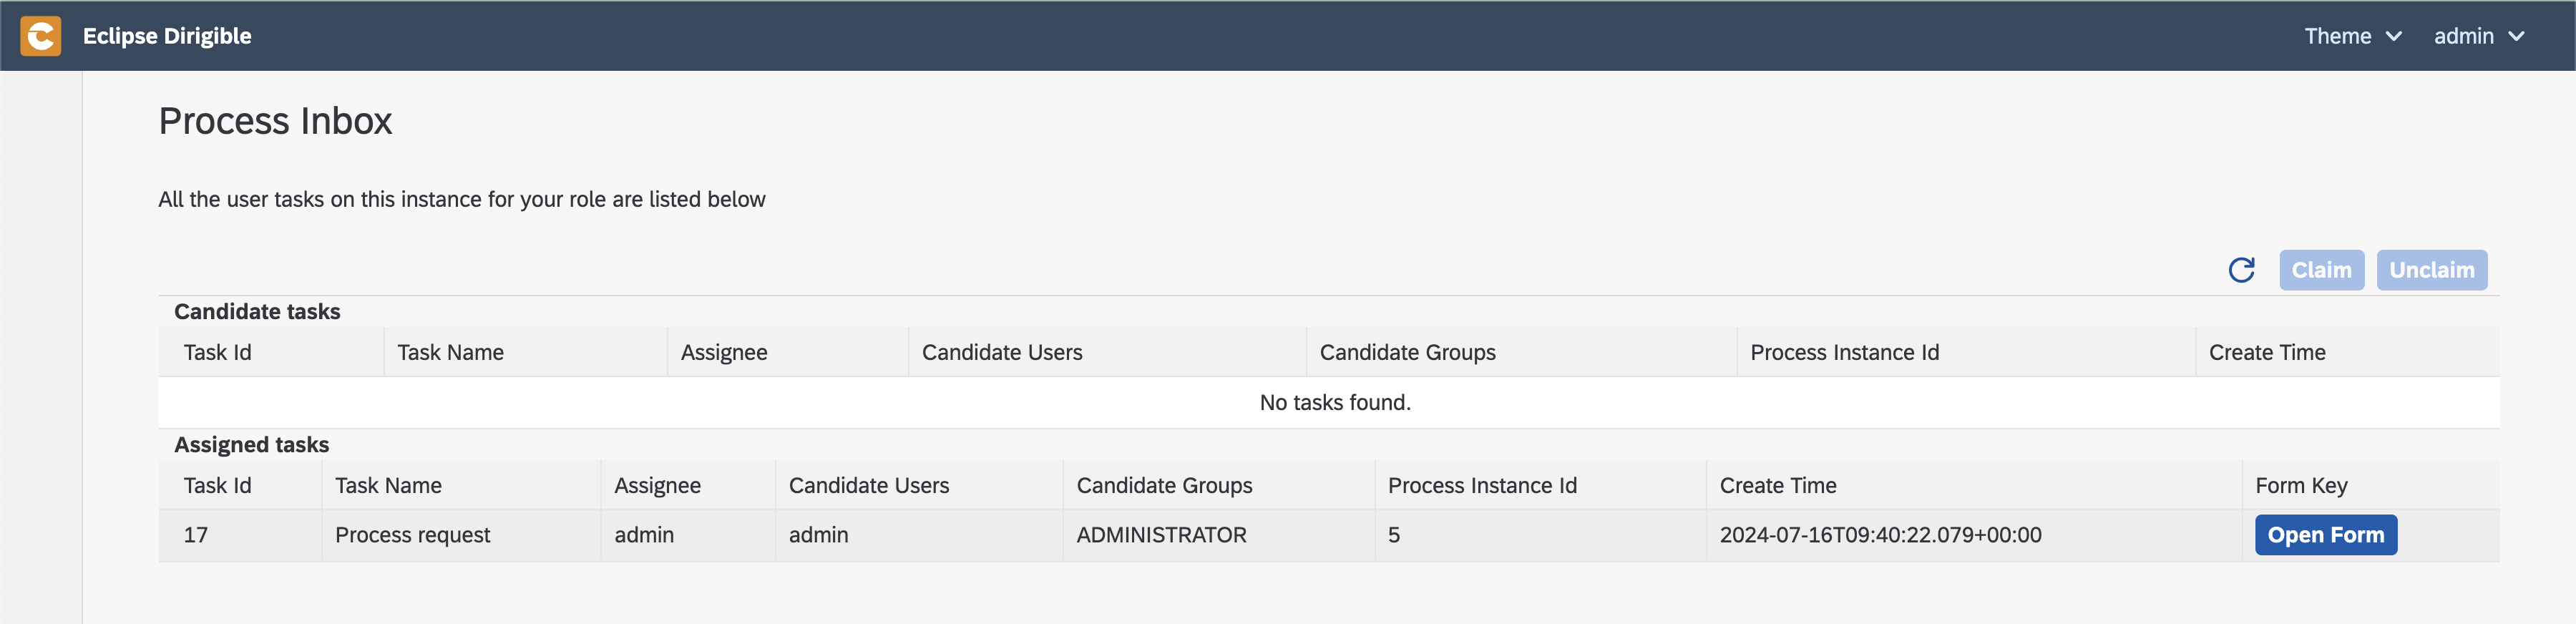
- when you click it, you will see the processing form which we implemented with details for the current request

- let's approve the request by clicking on
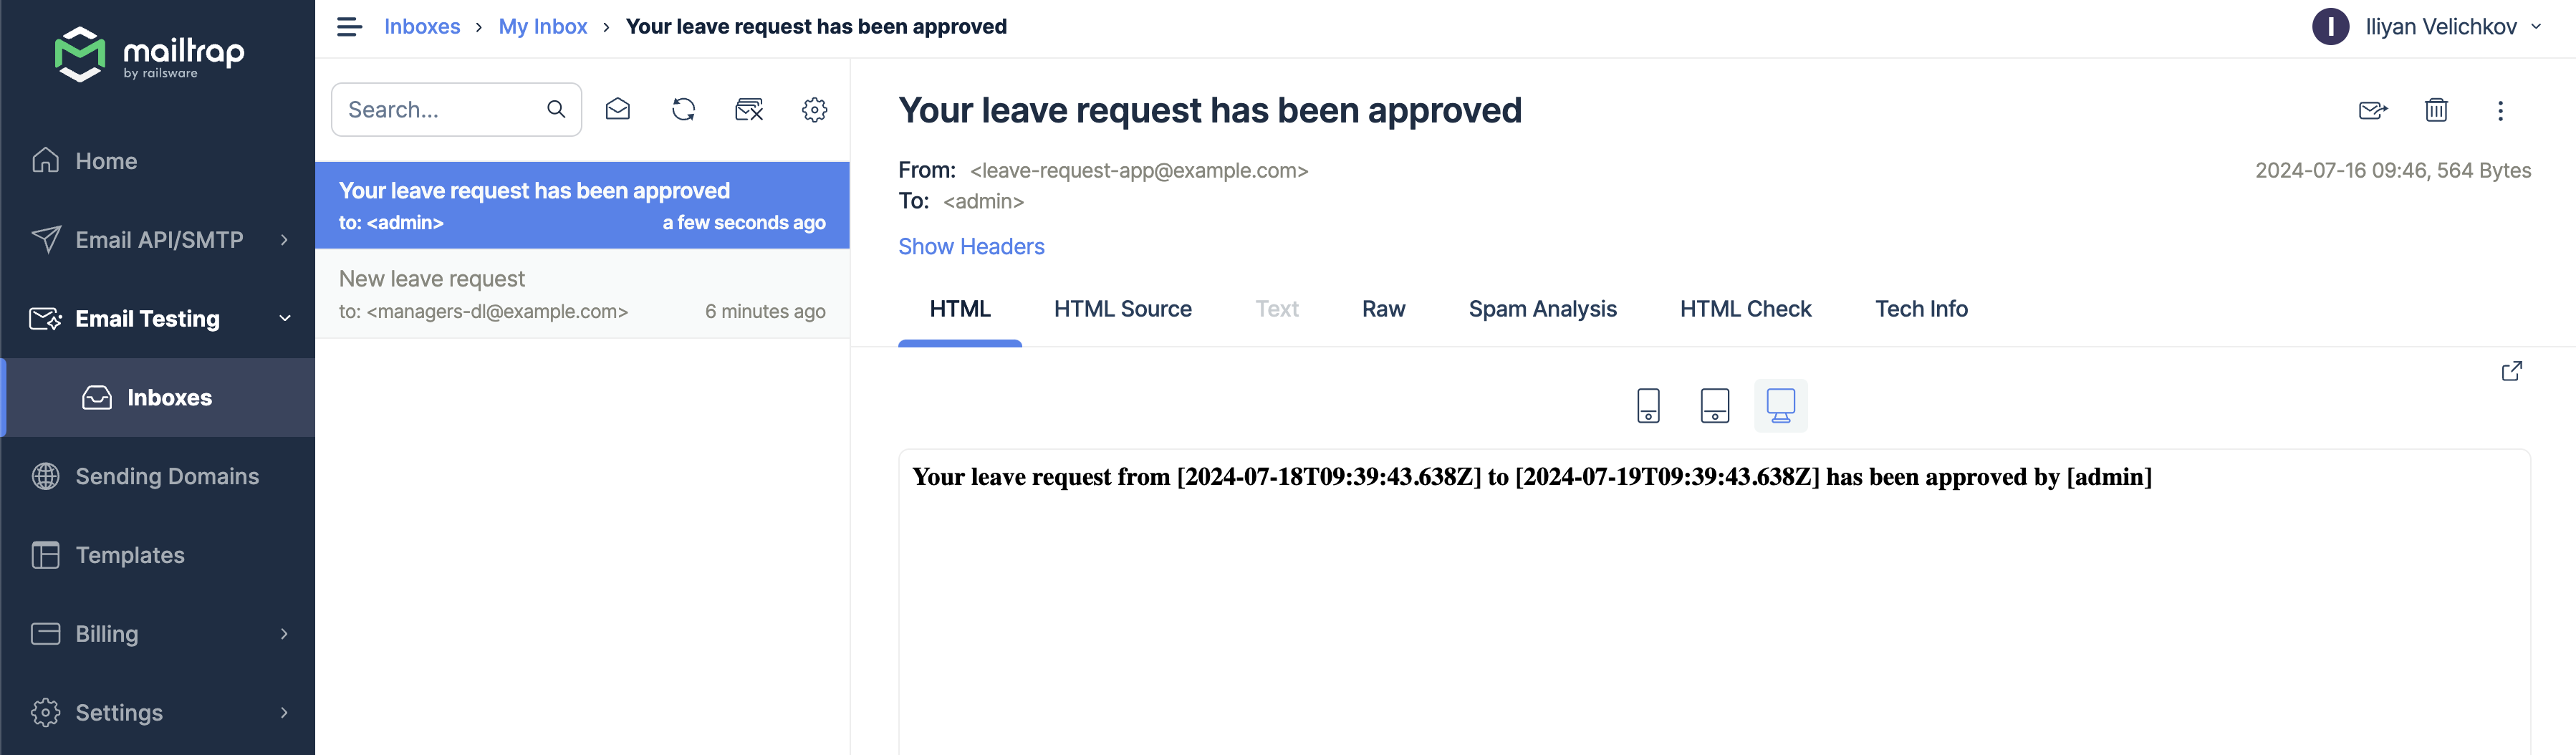
Approvebutton - an alert for confirmation should be displayed

- an email for the approved leave request should be received in your inbox
- open the inbox UI at http://localhost/services/web/inbox/ or use the link from the email. Inbox UI is the place where you can find all tasks (BPM user tasks in our case) which are applicable for the current user.
- Create new leave request
Authentication and authorization
To make our application ready for production, we have to add authentication and authorization.
With Hyperion it is an easy task.


- Let's define two roles
employeeandemployee-manager- create a folder called
security - right click on folder
security->New->Roles Definitions - set name
roles.roles - click
Createbutton - open file
roles.roles - edit the predefined entries to match our use case
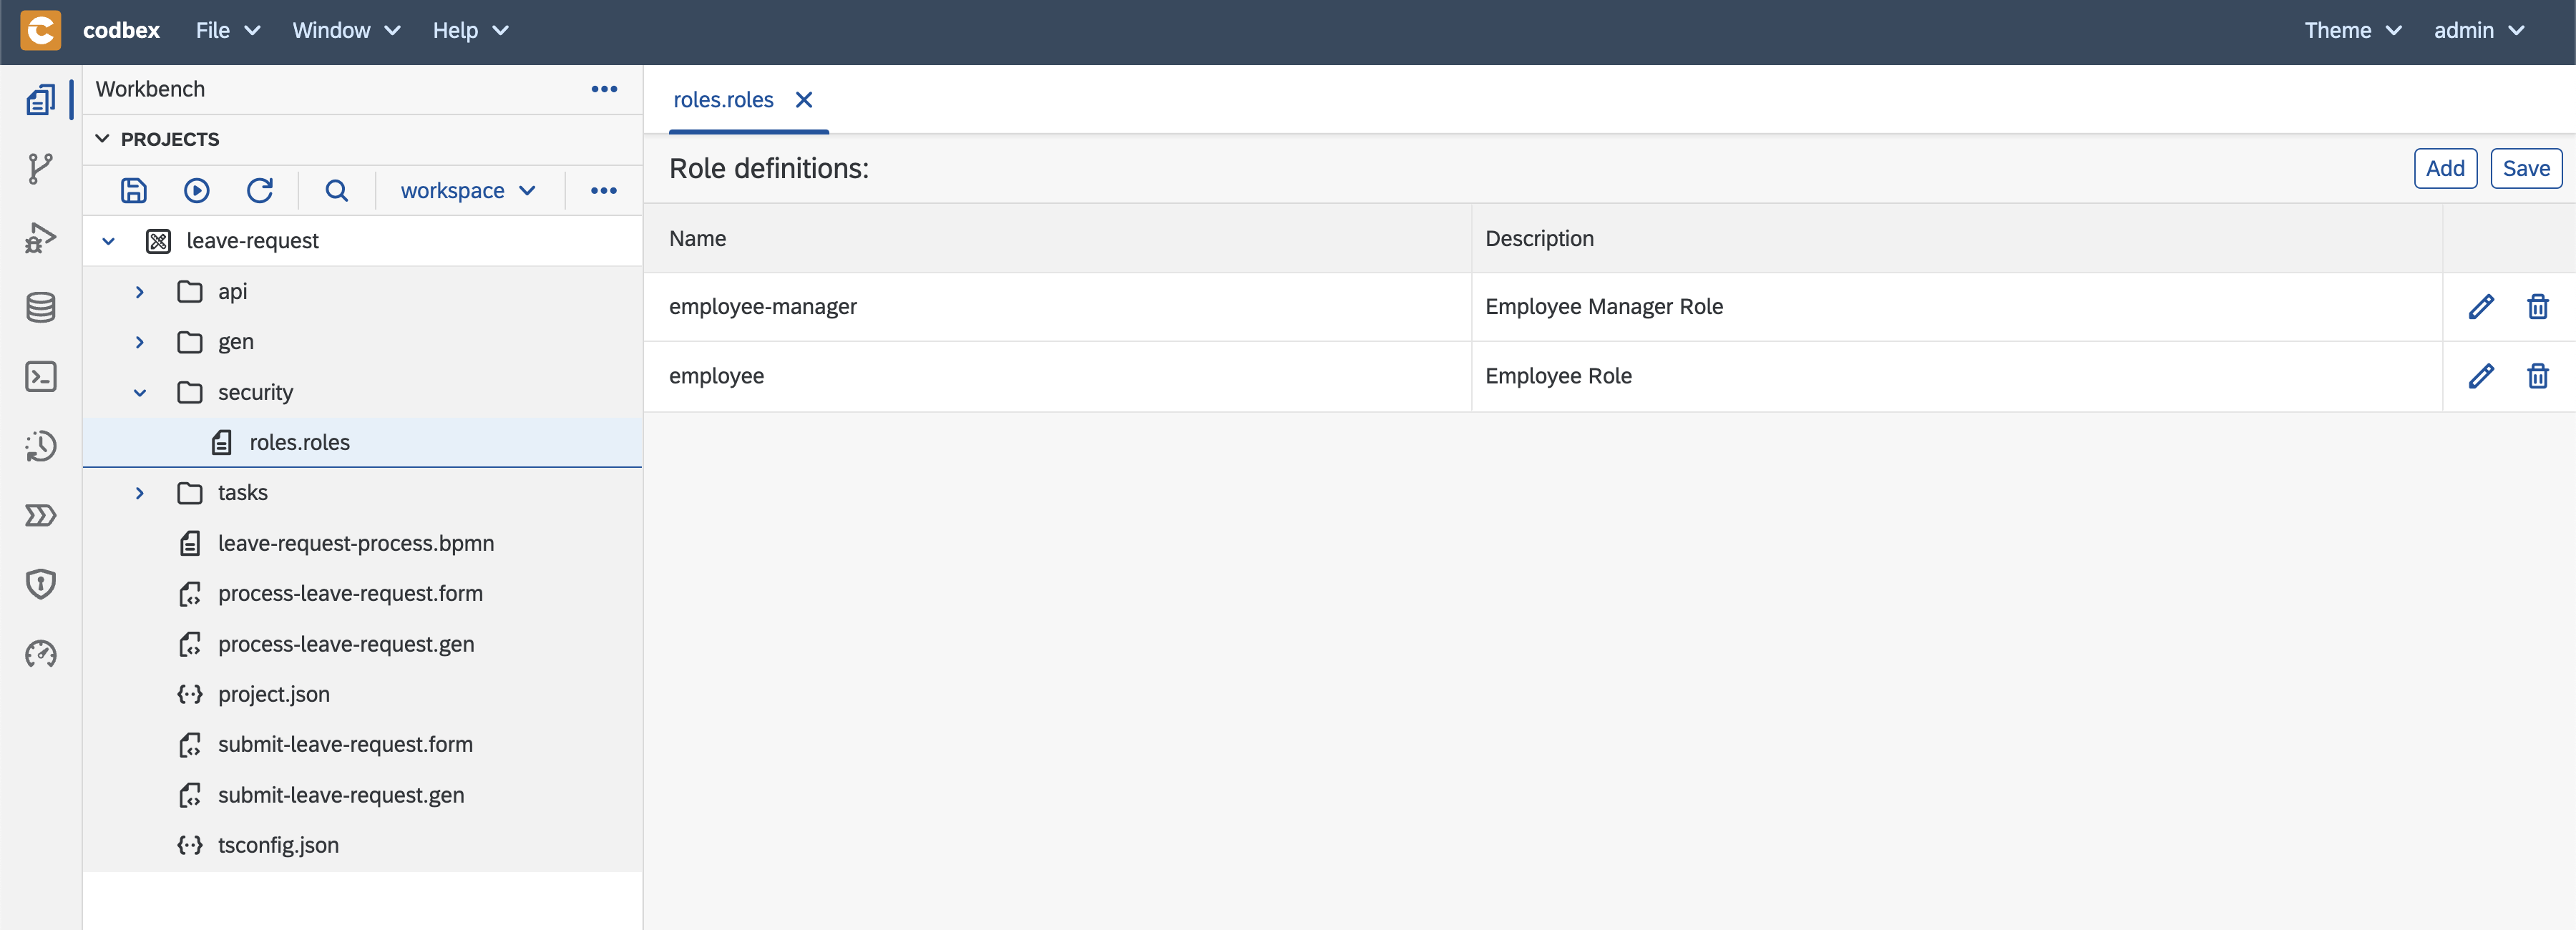
- save using the
Savebutton
- create a folder called
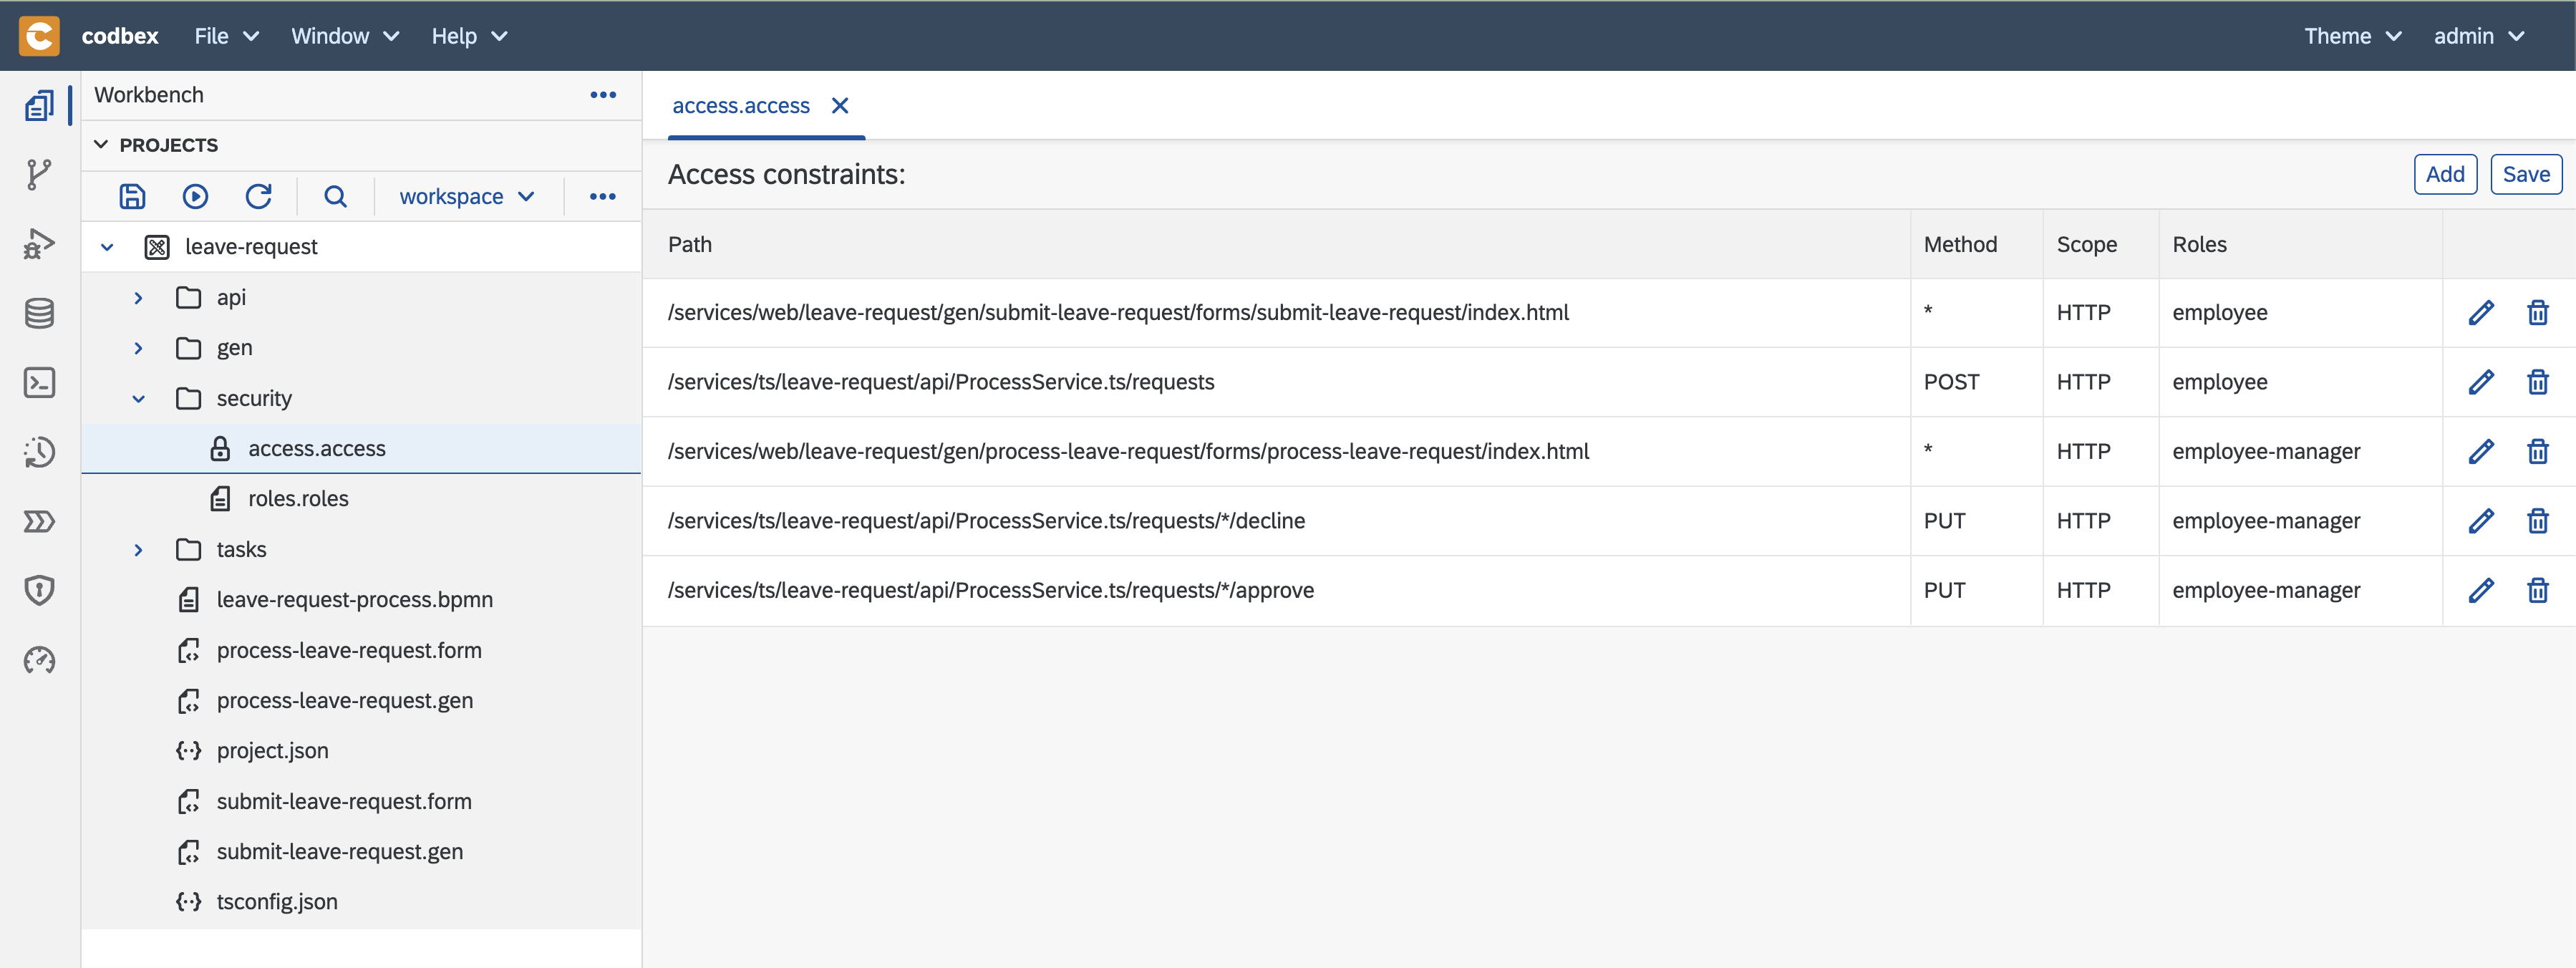
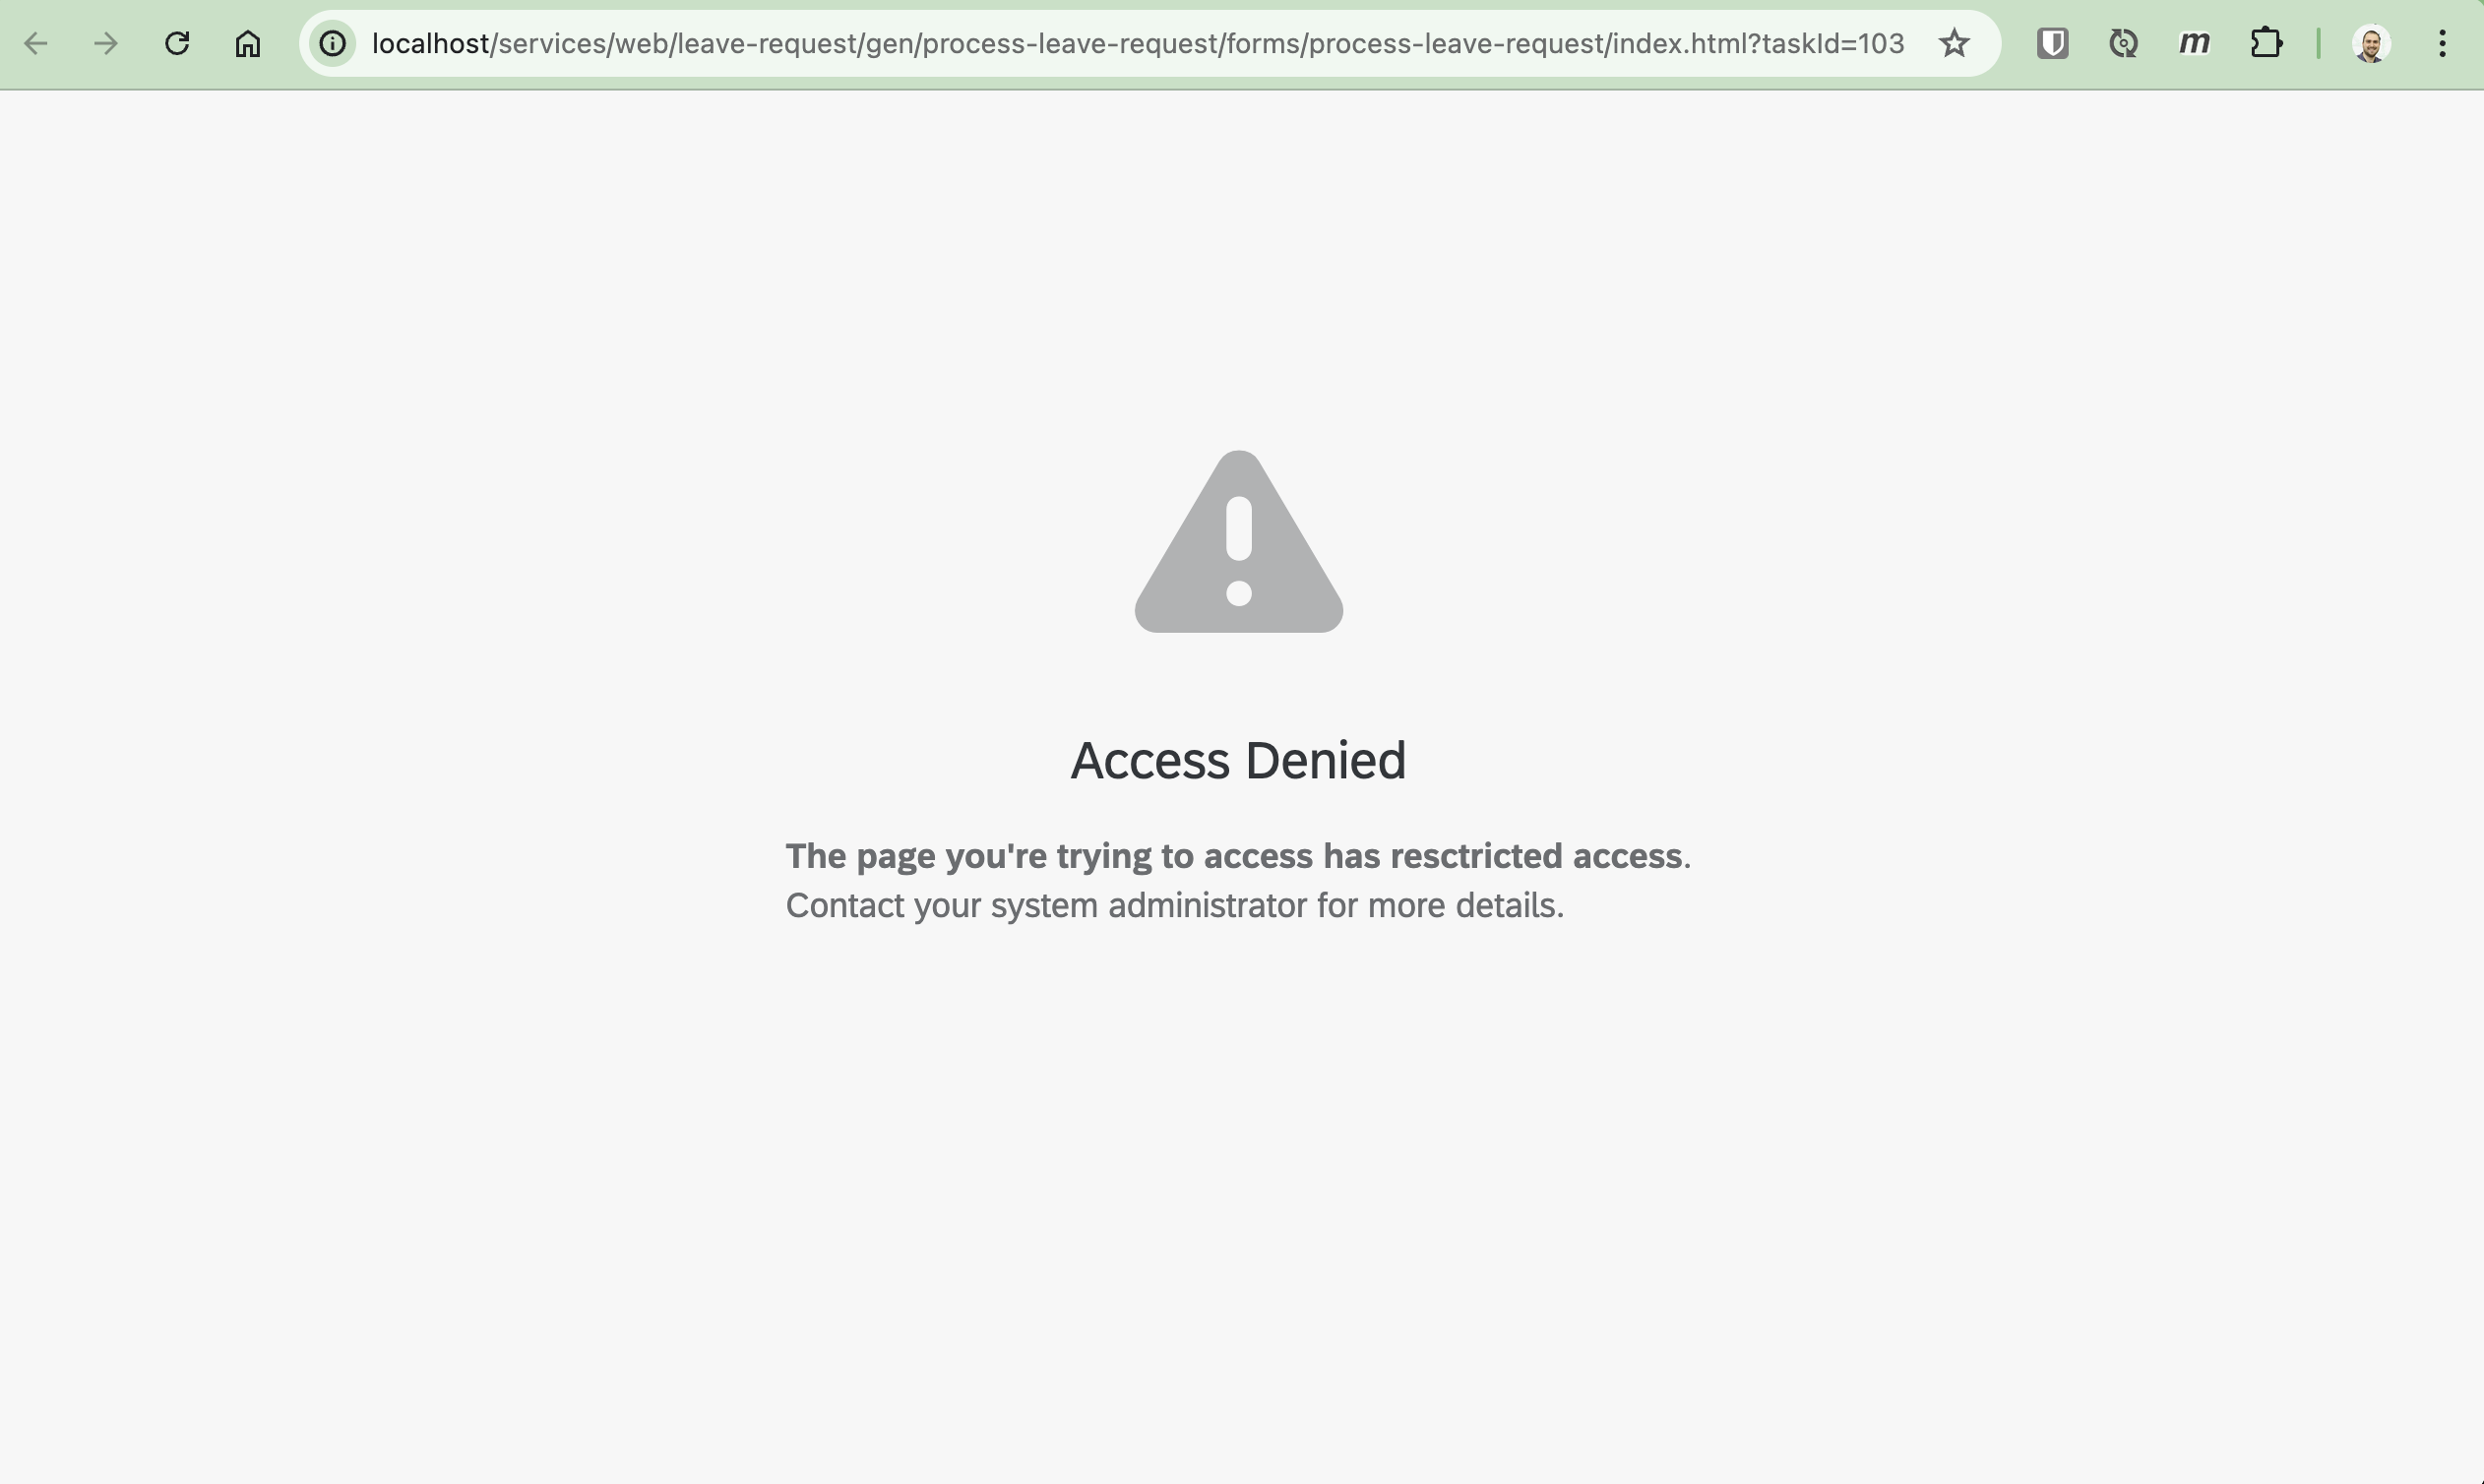
- Now, we have to protect the created forms and exposed REST APIs.
Here are the requirements: - users withemployeerole should have access to - submit form - REST API for creating new leave request (process instance) - users withemployee-managerrole should have access to - leave request processing form - REST API for approve/decline leave request - leave requests must be processable only by users with roleemployee-manager
To implement these requirements- right click on folder
security->New->Access Constraints - type
access.accessfor name - open file
access.access - edit the predefined constraints to match our use case
 You can replace the content of the file with this one if it is easier for you.
Now, let's open the forms - submit form and process form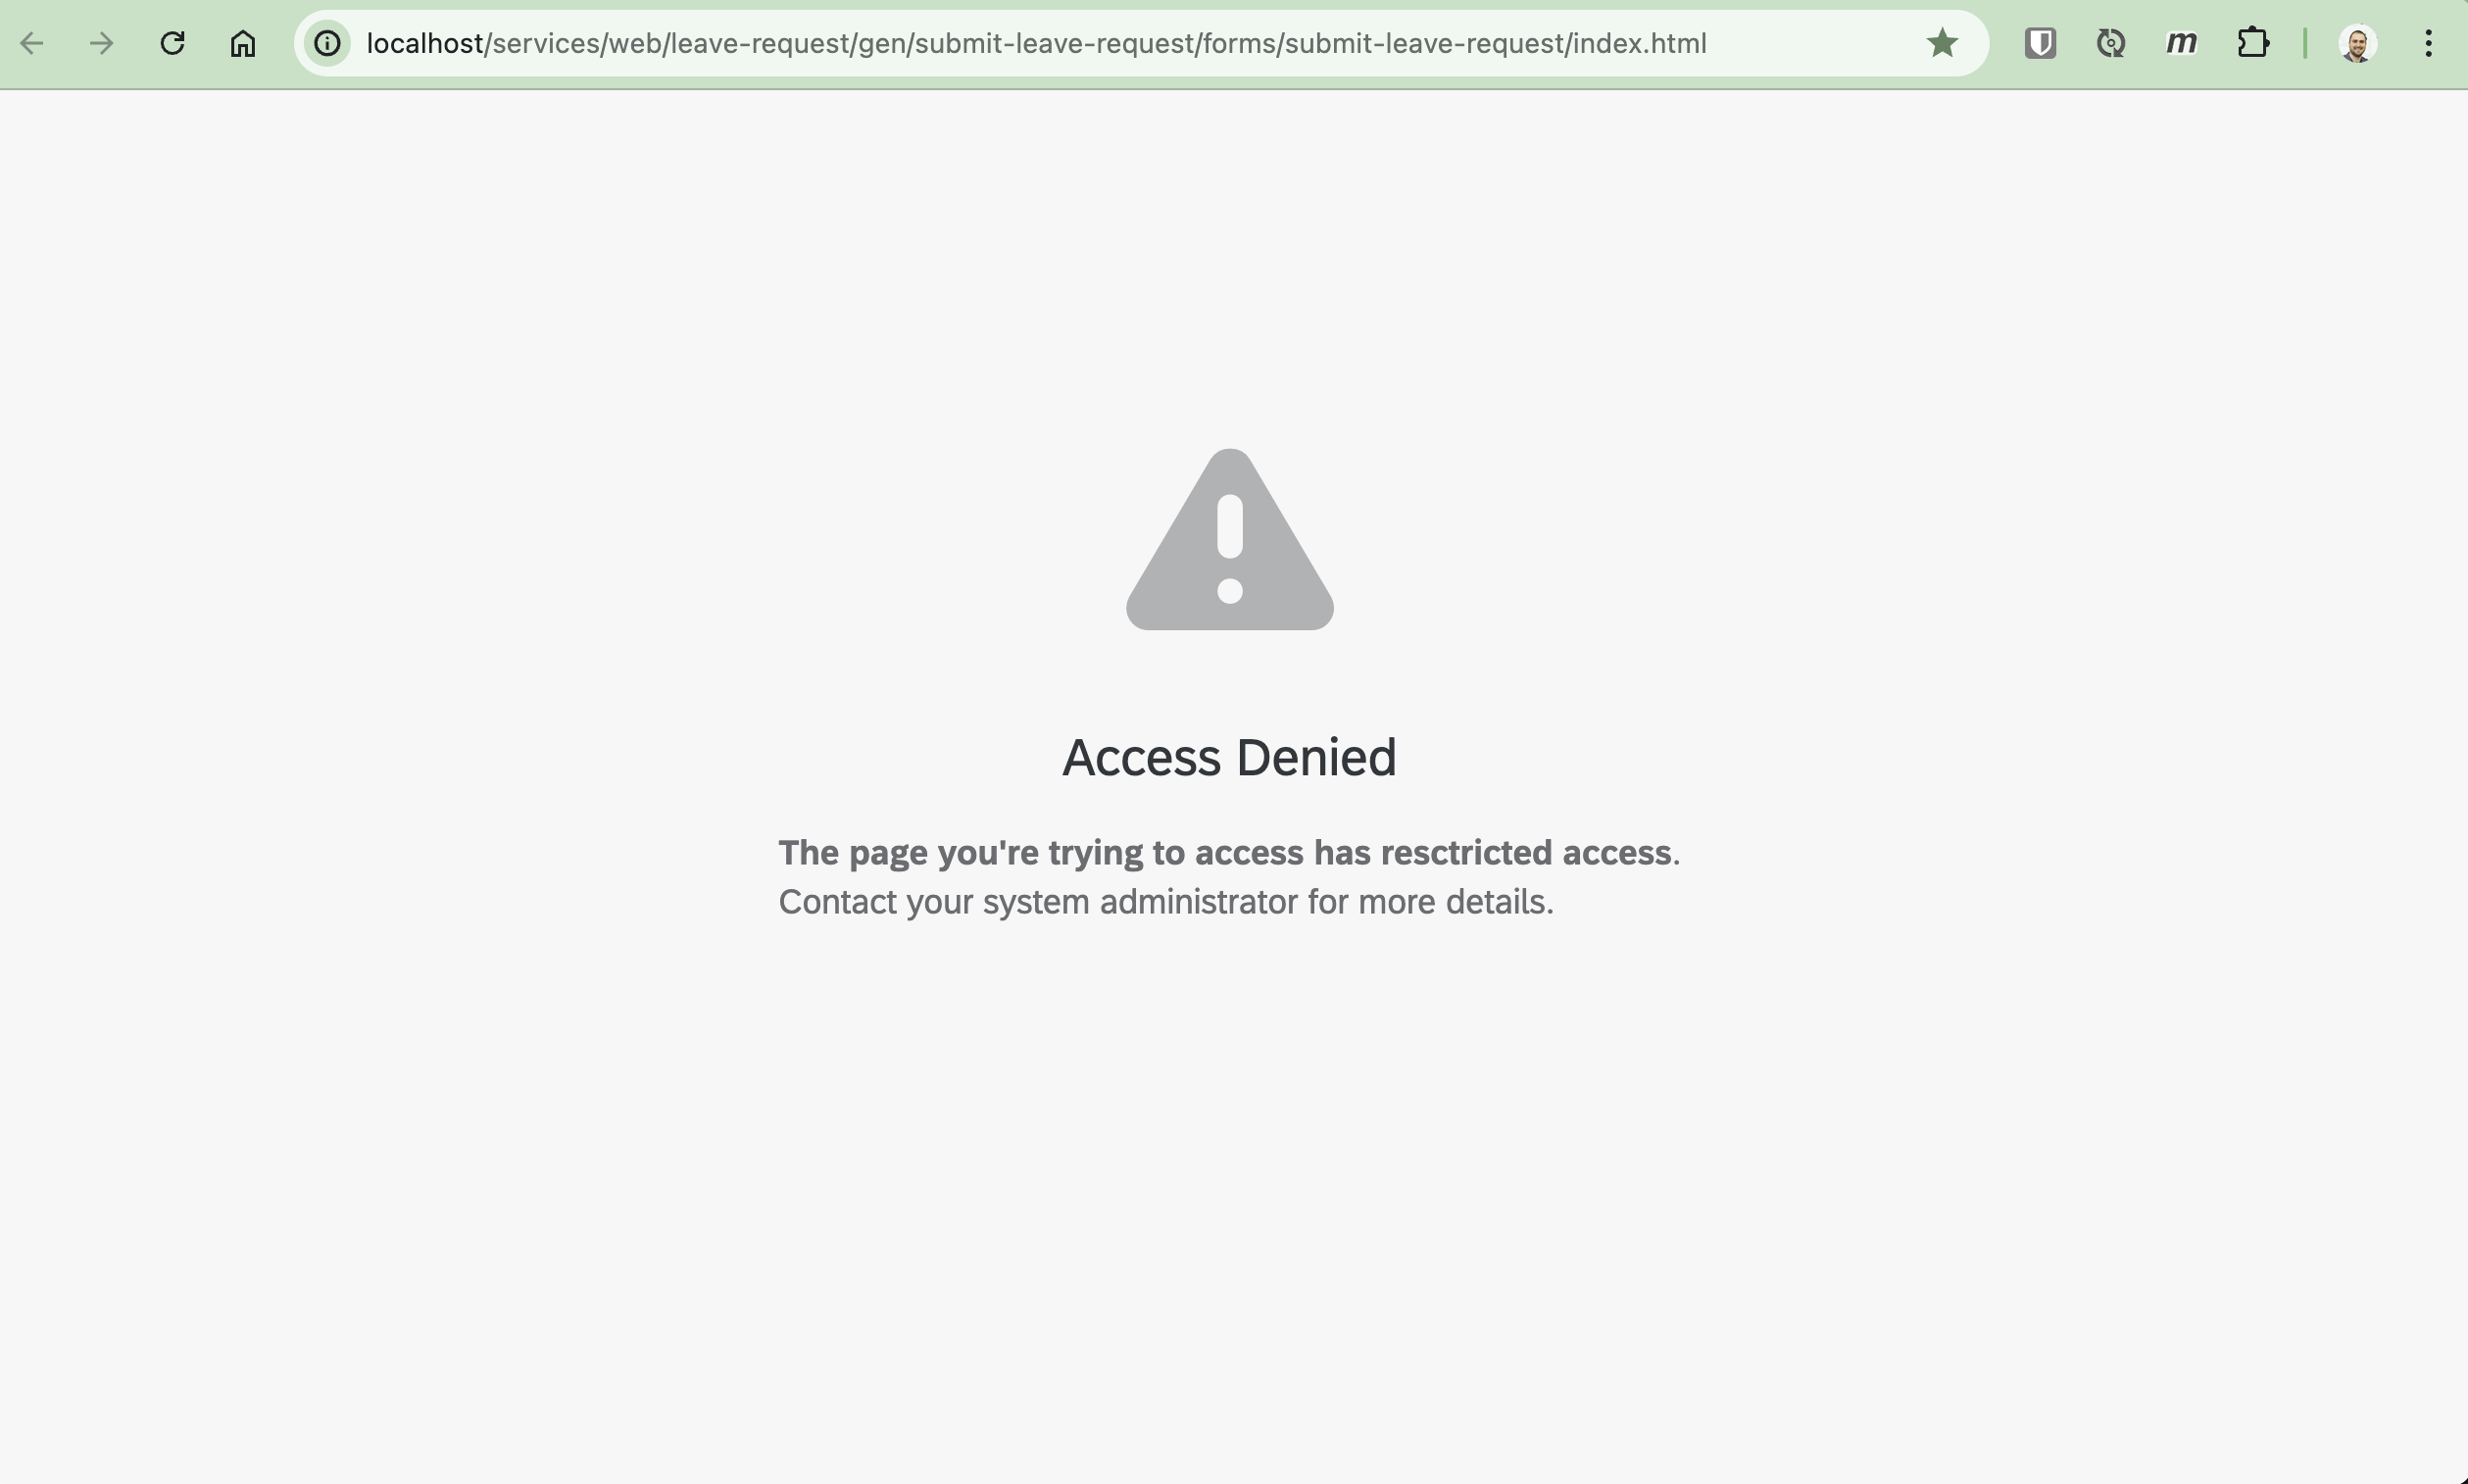
 Both forms must be protected.
 - open the process
leave-request-process.bpmn - select user task
Process request - click on
Assignments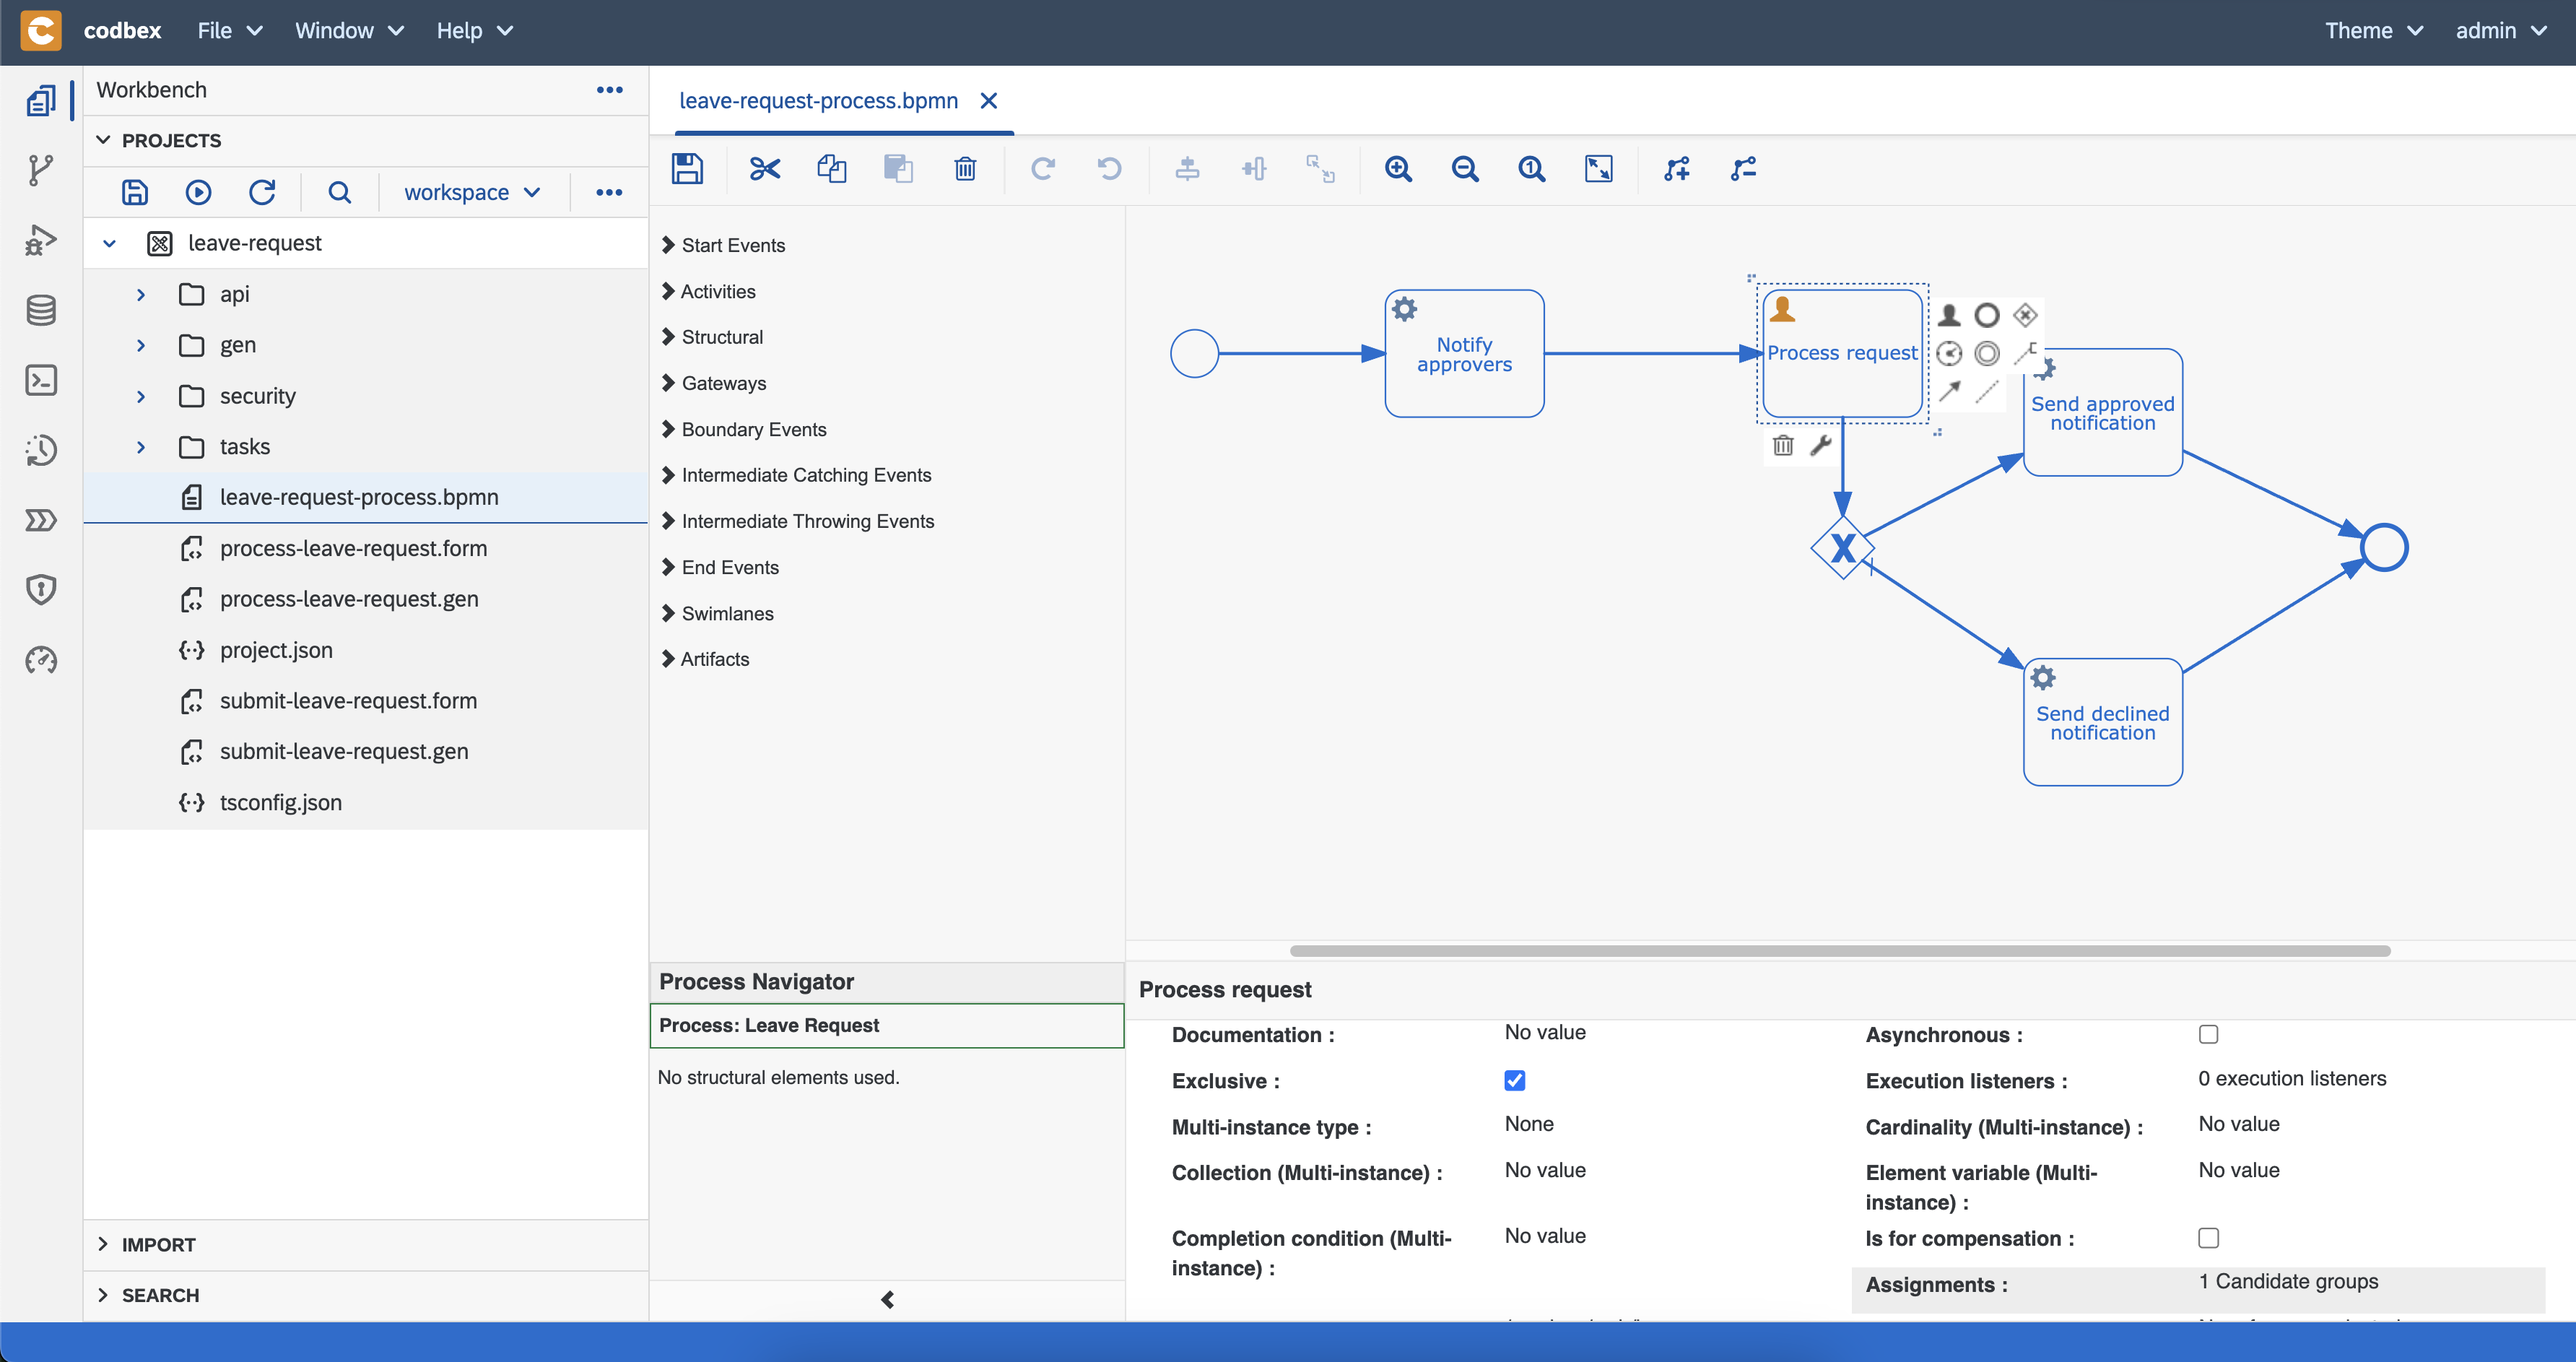
- change
Candidate groupsfromADMINISTRATORtoemployee-manager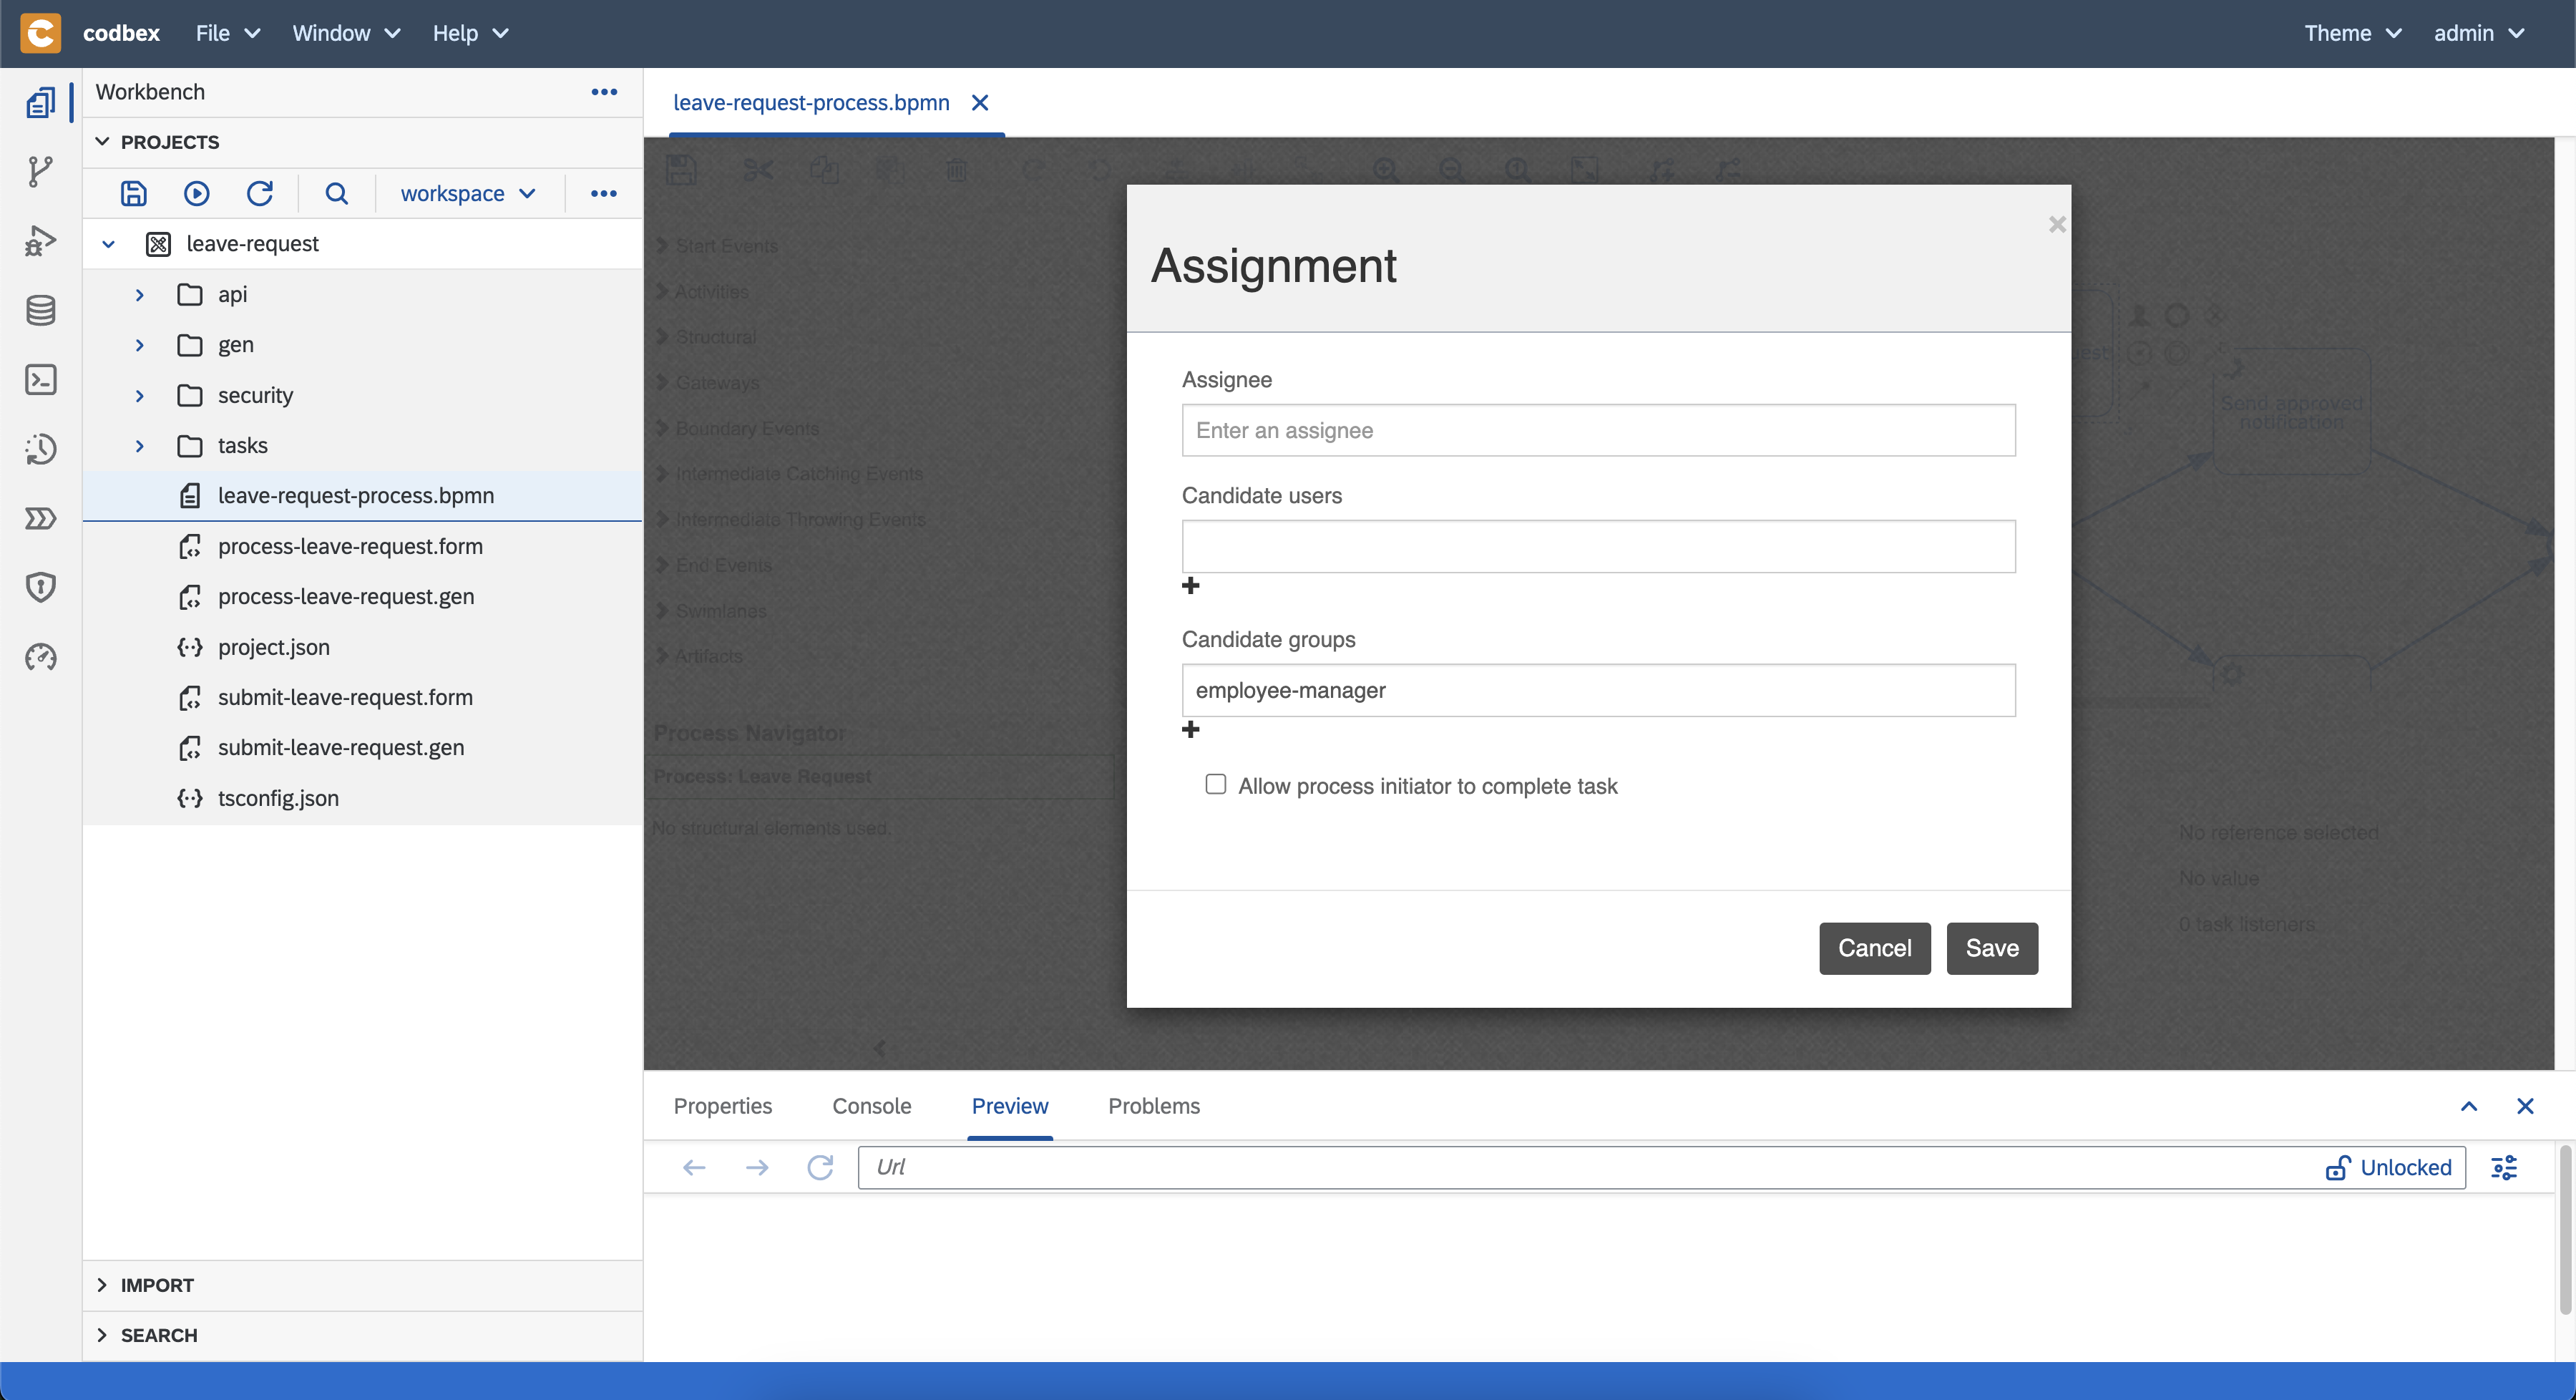
- click
Save - save the process file
- publish the project
- right click on folder


- Create users for testing
- Now, to test our scenario we need two users
- employee user
john.doe.employee@example.comwith roleemployee - employee manager user
emily.stone.mngr@example.comwith roleemployee-manager
- employee user
- To create these users follow the steps:
- open the security perspective using the
Securitybutton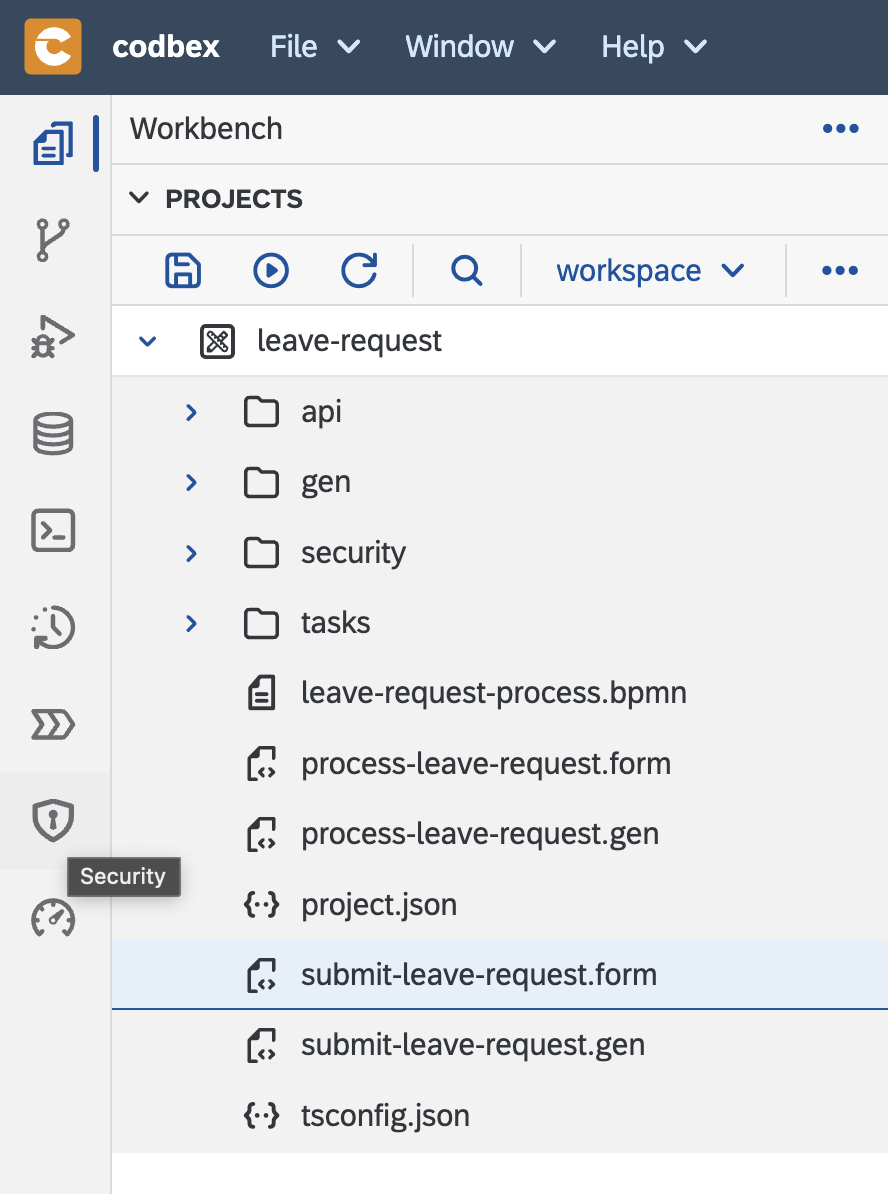
- create user
john.doe.employee@example.comwith roleemployeein the default tenant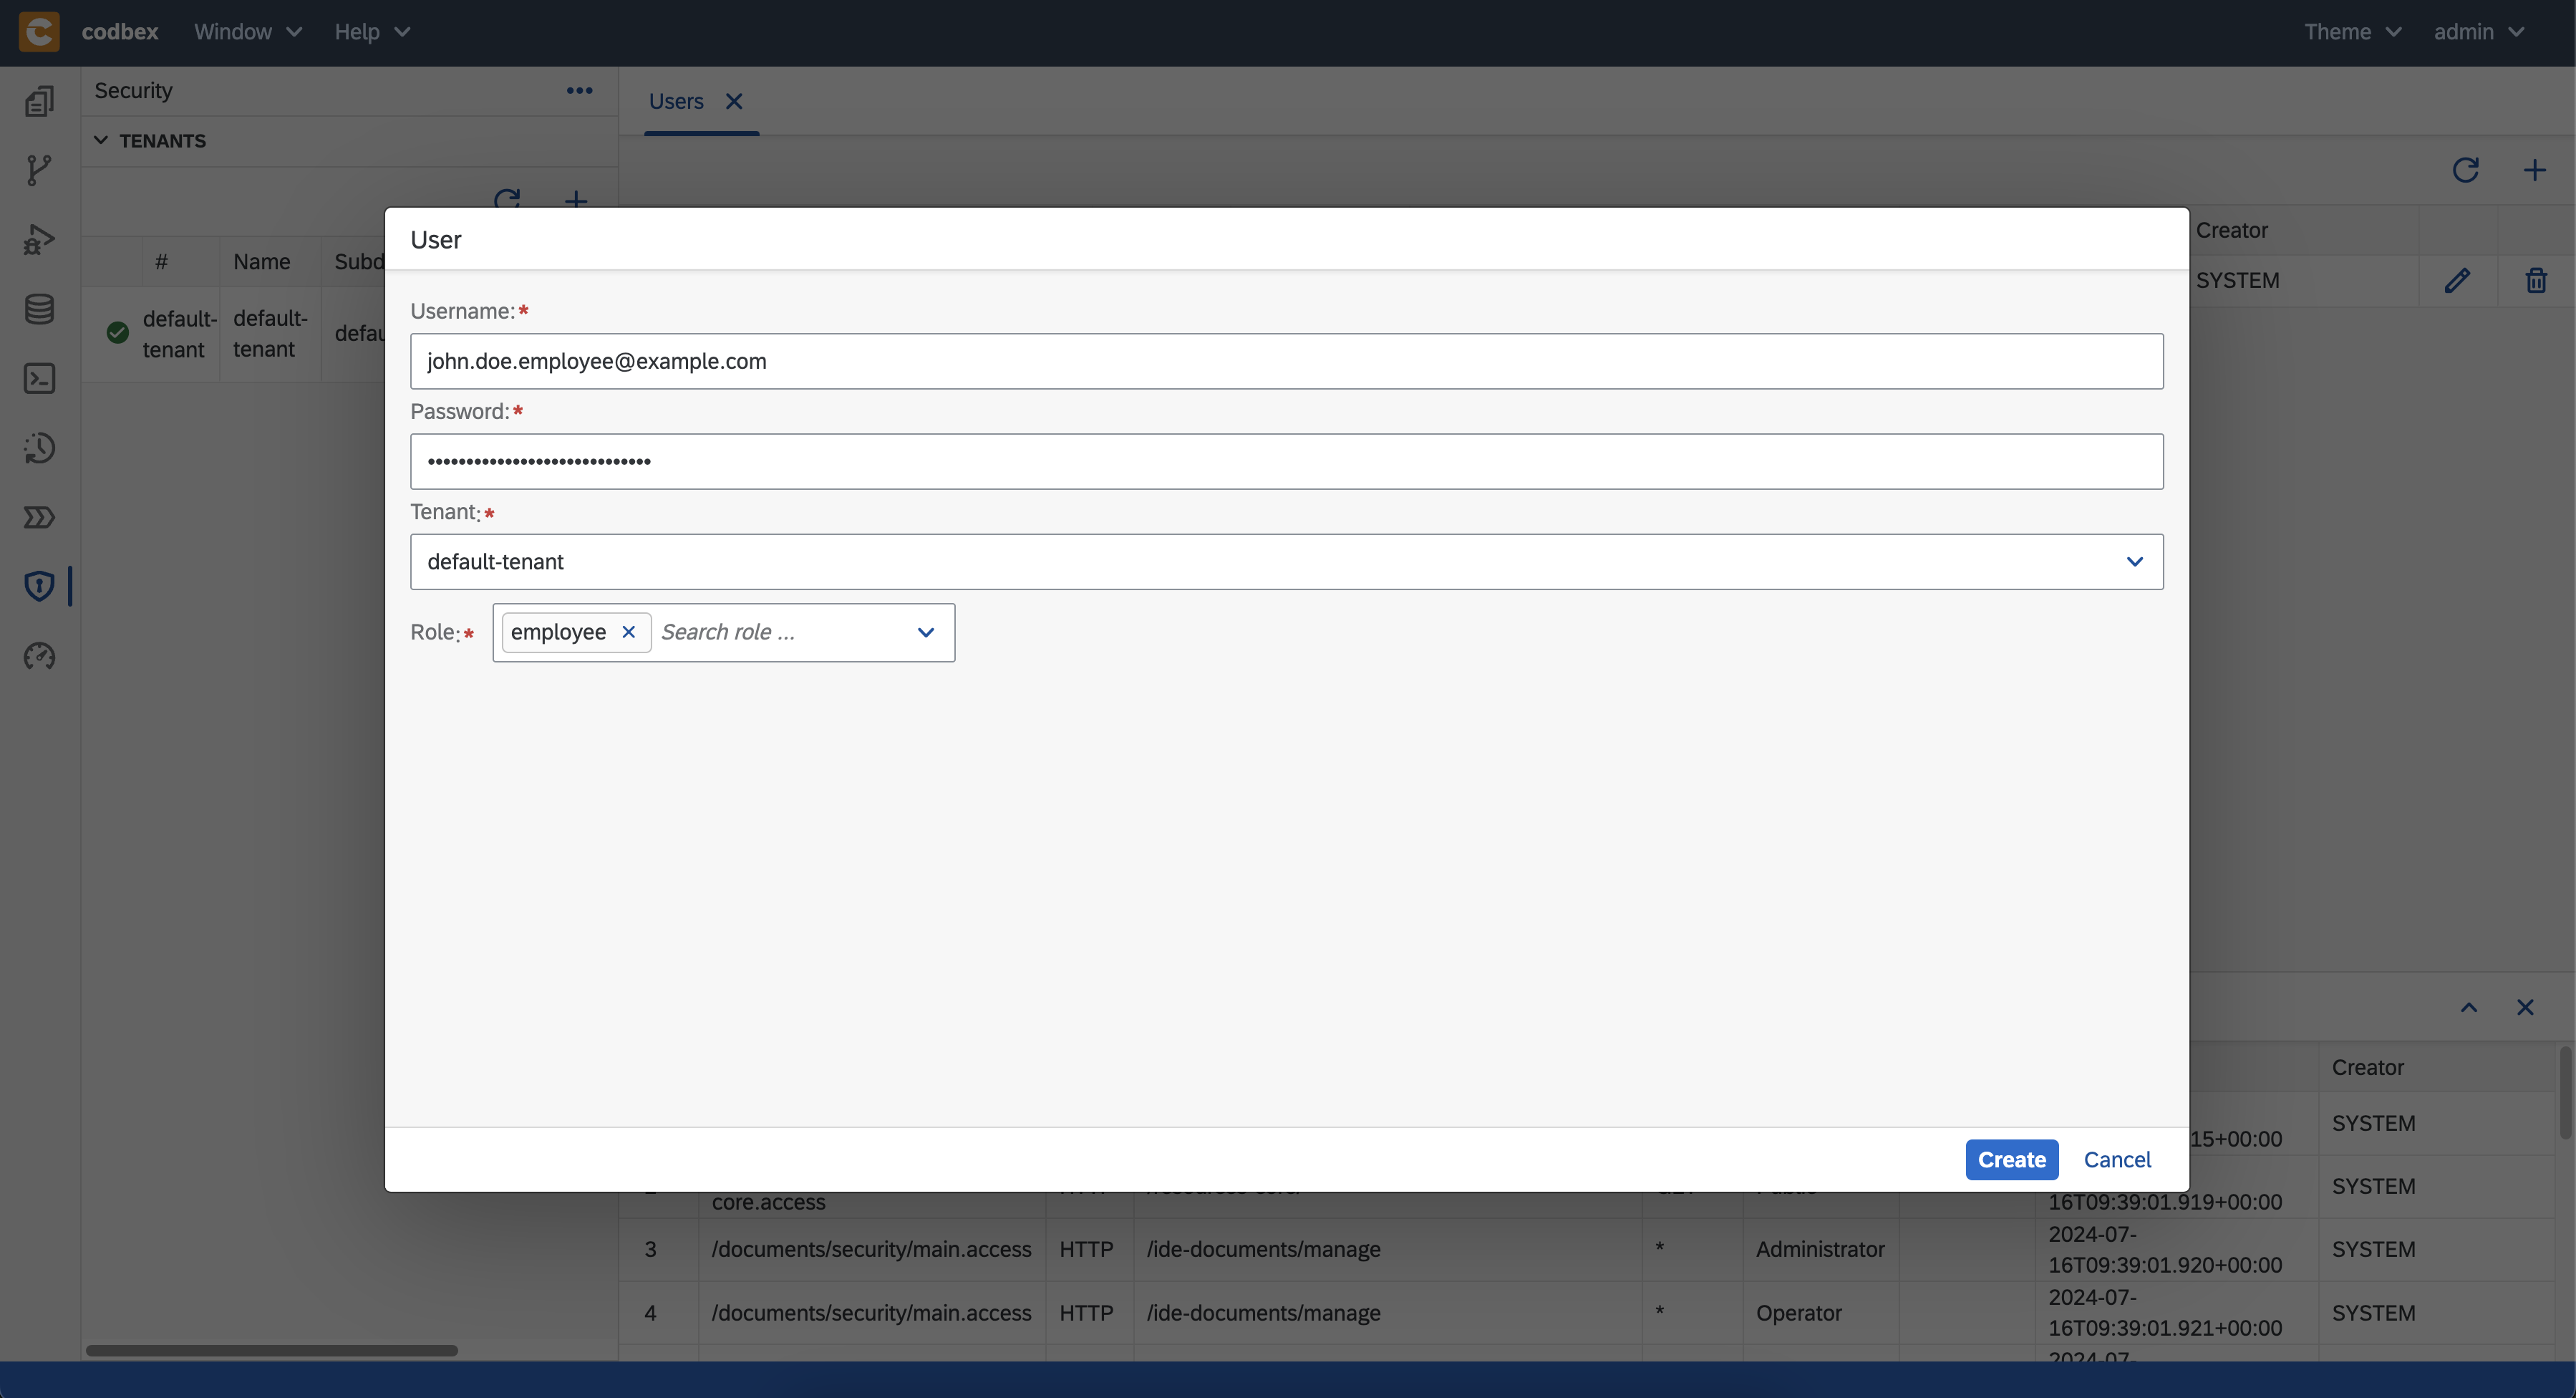
- create user
emily.stone.mngr@example.comwith roleemployee-managerin the default tenant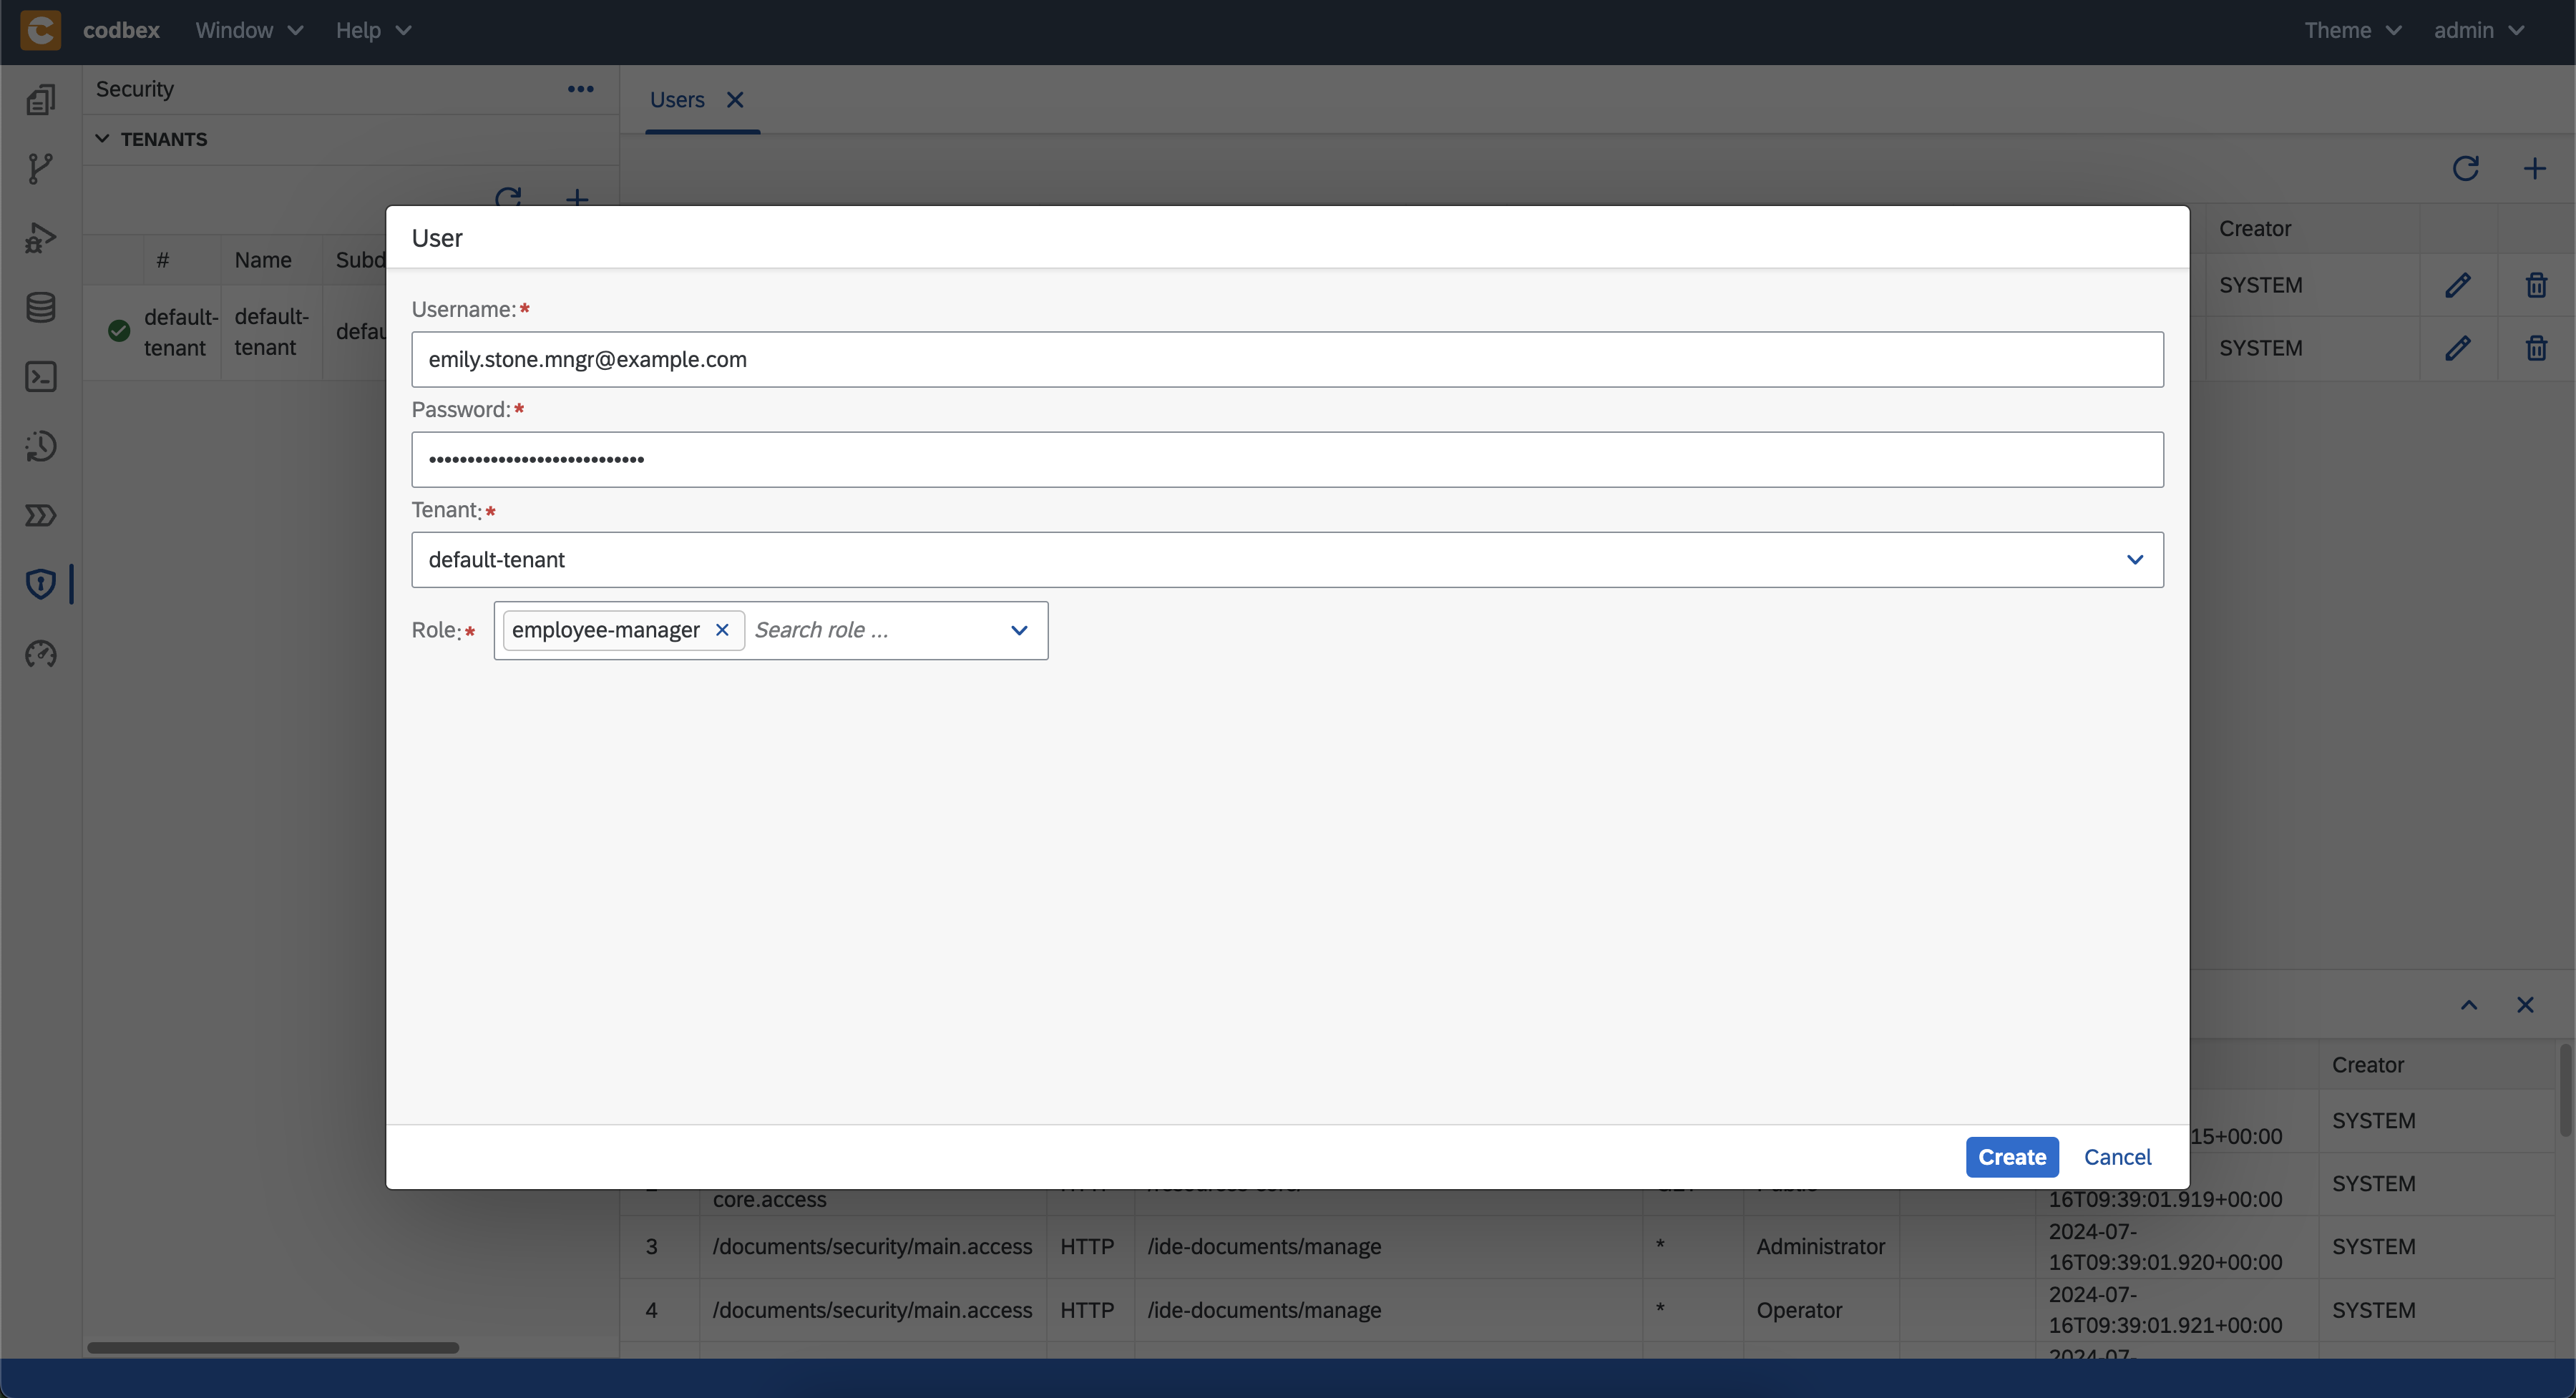
- open the security perspective using the


- Finally, test the whole scenario again with the created users
- open the submit form (you may need to logout first or open an incognito window) and login with the employee user
john.doe.employee@example.com - submit a new leave request

- check your mailbox
- open the inbox UI at http://localhost/services/web/inbox/ or use the link from the email (you may need to logout first or open an incognito window)
- login with the employee manager user
emily.stone.mngr@example.com - claim the task and open the form using the
Open Formbutton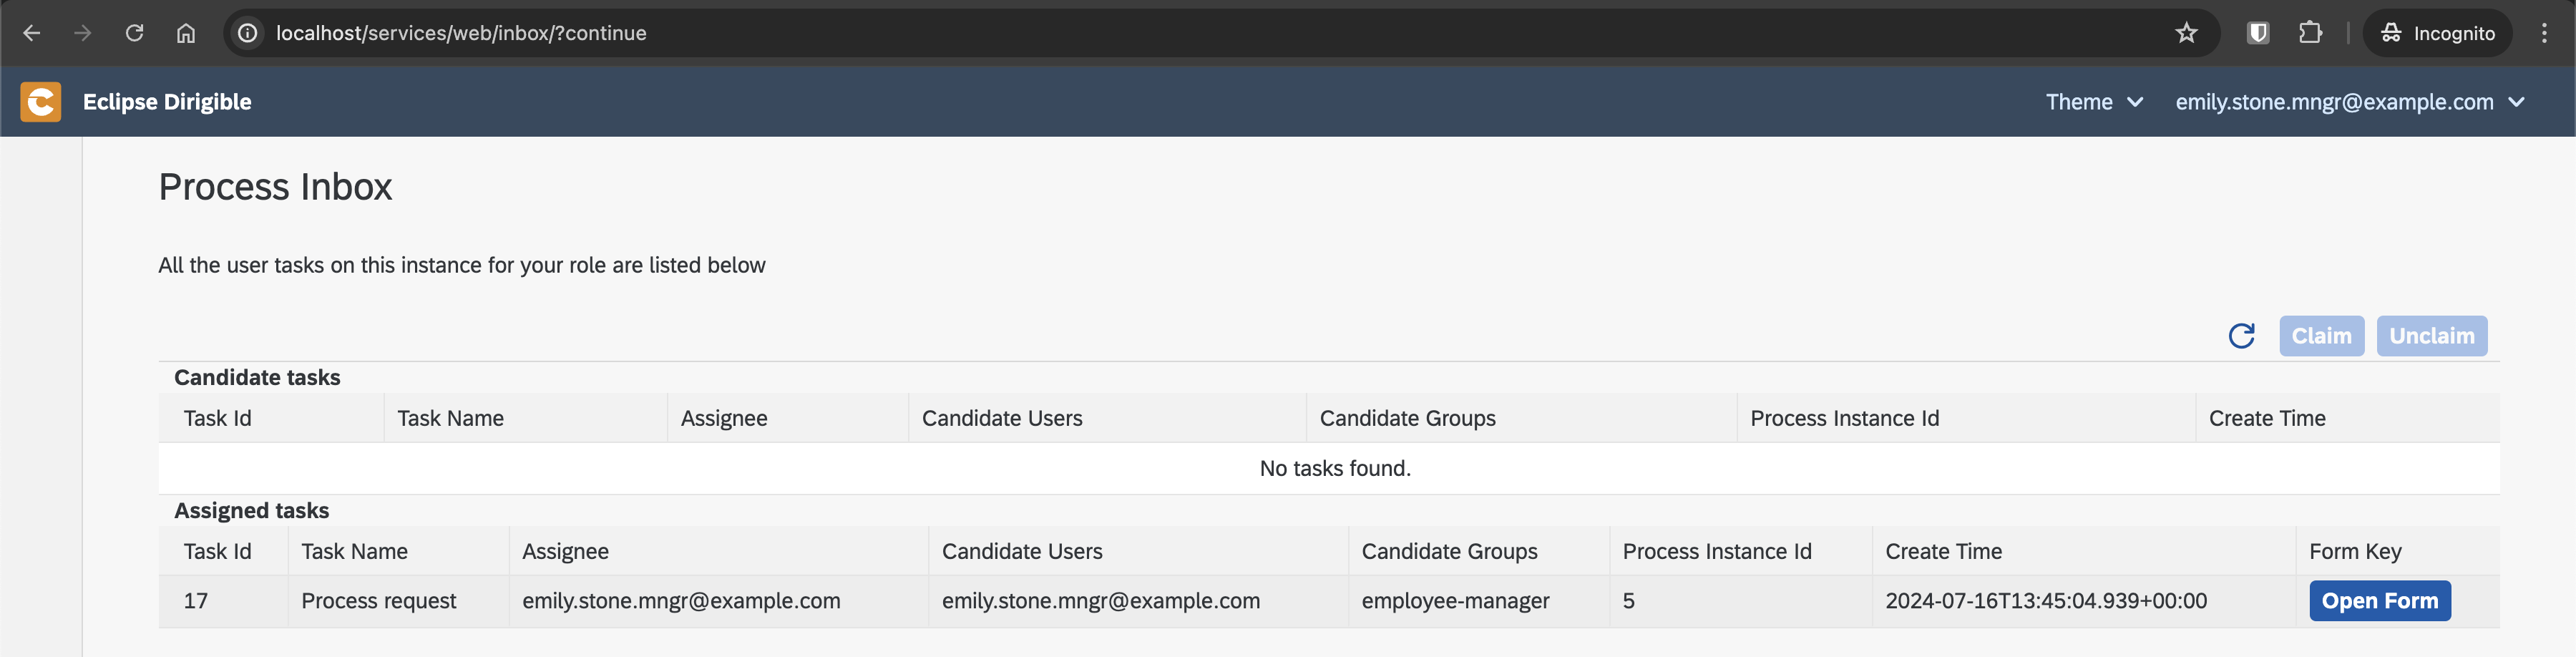
- this time, let's decline the request

- check the mailbox
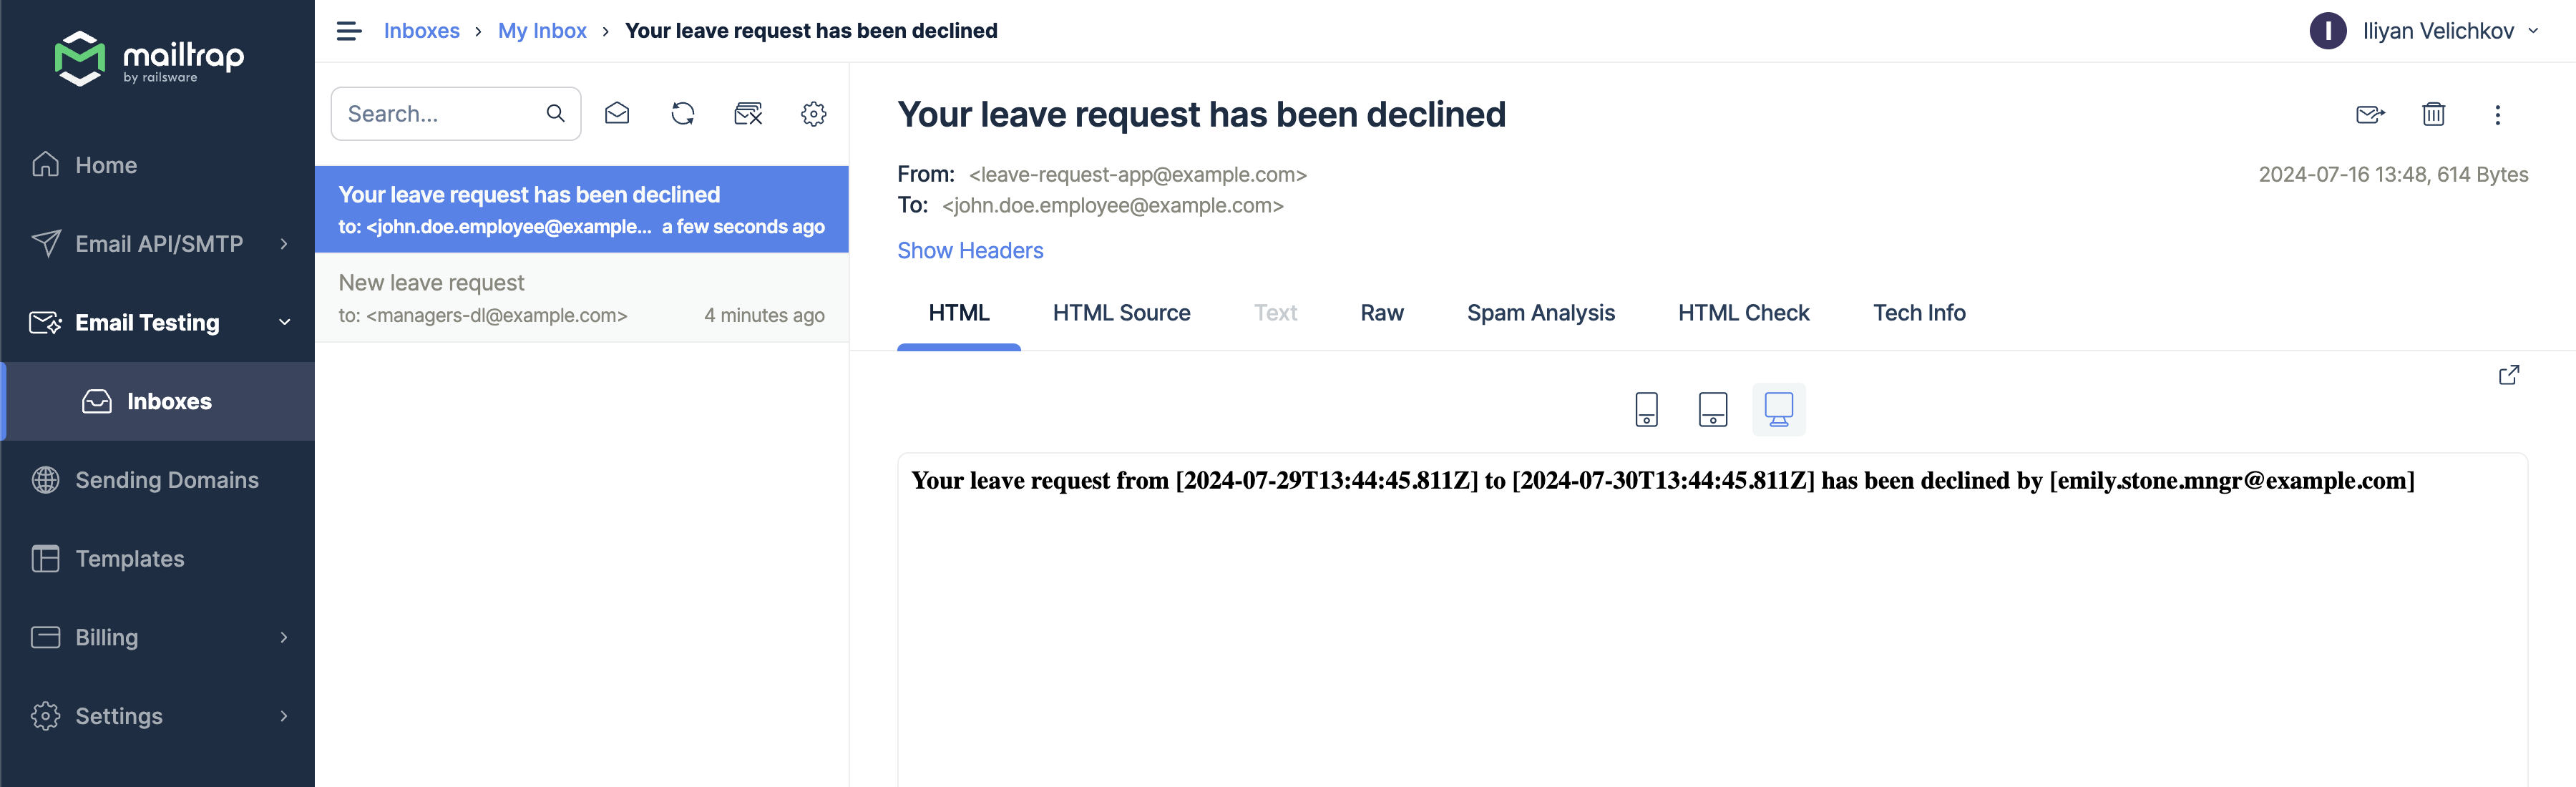


Congratulations, your application is ready!
Summary
Using Hyperion you can
- implement simple and complicated BPM processes using Flowable
- model modern user interfaces using forms (UI builder)
- write code in TypeScript
- use the comprehensive codbex SDK which uses different modern open source projects for messaging, jobs scheduling, REST, OData, mails etc.
- benefit from the codbex platform, tooling and modules
- add authentication and authorization to your application
The project we implemented can be found in this GitHub repository.
I hope you enjoyed this blog. Stay tuned for more great functionality by codbex!
If you have any questions, ideas or want to contribute, feel free to contact us.