Onboarding Process Tutorial 2: BPMN Configuration - Service Task Definition
Introduction
In today’s dynamic digital landscape, building efficient and adaptable business processes is crucial for organizational success. Hyperion Edition gives users the ability to model and automate workflows with ease through its intuitive, low-code tools. Its key feature is BPMN (Business Process Model and Notation), which brings visual clarity and precision to process modeling. With BPMN in Hyperion, users can design, execute, and optimize complex workflows using a standardized graphical notation. This powerful capability bridges the gap between business and IT, ensuring that even the most intricate processes are easy to visualize, manage, and refine.
BPMN File
Creating BPMN File
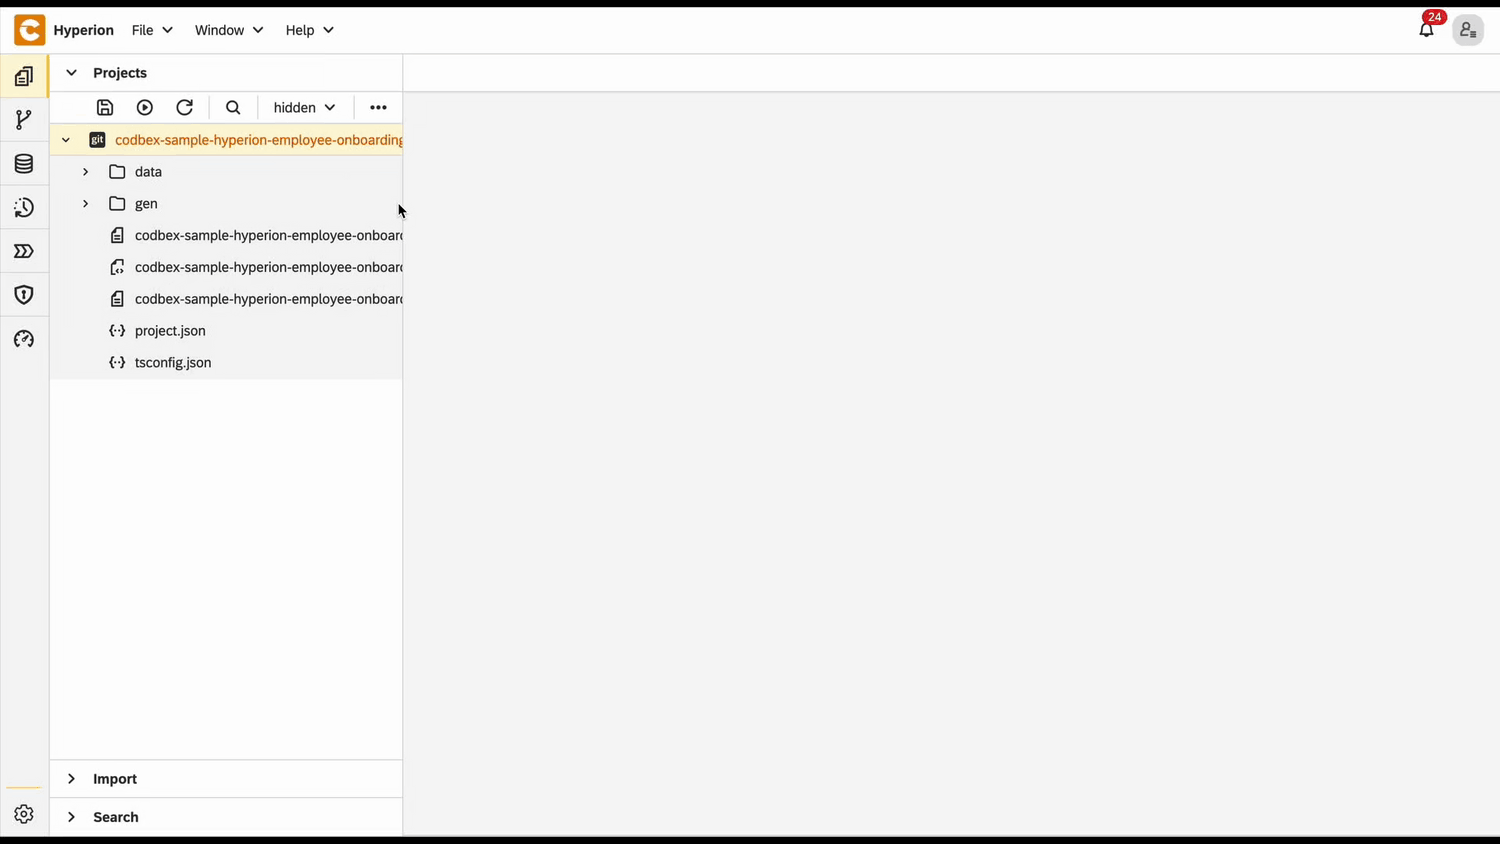
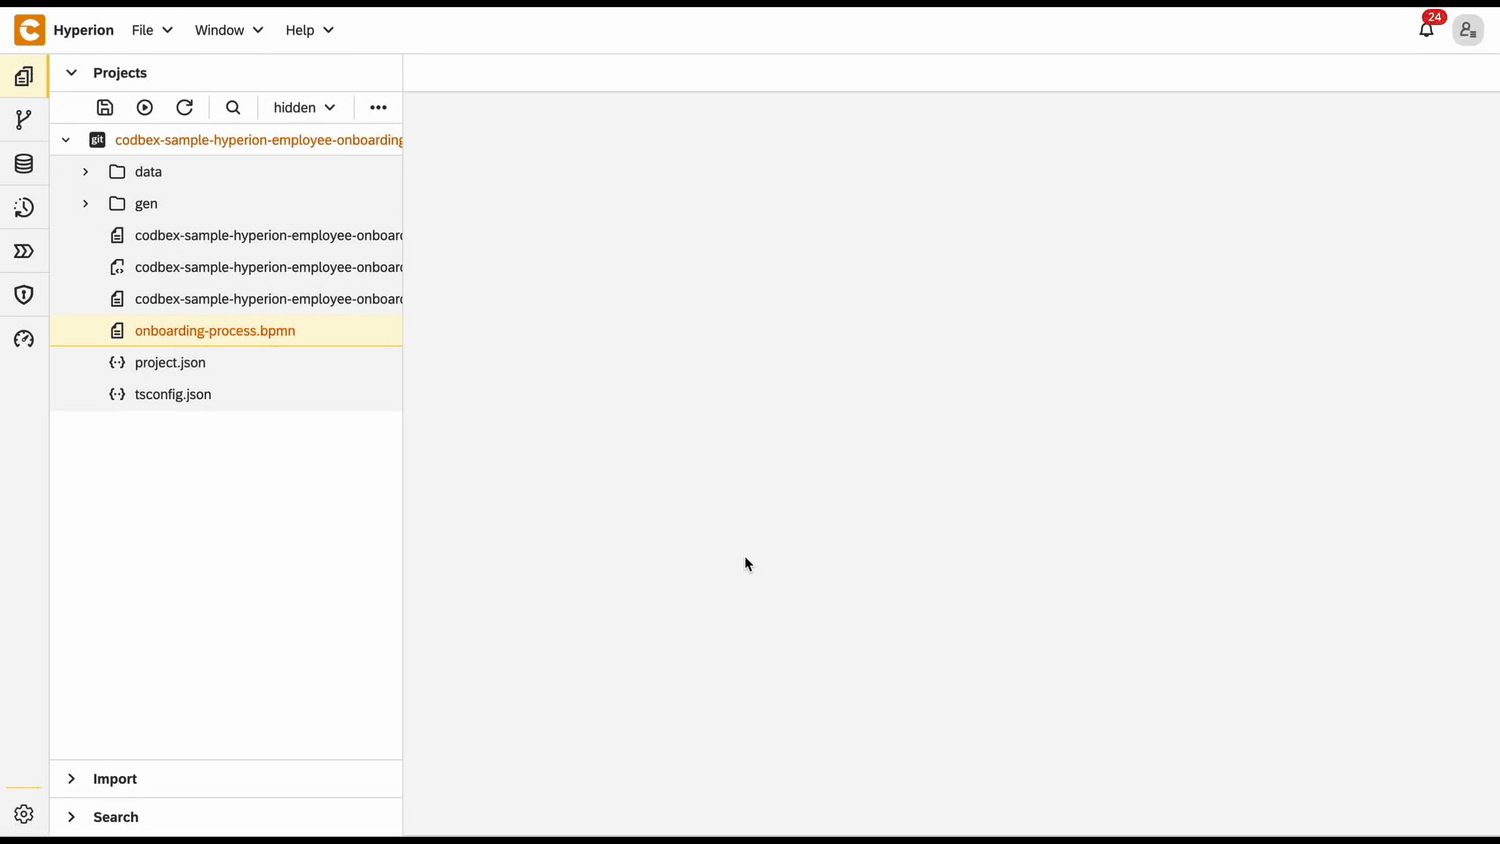
To start the implementation of a process a BPMN file needs to be created. In the same project from the previous tutorial create a file with .bpmn extension:
- Right click on the Project Name → New → Business Process Model
- Type the
onboarding-process.bpmnas a name - Click create
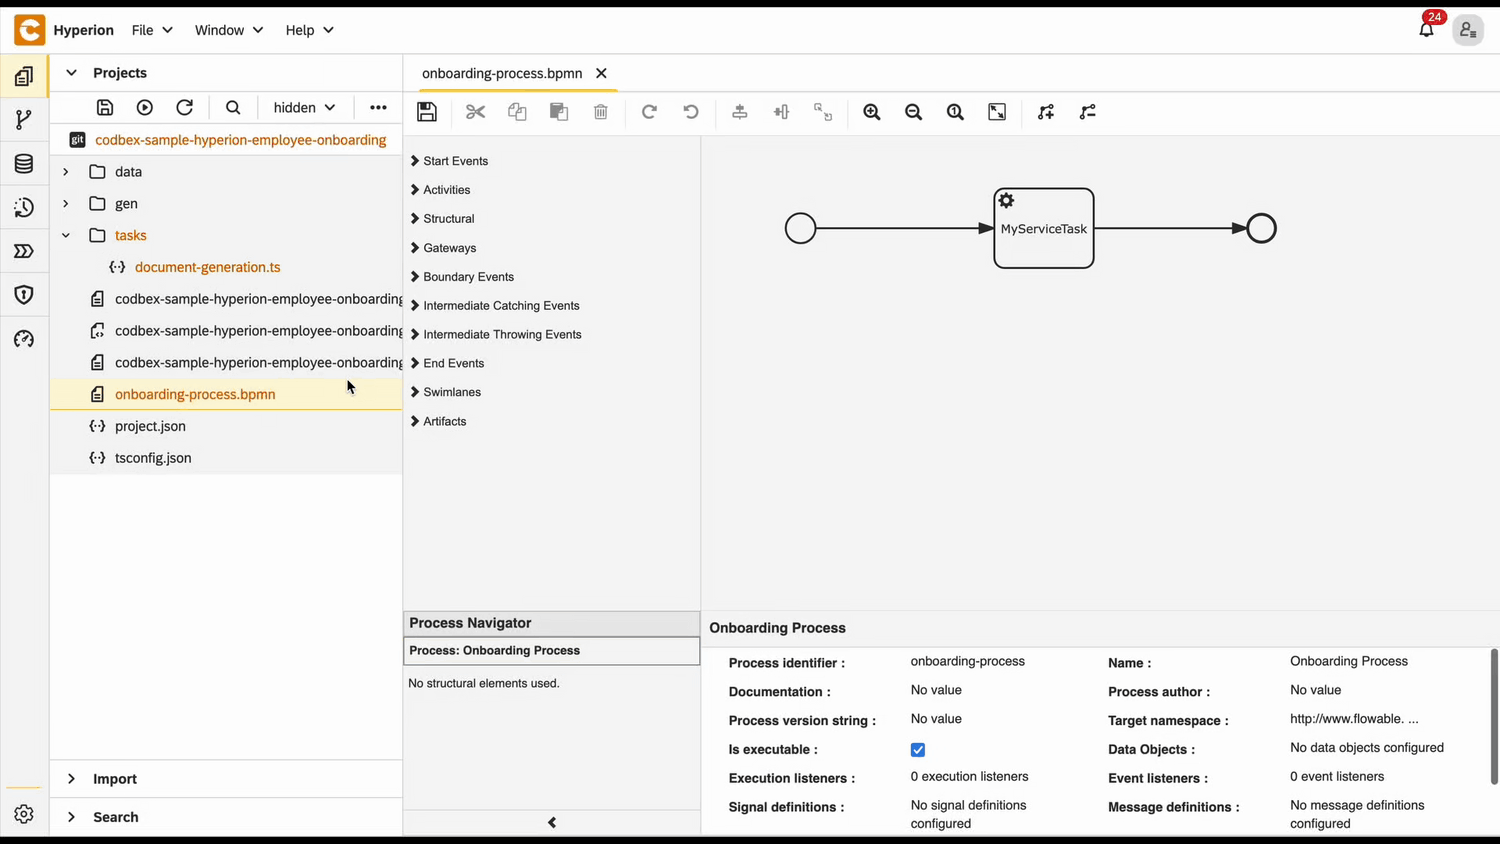
Configuring BPMN
For the configuration of the BPMN to be finished a process id and name must be provided. By default they are specified as "myprocess" and "MyProcess" respectively.
- Open the BPMN file
- In the Process Identifier field type
onboarding-process - In the Name field type
Onboarding Process - Save the changes
Service Tasks
Tasks are elements of the BPMN that allow you to define a single step in the execution of the process. There are different kinds of tasks. Service Tasks define an operation done internally (only on the server side of the platform) by the process. They don't require resources by other services nor supervision by users. They are marked by a cogwheel in the upper left corner.
Configuring Service Task
The recently created BPMN file has a diagram of two circles connected to a rectangle. The left circle is a start event - signalizing where the process starts - and the second one is end event. The rectangle is the service task. To configure it we not only need to give it Id and Name but also define what it would do. This is done by writing a TypeScript file and connecting it to the task.
- Create a folder for the definitions of the tasks called
tasks - In the new folder create a file called
document-generation.ts - Paste the following code in the file
📄 View code
import { OnboardingTaskRepository as OnboardingTaskDao } from "codbex-sample-hyperion-employee-onboarding/gen/codbex-sample-hyperion-employee-onboarding/dao/OnboardingTask/OnboardingTaskRepository";
import { EmployeeRepository as EmployeeDao } from "codbex-sample-hyperion-employee-onboarding/gen/codbex-sample-hyperion-employee-onboarding/dao/Employee/EmployeeRepository";
import { process } from "sdk/bpm";
const onboardingTaskDao = new OnboardingTaskDao();
const employeeDao = new EmployeeDao();
const execution = process.getExecutionContext();
const executionId = execution.getId();
const employeeId = process.getVariable(executionId, "Employee");
const taskLink = process.getVariable(executionId, "TaskLink");
const employee = employeeDao.findById(employeeId);
if (!employee) {
throw new Error(`Employee with ID ${employeeId} not found!`);
}
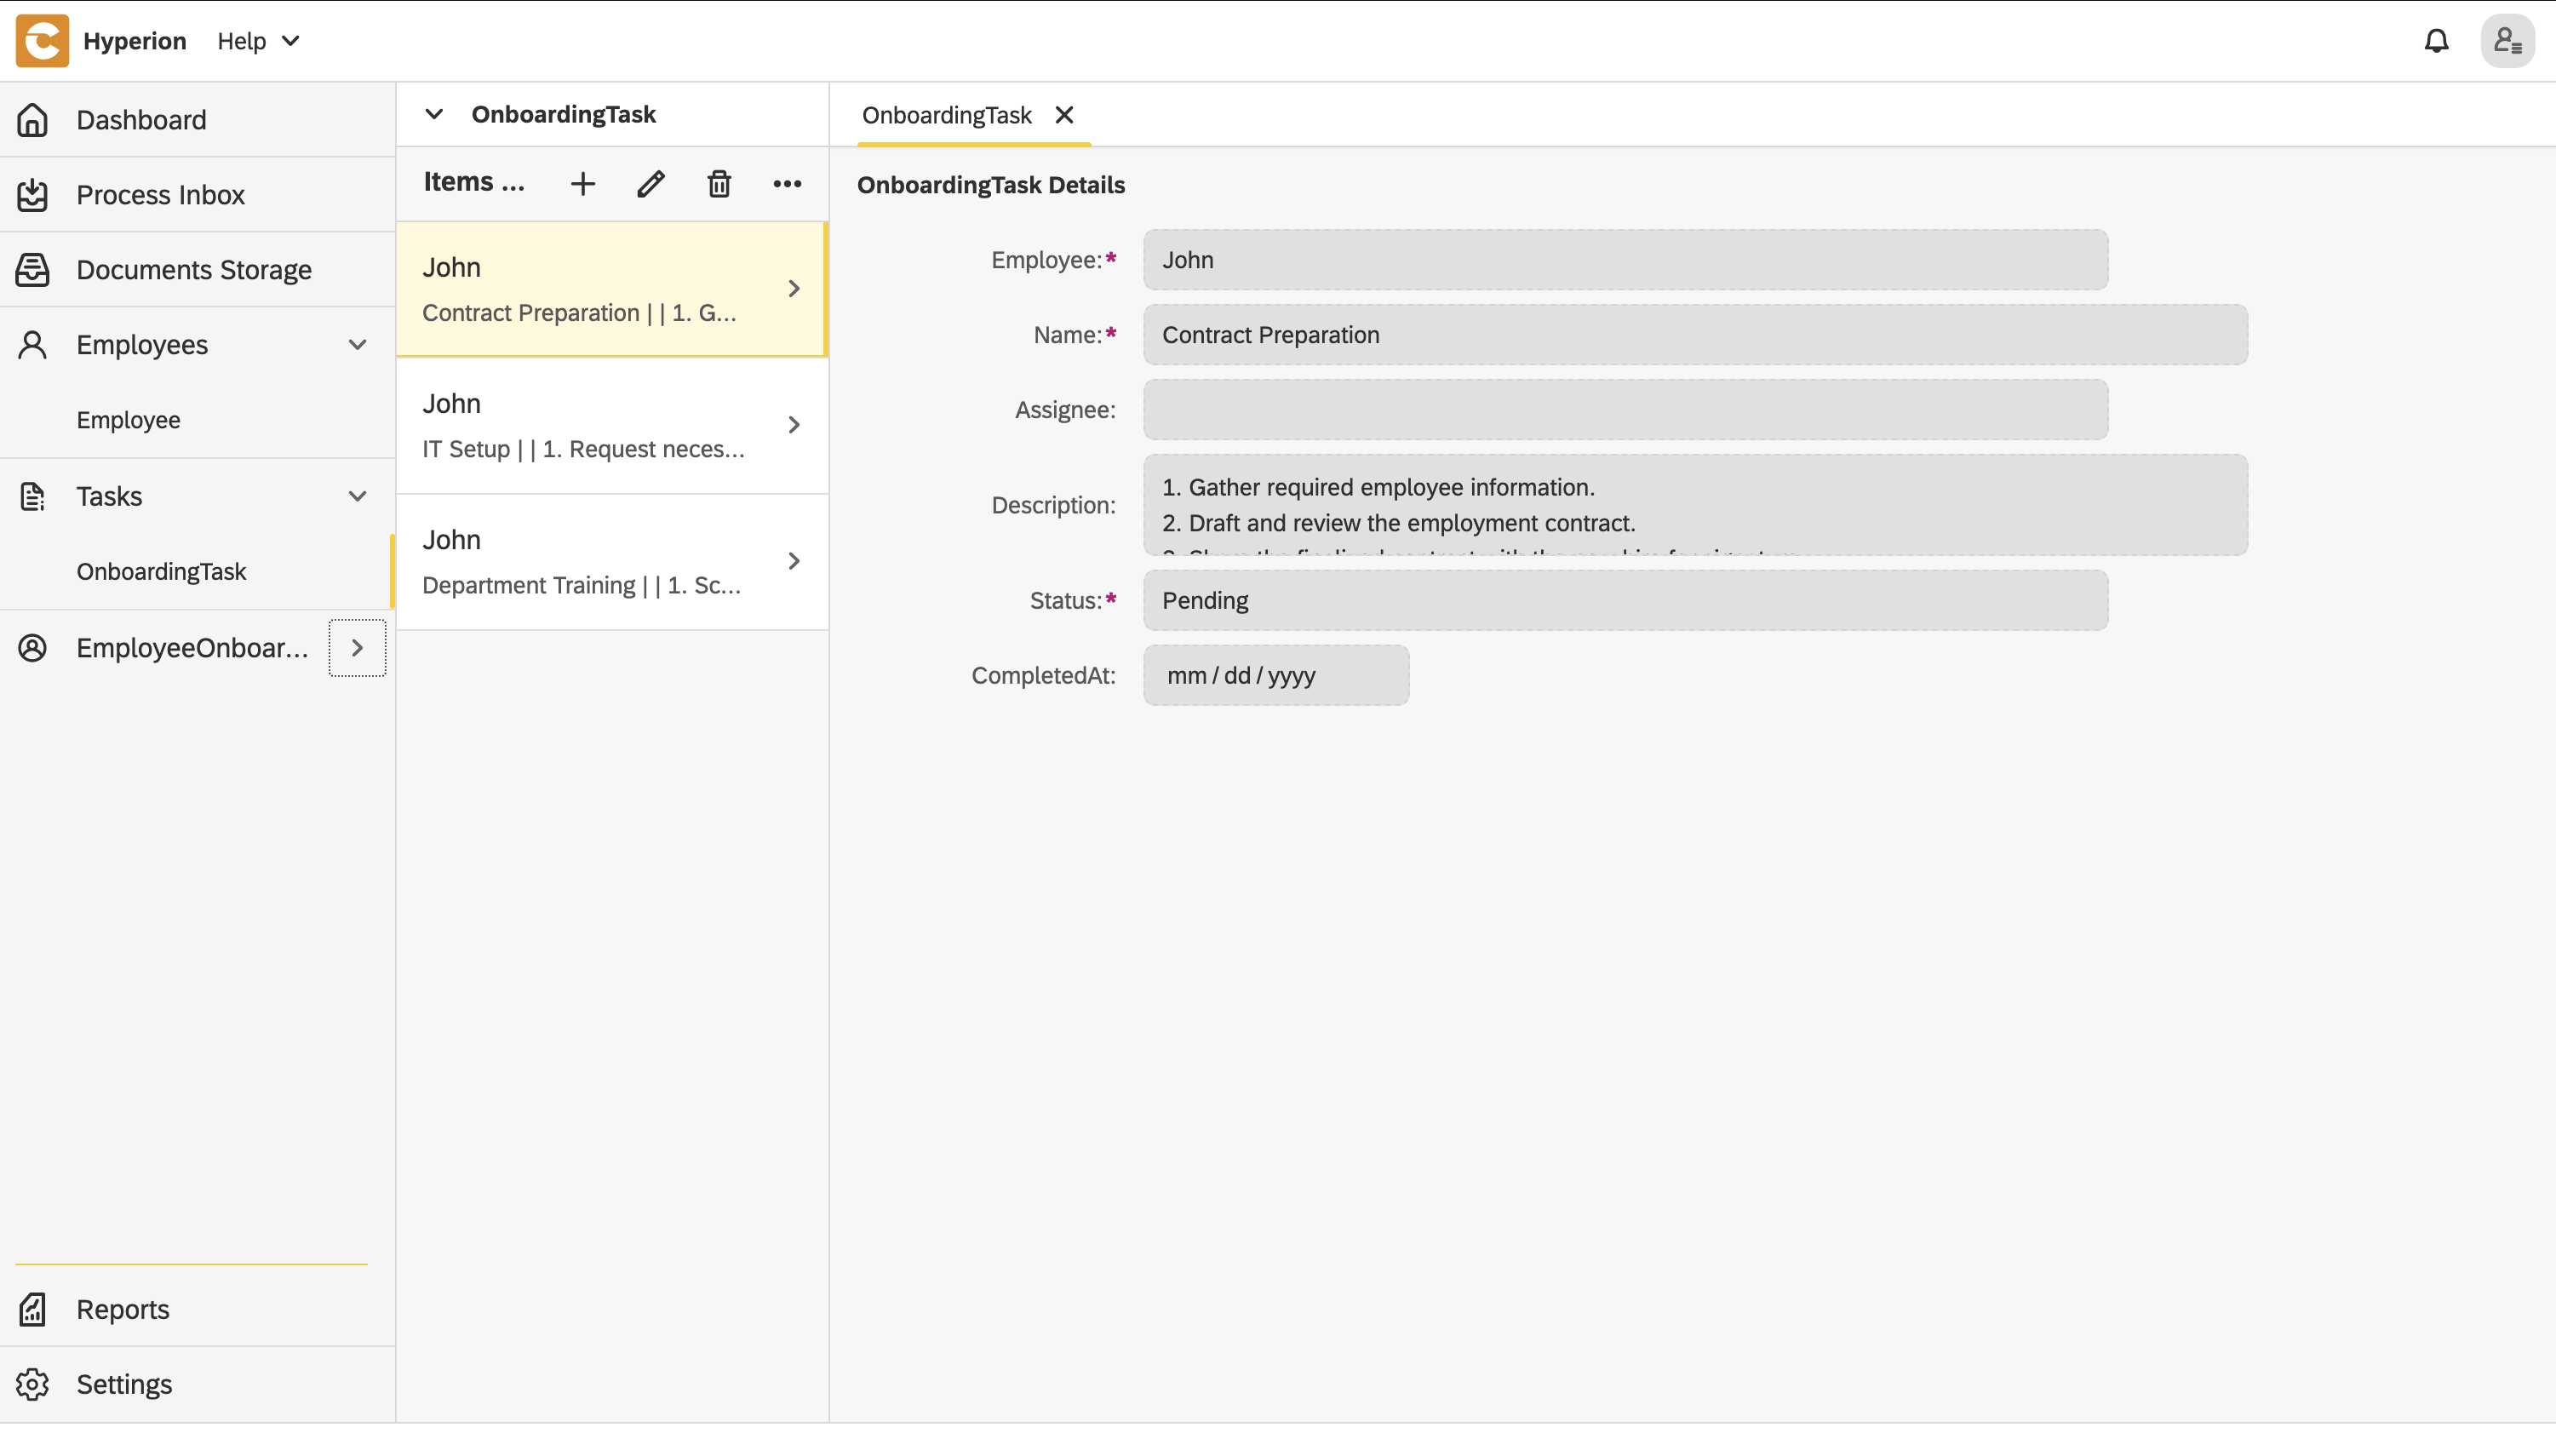
const hrTaskSteps = `1. Gather required employee information.
2. Draft and review the employment contract.
3. Share the finalized contract with the new hire for signature.`;
let hrTaskBody = {
"Employee": employeeId,
"Name": "Contract Preparation",
"Description": hrTaskSteps,
"Status": 1,
"Link": taskLink,
};
const itSetupSteps = `1. Request necessary hardware and software for the new hire.
2. Set up user accounts, email, and access permissions.
3. Test and confirm all systems are working before the start date.`;
let itTaskBody = {
"Employee": employeeId,
"Name": "IT Setup",
"Description": itSetupSteps,
"Status": 1,
"Link": taskLink,
};
const departmentTrainingSteps = `1. Schedule training sessions with the relevant team or manager.
2. Provide access to training materials and documentation.
3. Monitor progress and address any questions or support needs.`;
let managerTaskBody = {
"Employee": employeeId,
"Name": "Department Training",
"Description": departmentTrainingSteps,
"Status": 1,
"Link": taskLink,
};
let tasks = [hrTaskBody, itTaskBody, managerTaskBody];
tasks.forEach(task => {
const newTask = onboardingTaskDao.create(task);
if (!newTask) {
throw new Error("Task creation failed!");
}
})
execution.setVariable("tasks", tasks);
employee.Status = 2;
employeeDao.update(employee);💡 Note
This code uses the generated DAO from the EDM model. It retrieves the current process context and employee ID from the BPM system, verifies if employee exists, and then creates three onboarding tasks:HR contract preparation,IT setupandDepartment training. Each task is structured with details like name, description, status and a tracking link, then saved to the database. The tasks are also stored in the process context for reference, and the employee's onboarding status is updated to"In Progress"to reflect the workflow's advancement.
- Open the BPMN again
- Click on the service task
- In the Id field type
document-generation - In the Name field type
Document Generation - Click on the Class field → the + button to add handler entry
- In the Name field type
handler - In the String value field type the link to the task definition
codbex-sample-hyperion-employee-onboarding/tasks/document-generation.ts - Click Save
- Save the changes to the file
HR Initiation Form
Now that the BPMN is configured there needs to be a way to start it. In the business logic of the onboarding process this would happen when a HR of the company enters the details of the new hire. For this to happen there needs to be a form where the information can be submitted.
Form Configuration
Follow these steps to create the necessary folder structure and file:
Create a folder named
forms.Inside the
formsfolder, create another folder namedNewHireDetails.Still within the
formsfolder, create a new file namednew-hire-details-generate.jsand place the required code inside it.
📄 View code
const viewData = {
    id: 'NewHire',
    label: 'NewHire',
    path: '/services/web/codbex-sample-hyperion-employee-onboarding/forms/NewHireDetails/new-hire-details-form.html',
    groupId: 'EmployeeOnboarding',
    order: 1,
    icon: '/services/web/resources/unicons/users-alt.svg'
};
if (typeof exports !== 'undefined') {
    exports.getPerspective = () => viewData;
}
💡 Note
This code creates a perspective, sets the view within that perspective, and specifies where in the navigation that perspective should appear.
- Within the
formsfolder, create a new file namednew-hire-details-form.htmland place the required code inside it.
📄 View code
<!DOCTYPE html>
<html lang="en" xmlns="http://www.w3.org/1999/xhtml" ng-app="templateApp" ng-controller="templateController">

    <head>
        <meta charset="utf-8" />
        <meta name="viewport" content="width=device-width, initial-scale=1">
        <link rel="icon" sizes="any" href="data:;base64,iVBORw0KGgo=">
        <title config-title></title>
        <script type="text/javascript" src="new-hire-details-generate.js"></script>
        <script type="text/javascript" src="/services/js/platform-core/services/loader.js?id=view-js"></script>
        <link type="text/css" rel="stylesheet" href="/services/js/platform-core/services/loader.js?id=view-css" />
        <script src="new-hire-details-form-controller.js"></script>
    </head>

    <body class="bk-vbox">
        <h2 bk-title class="bk-padding--md bk-center" wrap="true" header-size="2" aria-label="title">New Hire</h2>
        <bk-scrollbar class="bk-full-height">
            <bk-fieldset class="bk-padding-begin-end--sm bk-margin-top--lg" ng-form="forms.details">
                <bk-form-group label="{{formHeaders[action]}}" name="entityForm" transclude-classes="fd-container fd-form-layout-grid-container">
                    <bk-form-item class="fd-row">
                        <div class="fd-col fd-col-md--2">
                            <bk-form-label for="idName" ng-required="true" colon="true">Name</bk-form-label>
                        </div>
                        <div class="fd-col  fd-col-md--8 ">
                            <bk-form-input-message state="{{ forms.details['Name'].$valid ? '' : 'error' }}" message="'The value doesn\'t match the required pattern: '">
                                <bk-input id="idName" name="Name" state="{{ forms.details['Name'].$valid ? '' : 'error' }}" ng-required="true" ng-model="entity.Name" ng-readonly="action === 'select'" ng-maxlength="100.0"
                                    input-rules="{ patterns: [''] }" type="text" placeholder="Enter Name">
                                </bk-input>
                            </bk-form-input-message>
                        </div>
                    </bk-form-item>
                    <bk-form-item class="fd-row">
                        <div class="fd-col fd-col-md--2">
                            <bk-form-label for="idEmail" ng-required="true" colon="true">Email</bk-form-label>
                        </div>
                        <div ng-show="action === 'select'" style="margin: 4px 0px; padding: 0px 10px" class="fd-col  fd-col-md--8 ">
                            <bk-link href="mailto:{{entity.Email}}">{{entity.Email}}</bk-link>
                        </div>
                        <div ng-show="action !== 'select'" class="fd-col  fd-col-md--4 ">
                            <bk-form-input-message state="{{ forms.details['Email'].$valid ? '' : 'error' }}" message="'The value doesn\'t match the required pattern: '">
                                <bk-input id="idEmail" name="Email" state="{{ forms.details['Email'].$valid ? '' : 'error' }}" ng-required="true" ng-model="entity.Email" ng-readonly="action === 'select'" ng-maxlength="80.0"
                                    input-rules="{ patterns: [''] }" type="email" placeholder="Enter Email">
                                </bk-input>
                            </bk-form-input-message>
                        </div>
                    </bk-form-item>
                    <bk-form-item class="fd-row">
                        <div class="fd-col fd-col-md--2">
                            <bk-form-label for="idDepartment" ng-required="true" colon="true">Department</bk-form-label>
                        </div>
                        <div class="fd-col  fd-col-md--7 ">
                            <bk-combobox-input input-id="idDepartment" name="Department" state="{{ forms.details['Department'].$valid ? '' : 'error' }}" ng-required="true" ng-model="entity.Department" is-readonly="action === 'select'"
                                dropdown-items="optionsDepartment" placeholder="Search Department ..." btn-aria-label="show/hide Department options" list-aria-label="Department options">
                            </bk-combobox-input>
                        </div>
                        <div class="fd-col fd-col--full">
                            <bk-button glyph="sap-icon--add" aria-label="Add" ng-click="createDepartment()" ng-hide="action === 'select'"></bk-button>
                            <bk-button glyph="sap-icon--refresh" aria-label="Refresh" ng-click="refreshDepartment()" ng-hide="action === 'select'"></bk-button>
                        </div>
                    </bk-form-item>
                    <bk-form-item class="fd-row">
                        <div class="fd-col fd-col-md--2">
                            <bk-form-label for="idStartDate" ng-required="true" colon="true">StartDate</bk-form-label>
                        </div>
                        <div class="fd-col  fd-col-md--2 ">
                            <bk-form-input-message state="{{ forms.details['StartDate'].$valid ? '' : 'error' }}" message="'Incorrect Input'">
                                <bk-input id="idStartDate" name="StartDate" state="{{ forms.details['StartDate'].$valid ? '' : 'error' }}" ng-required="true" ng-model="entity.StartDate" ng-readonly="action === 'select'" type="date">
                                </bk-input>
                            </bk-form-input-message>
                        </div>
                    </bk-form-item>
                </bk-form-group>
            </bk-fieldset>
        </bk-scrollbar>
        <bk-bar bar-design="footer" class="bk-margin-top--md">
            <bk-bar-right>
                <bk-bar-element>
                    <bk-button label="Generate" state="emphasized" ng-click="createNewHire()" ng-disabled="!(entity.Name && entity.Email && entity.Department && entity.StartDate)"></bk-button>
                </bk-bar-element>
                <bk-bar-element>
                    <bk-button label="Cancel" state="negative" ng-click="resetForm()"></bk-button>
                </bk-bar-element>
            </bk-bar-right>
        </bk-bar>
        <theme></theme>
    </body>
</html>
💡 Note
This is the HTML layout of the view. It consists of a form
that must be filled out to register a new onboarding employee.
- Within the
formsfolder, create a new file namednew-hire-details-form-controller.jsand place the required code inside it.
📄 View code
angular.module('templateApp', ['blimpKit', 'platformView']).controller('templateController', ($scope, $http) => {

    $scope.entity = {};
    $scope.forms = {
        details: {},
    };

    const departmentsUrl =
        "/services/ts/codbex-sample-hyperion-employee-onboarding/forms/NewHireDetails/api/NewHireDetailsFormService.ts/departmentData";
    const employeeUrl =
        "/services/ts/codbex-sample-hyperion-employee-onboarding/forms/NewHireDetails/api/NewHireDetailsFormService.ts/createEmployee";

    $http.get(departmentsUrl)
        .then(response => {
            $scope.optionsDepartment = response.data;
        })
        .catch((error) => {
            console.error("Error getting departments data: ", error);
            $scope.resetForm();
        });

    $scope.createNewHire = () => {

        const employeeBody = {
            Name: $scope.entity.Name,
            Email: $scope.entity.Email,
            Department: $scope.entity.Department,
            StartDate: new Date($scope.entity.StartDate),
            Status: 1
        }

        $http.post(employeeUrl, employeeBody)
            .then(response => {
                if (response.status == 201) {
                    $scope.resetForm();
                }
                else {
                    console.error("Error creating Employee: ", response.data);
                }
            })
            .catch((error) => {
                console.error("Error creating Employee: ", error.data);
                $scope.resetForm();
            });
    }

    $scope.resetForm = () => {
        $scope.entity = {};
    };

});
💡 Note
The controller acts as an intermediary between the frontend and the backend. It receives data from the frontend, then passes it to a TypeScript service. The service, in turn, processes the data and interacts with the database to fetch or manipulate the required information.
- Inside the
formsfolder, create a new folder namedapi, then create a file calledNewHireDetailsFormService.tswithin it. Place the following code inside this file:
📄 View code
import { EmployeeRepository as EmployeeDao } from "codbex-sample-hyperion-employee-onboarding/gen/codbex-sample-hyperion-employee-onboarding/dao/Employee/EmployeeRepository";
import { DepartmentRepository as DepartmentDao } from "codbex-sample-hyperion-employee-onboarding/gen/codbex-sample-hyperion-employee-onboarding/dao/Settings/DepartmentRepository";

import { Controller, Get, Post, response, request } from "sdk/http";
import { process } from "sdk/bpm";
import { user } from "sdk/security";

@Controller
class NewHireDetailsFormService {

    private readonly employeeDao;
    private readonly departmentDao;

    constructor() {
        this.employeeDao = new EmployeeDao();
        this.departmentDao = new DepartmentDao();
    }

    @Get("/departmentData")
    public departmentData() {
        return this.departmentDao.findAll().map(function (value) {
            return {
                value: value.Id,
                text: value.Name
            };
        });
    }

    @Post("/createEmployee")
    public createEmployee(body: any) {

        try {
            ["Name", "Email", "Department", "StartDate"].forEach(elem => {
                if (!body.hasOwnProperty(elem)) {
                    response.setStatus(response.BAD_REQUEST);
                    return;
                }
            })

            const newEmployee = this.employeeDao.create(body);

            if (!newEmployee) {
                response.setStatus(500);
                return { message: "Failed to create Employee!" };
            }

            this.startProcess(newEmployee);

            response.setStatus(response.CREATED);
            return { message: "Employee created!" };

        } catch (e: any) {
            response.setStatus(response.BAD_REQUEST);
            return { error: e.message };
        }
    }

    private startProcess(employeeId: number) {
        const users = this.employeeDao.findAll({
            $filter: {
                equals: {
                    Email: user.getName()
                }
            }
        });

        const protocol = request.getScheme() + "://";
        const domain = request.getHeader("Host")

        const taskLink = `${protocol}${domain}/services/web/codbex-sample-hyperion-employee-onboarding/forms/TaskCompletion/task-completion-form.html?employeeId=${employeeId}`;
        const managerLink = `${protocol}${domain}/services/web/codbex-sample-hyperion-employee-onboarding/forms/ManagerReview/manager-review-form.html?employeeId=${employeeId}`;
        const onboardingInitiatorLink = `${protocol}${domain}/services/web/codbex-sample-hyperion-employee-onboarding/forms/HRConfirmation/hr-confirmation-form.html?employeeId=${employeeId}`;

        const processInstanceId = process.start("onboarding-process", {
            Employee: employeeId,
            TaskLink: taskLink,
            Manager: 1,
            ManagerLink: managerLink,
            OnboardingInitiator: users[0].Id,
            OnboardingInitiatorLink: onboardingInitiatorLink
        });

        if (!processInstanceId) {
            throw new Error("Failed to start onboarding process!");
        }
    }

}
💡 Note
This service handles communication with the database. It processes the data passed from the controller and interacts with the database to perform the necessary operations, such as fetching, inserting, or updating records.
Test BPMN Process
Configuring HR User
For the process to start new hire details need to be submitted. For that to happen there needs to be a registered employee to act as the HR.
- Go to the Dashboard of the application at http://localhost/services/web/dashboard/ → Click the Employee Navigation
- Create an employee with all needed fields
- Go to the Security editor and create a user

- Set the username of the user the same as the email of the employee created in the previous step
- Set the tenant as default
Starting the process
Now everything is ready to start the process.
- To simulate the start of the onboarding process you need to logout of the admin user and login with the HR user
- Go to the Dashboard of the application at http://localhost/services/web/dashboard/ → Click the New Hire Navigation
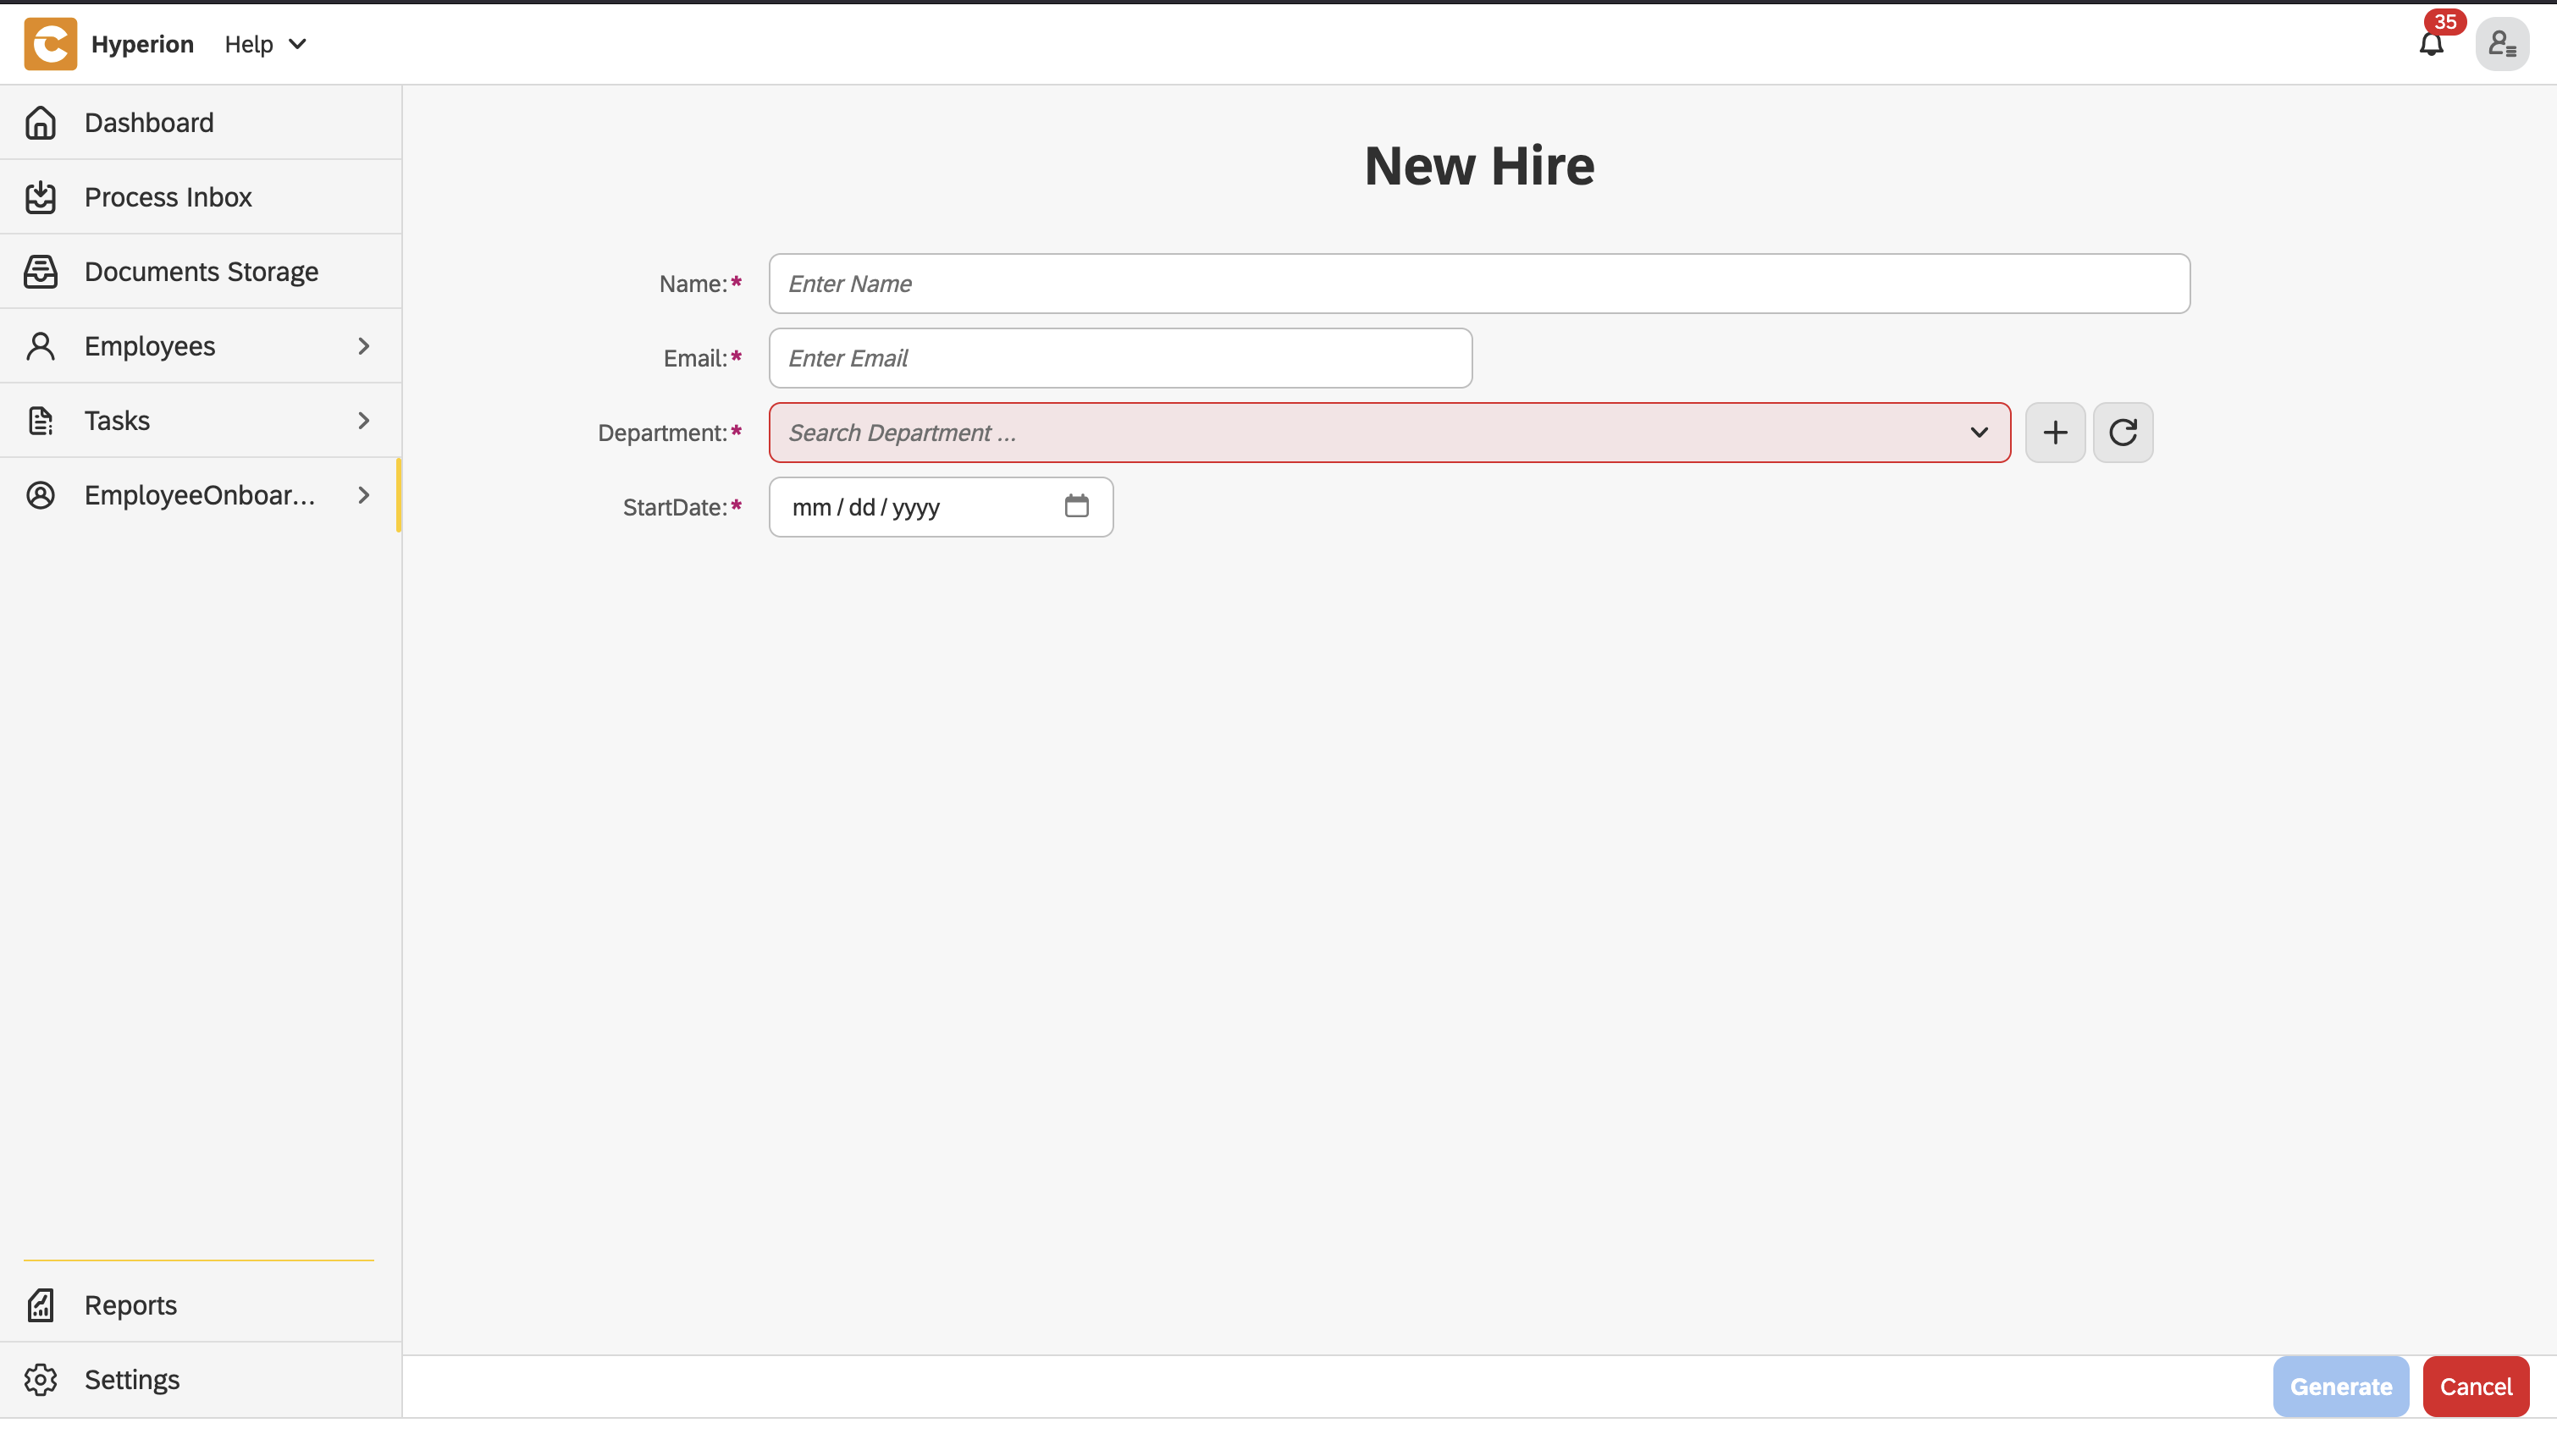
- Enter the details of the new hire
- After some time the tasks of the onboarding process will be created. To view them go to the Dashboard of the application at http://localhost/services/web/dashboard/ → Click the Onboarding Tasks Navigation
Other blogs
- Onboarding Process Tutorial 1: EDM Configuration
- Onboarding Process Tutorial 2: BPMN Configuration - Service Task Definition
- Onboarding Process Tutorial 3: SMTP Connection
- Onboarding Process Tutorial 4: User Task Definition and Logical Gateways
- Onboarding Process Tutorial 5: Configuring Subprocess
- Onboarding Process Tutorial 6: Completing Onboarding Process